NEW GAUGE BEZEL DENNIS CARPENTER INSTALL PICS AND TIPS
Moderator: FORDification
- Dan
- New Member
- Posts: 121
- Joined: Wed May 19, 2010 9:34 pm
NEW GAUGE BEZEL DENNIS CARPENTER INSTALL PICS AND TIPS
**THREAD NOTE: I mistakenly thought I had an "LMC" bezel and lens, I actually had a "Dennis Carpenter" set so I originally titled this thread as "LMC". I have made the needed corrections to the post, sorry for any confusion. My wife got the set for me for Christmas, I mistakenly thought she got them from LMC, but today found the box and sure enough it is a Dennis Carpenter product!
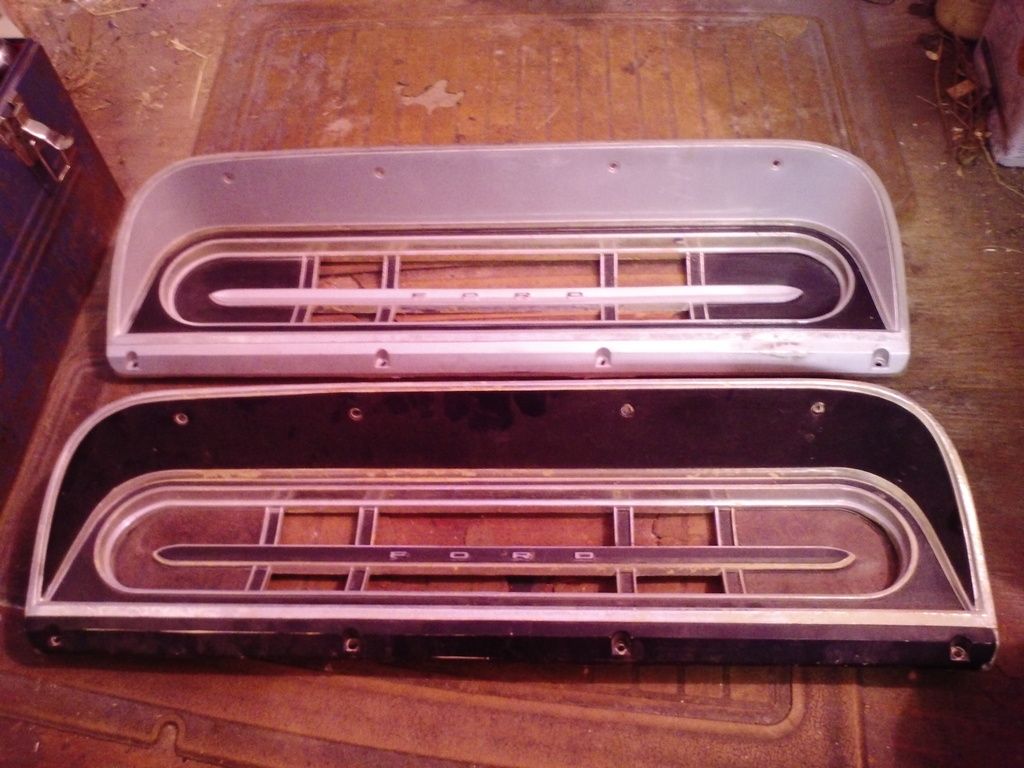
For Christmas I got a new chrome gauge cluster bezel from DENNIS CARPENTER truck, just got around to installing it tonight, thought I'd share in case anyone else was considering this item. first the before/after, then further down some things you might want to know.
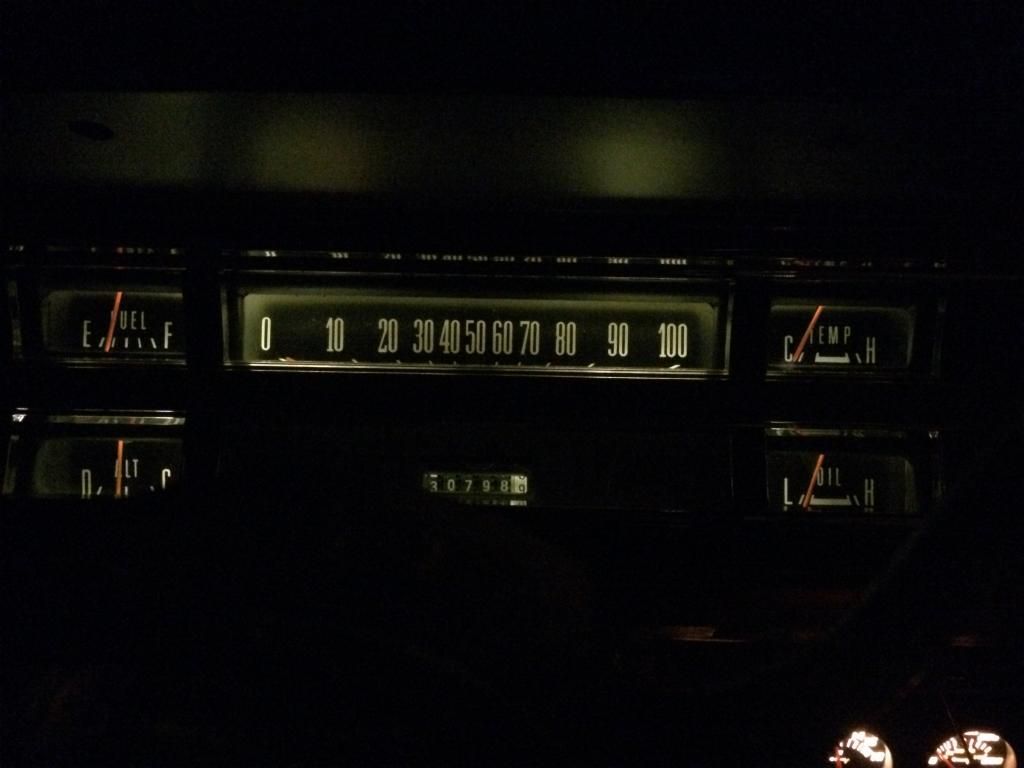
Before pic original cluster bezel:
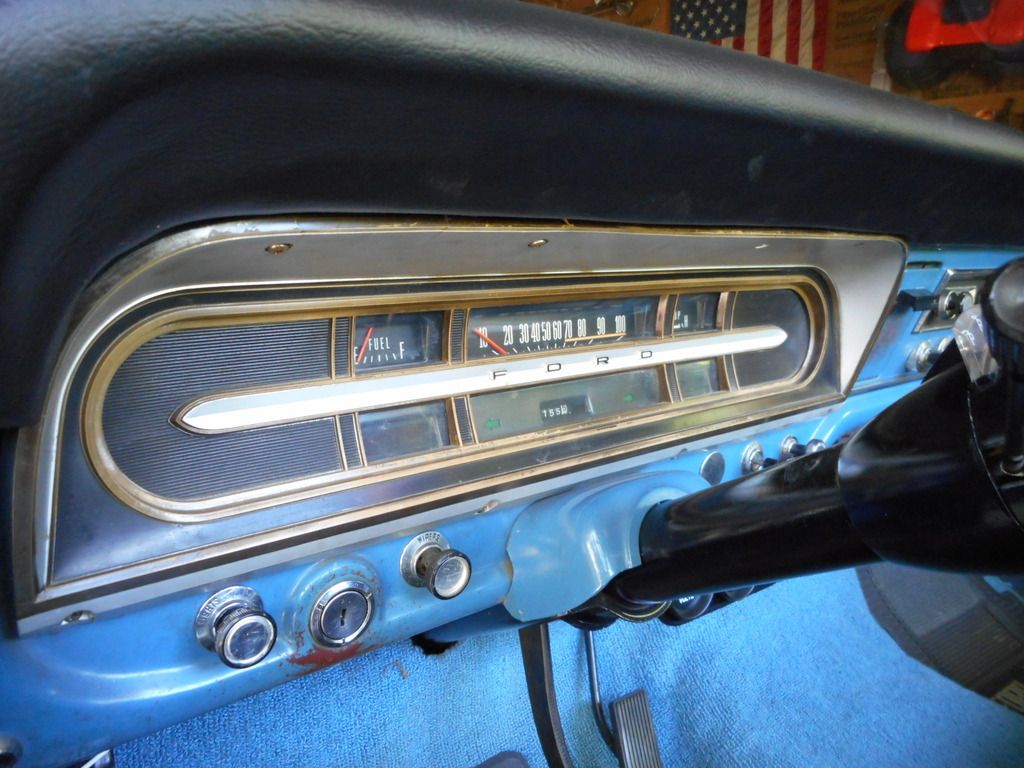
After pic:
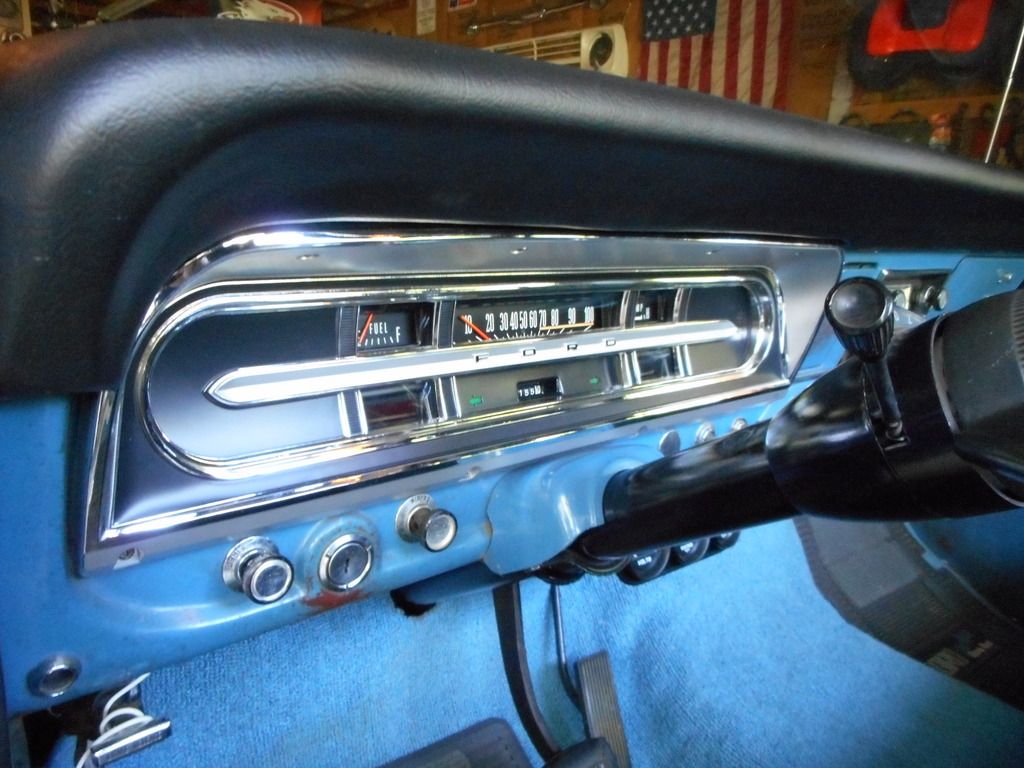
I like the bezel, I also got the replacement clear lens as long as I was doing the bezel. It fits fine and all, but is missing some mounting points that in the end are probably not critical, but look at the pics to see what I mean:
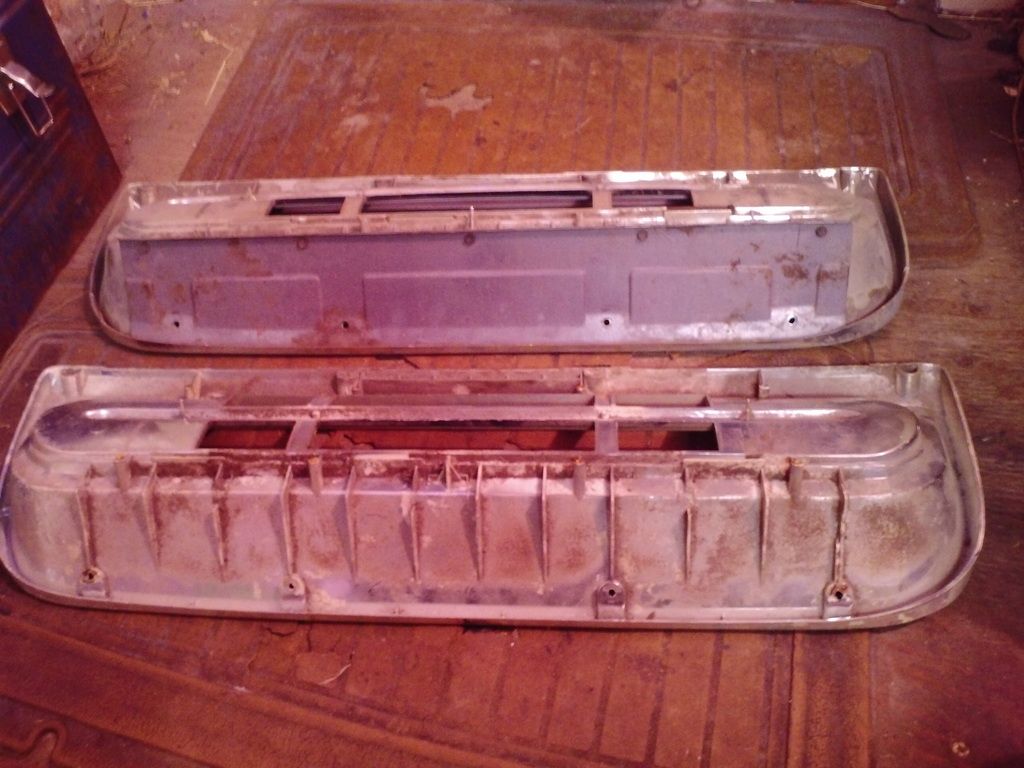
Shown above is the cluster tipped forward out of the dash, you can see on top is a metal plate, and it has holes at the edge of the cluster for the screws that hold the outer bezel onto the dash, and also has 5 screws along it's back edge (I'm missing a couple) and those screw into the bezel directly.
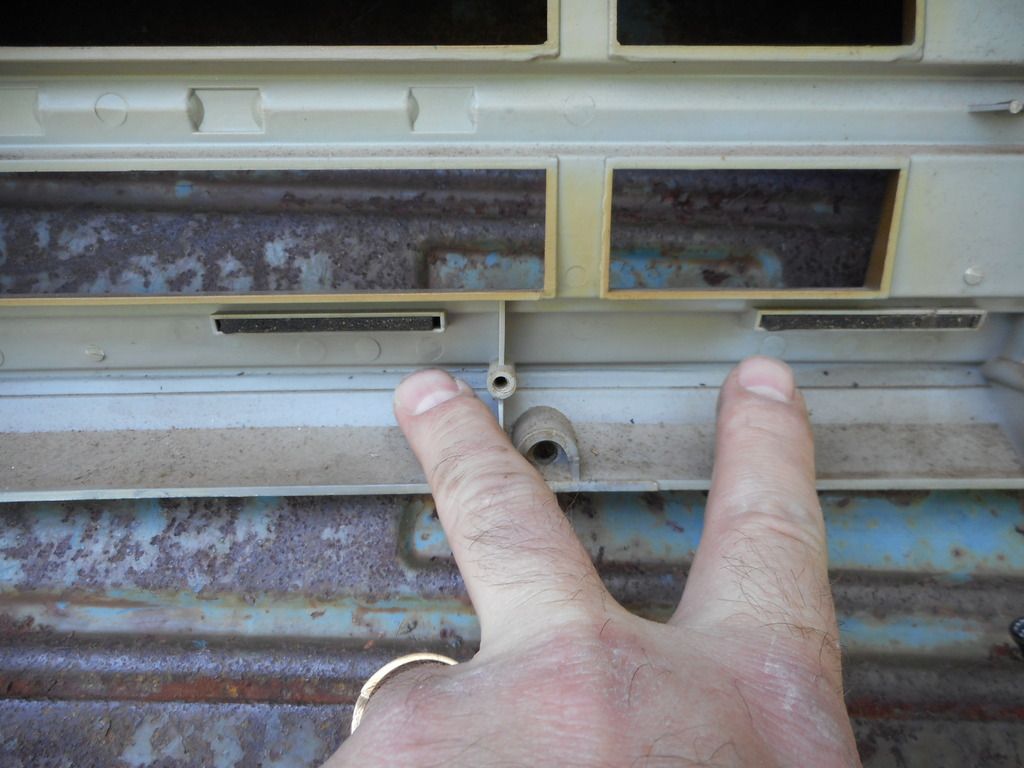
Below is a closer pic, you can see the molded plastic mounting hole by my top finger on the factory bezel...well, those are non-existent on the Dennis Carpenter unit, nothing at all for mounting the rear of the panel!
I chose to reinstall the metal panel using just the front screws, the panel lends support to the plastic bezel to help it not crack, so even with only 1/2 of the screws it is doing SOME good.
Also, there are 5 black rubber like strips on the original bezel, you'll want to remember to pry these out and reuse them on your new bezel, they are a buffer for the lens and the back of the bezel. (2 of 5 shown below)
I'd also suggest buying all new dash light bulbs ahead of time, as long as you have everything out might as well pop in new bulbs...wish I had remembered that! Only took me an hour or so, main thing is be careful not to scratch the new bezel since it's plastic/chrome like the factory was so easily damaged, and if you over tighten screws you can easily crack it and ruin it.
I also had to hand paint the "F O R D" letters in the new bezel, they don't come painted.
For Christmas I got a new chrome gauge cluster bezel from DENNIS CARPENTER truck, just got around to installing it tonight, thought I'd share in case anyone else was considering this item. first the before/after, then further down some things you might want to know.
Before pic original cluster bezel:
After pic:
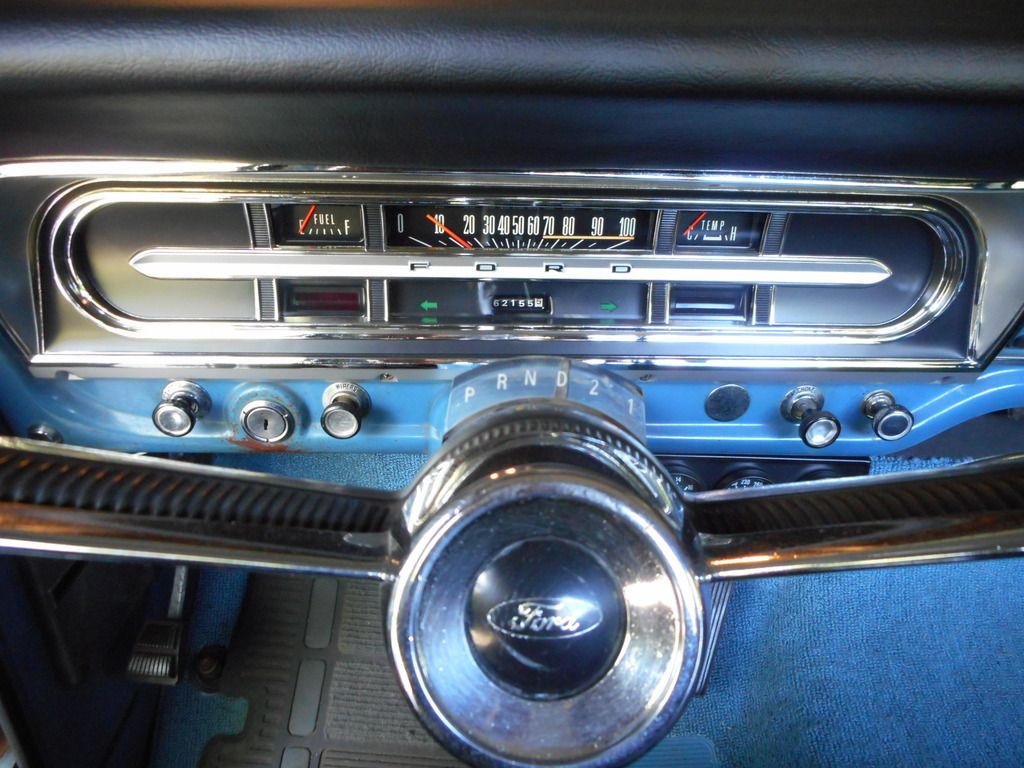
I like the bezel, I also got the replacement clear lens as long as I was doing the bezel. It fits fine and all, but is missing some mounting points that in the end are probably not critical, but look at the pics to see what I mean:
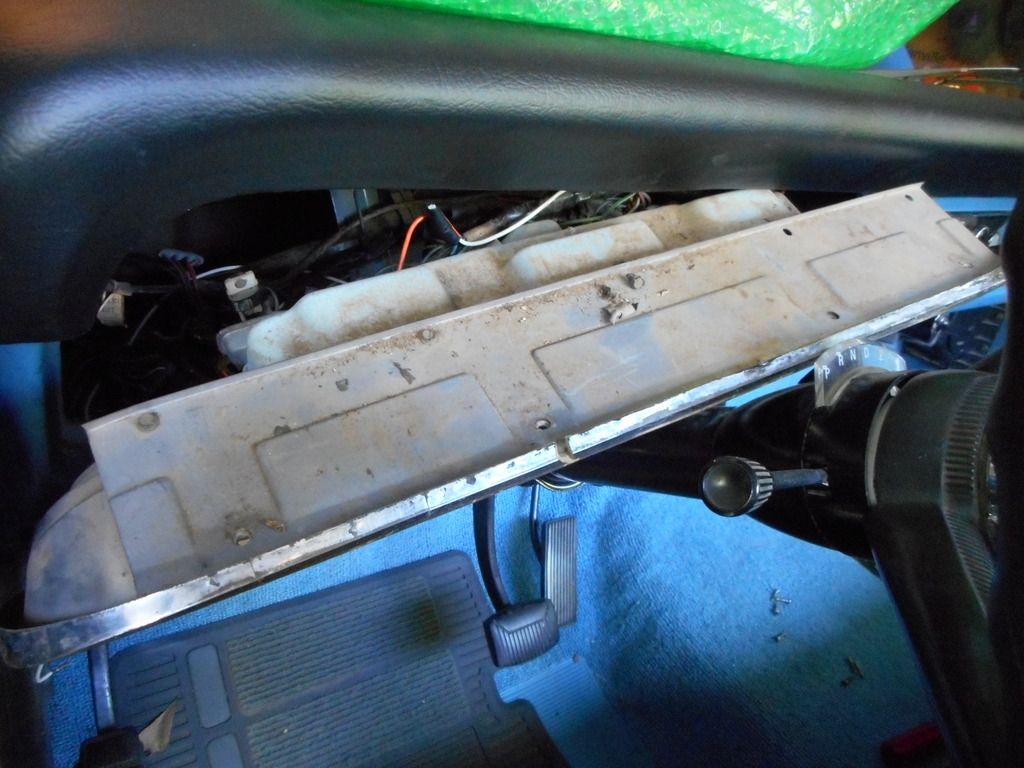
Shown above is the cluster tipped forward out of the dash, you can see on top is a metal plate, and it has holes at the edge of the cluster for the screws that hold the outer bezel onto the dash, and also has 5 screws along it's back edge (I'm missing a couple) and those screw into the bezel directly.
Below is a closer pic, you can see the molded plastic mounting hole by my top finger on the factory bezel...well, those are non-existent on the Dennis Carpenter unit, nothing at all for mounting the rear of the panel!
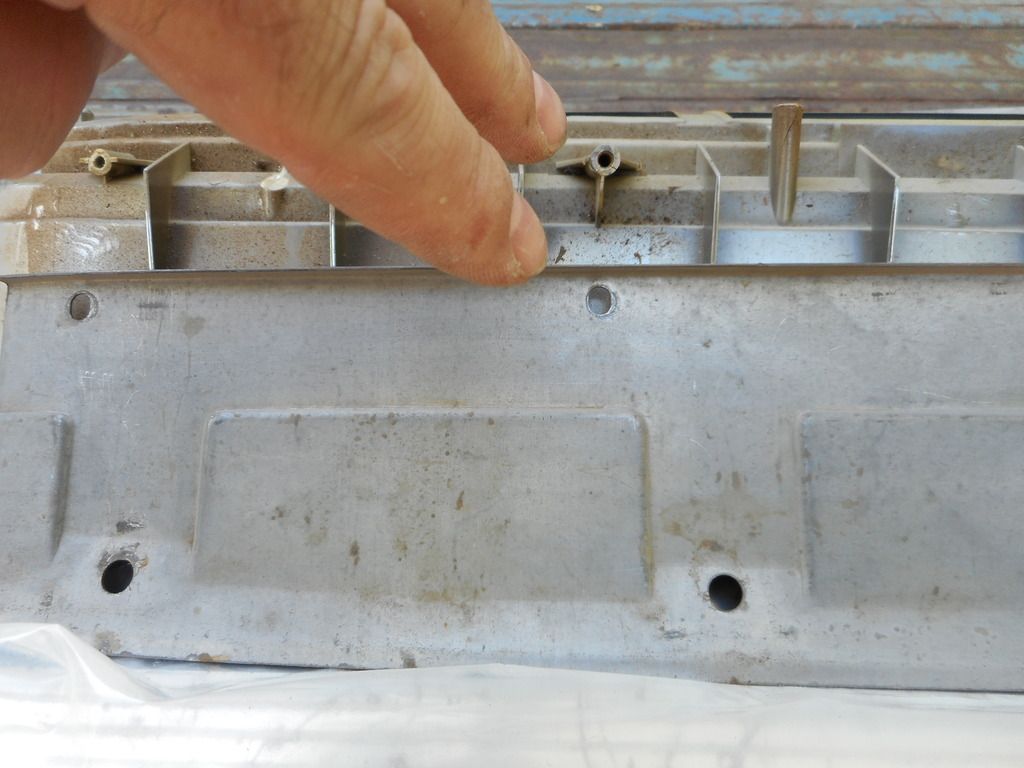
I chose to reinstall the metal panel using just the front screws, the panel lends support to the plastic bezel to help it not crack, so even with only 1/2 of the screws it is doing SOME good.
Also, there are 5 black rubber like strips on the original bezel, you'll want to remember to pry these out and reuse them on your new bezel, they are a buffer for the lens and the back of the bezel. (2 of 5 shown below)
I'd also suggest buying all new dash light bulbs ahead of time, as long as you have everything out might as well pop in new bulbs...wish I had remembered that! Only took me an hour or so, main thing is be careful not to scratch the new bezel since it's plastic/chrome like the factory was so easily damaged, and if you over tighten screws you can easily crack it and ruin it.
I also had to hand paint the "F O R D" letters in the new bezel, they don't come painted.
Last edited by Dan on Mon May 25, 2015 12:04 pm, edited 1 time in total.
- jimmy828
- 100% FORDified!
- Posts: 1611
- Joined: Thu Dec 23, 2010 6:47 pm
- Location: asheville,NC
Re: NEW GAUGE BEZEL LMC INSTALL PICS AND TIPS
I like it just as much as a 5 or 6 pc gauge cluster
-
- Blue Oval Fanatic
- Posts: 943
- Joined: Sat Jan 24, 2015 9:51 am
- Location: Nampa Idaho
Re: NEW GAUGE BEZEL LMC INSTALL PICS AND TIPS
I bought mine from Dennis Carpenter and had exactly the same situation. It wasn't made exactly like the original and also didn't have the capability to mount the metal piece you show in your pictures. Not much choice apparently.
1967 F-100 4x4 custom cab.
Another 67 F-100 4x4 custom cab.
2016 F-150 Eco-Boost 2.7 liter. (It will smoke the tires!)
1972 F-350 Sport Custom cab & chassis.
1972 F-250 Explorer Special, Camper Special.
1971 F-100 custom. 302, C-4, p.s. p.b. factory 65 amp alternator with transistorized voltage regulator.
Another 67 F-100 4x4 custom cab.
2016 F-150 Eco-Boost 2.7 liter. (It will smoke the tires!)
1972 F-350 Sport Custom cab & chassis.
1972 F-250 Explorer Special, Camper Special.
1971 F-100 custom. 302, C-4, p.s. p.b. factory 65 amp alternator with transistorized voltage regulator.
- duaneo
- Preferred User
- Posts: 269
- Joined: Thu Aug 21, 2014 1:39 pm
- Location: California, Oakland
Re: NEW GAUGE BEZEL LMC INSTALL PICS AND TIPS
In my case, I used compressed air to blow the dust off the mask, and blew the paint off too. It looks pretty good now that it's properly painted, but it took some effort. Since I only had one working light in my gauge cluster (though none were burnt out) I also replaced the circuit "board", bulb sockets, and bulbs. The bulbs were replaced with LEDs which look the same from the front, but should last forever.
Since you're already up to your elbows in cluster, you might make sure your gas gauge is reading correctly, and adjust the voltage regulator appropriately. Mine is reading about 1/4 tank low, and I haven't had a chance to pull it out and sort out the issue.
Cheers,
Duane
Since you're already up to your elbows in cluster, you might make sure your gas gauge is reading correctly, and adjust the voltage regulator appropriately. Mine is reading about 1/4 tank low, and I haven't had a chance to pull it out and sort out the issue.
Cheers,
Duane
1971 F100 - Ugly on the outside, but purty under the hood...
1968 Chevrolet Impala - Family car since 1970, My car since I was 16, in need of bodywork/paint, but otherwise straight.
2004 Mini Cooper S - Daily driver and grown up go-kart
1968 Chevrolet Impala - Family car since 1970, My car since I was 16, in need of bodywork/paint, but otherwise straight.
2004 Mini Cooper S - Daily driver and grown up go-kart
- duaneo
- Preferred User
- Posts: 269
- Joined: Thu Aug 21, 2014 1:39 pm
- Location: California, Oakland
Re: NEW GAUGE BEZEL LMC INSTALL PICS AND TIPS
What's up with your speedo, by the way?
Duane
Duane
1971 F100 - Ugly on the outside, but purty under the hood...
1968 Chevrolet Impala - Family car since 1970, My car since I was 16, in need of bodywork/paint, but otherwise straight.
2004 Mini Cooper S - Daily driver and grown up go-kart
1968 Chevrolet Impala - Family car since 1970, My car since I was 16, in need of bodywork/paint, but otherwise straight.
2004 Mini Cooper S - Daily driver and grown up go-kart
- Dan
- New Member
- Posts: 121
- Joined: Wed May 19, 2010 9:34 pm
Re: NEW GAUGE BEZEL LMC INSTALL PICS AND TIPS
You can adjust the gas gauge? That would have been good to know since I just ordered $100 worth of sending unit and other gas tank stuff from LMC to..... FIX MY GAS GAUGE!!
Must be what that weird looking thing is screwed on the back of the gauge cluster near the gas gauge? If adjustable, love to know how you do it? My gauge reads empty when tank is full, then after some gas is used will read 1/2 tank and probably is accurate until empty after that.
Temp gauge doesn't work at all but I have 3 auxillary gauges (volts/oil/temp) under the dash that I use instead.
My speedo actually wasn't hooked back up when I took the pic, it's back at zero now that everything is in place.
And here I thought people would be asking why the shift indicator is in "D"!
- Dan
- New Member
- Posts: 121
- Joined: Wed May 19, 2010 9:34 pm
Re: NEW GAUGE BEZEL LMC INSTALL PICS AND TIPS
LED's are a great idea, do you recall the size? And is the light the same "glow" the originals gave off or is it brighter and more intense like LED's can be?
- duaneo
- Preferred User
- Posts: 269
- Joined: Thu Aug 21, 2014 1:39 pm
- Location: California, Oakland
Re: NEW GAUGE BEZEL LMC INSTALL PICS AND TIPS
It was over a year ago, but I think these were the LEDs I got.
https://www.npdlink.com/store/products/ ... 50000.html
There are more in the set than are needed in the dash, unfortunately. Here's a pic of the panel illuminated.
https://www.npdlink.com/store/products/ ... 50000.html
There are more in the set than are needed in the dash, unfortunately. Here's a pic of the panel illuminated.
1971 F100 - Ugly on the outside, but purty under the hood...
1968 Chevrolet Impala - Family car since 1970, My car since I was 16, in need of bodywork/paint, but otherwise straight.
2004 Mini Cooper S - Daily driver and grown up go-kart
1968 Chevrolet Impala - Family car since 1970, My car since I was 16, in need of bodywork/paint, but otherwise straight.
2004 Mini Cooper S - Daily driver and grown up go-kart
- Dan
- New Member
- Posts: 121
- Joined: Wed May 19, 2010 9:34 pm
Re: NEW GAUGE BEZEL LMC INSTALL PICS AND TIPS
Looks good! Thanks for the link too.
- Timd
- New Member
- Posts: 68
- Joined: Thu Dec 08, 2016 11:42 pm
- Location: Las Vegas
Re: NEW GAUGE BEZEL DENNIS CARPENTER INSTALL PICS AND TIPS
Would anyone happen to know the screw size to mount the gauge cluster to the bezel? just bought a new bezel from DC but my original screws were not original.
Thanks
Thanks
1969 Ford F100 Custom Cab
302
302
-
- New Member
- Posts: 92
- Joined: Fri Apr 25, 2014 10:59 am
- Location: Shedd, Oregon
Re: NEW GAUGE BEZEL DENNIS CARPENTER INSTALL PICS AND TIPS
OK. It's a good thing I roam around on here looking for good advise. I too have a carpenter repopped dash bezel that I put together a while ago for my restore. I took it apart after reading your post to find the following... It has all of the mounting holes but I did not catch the rubber bumpers that were part of the original assembly. Luckily I kept the old bezel but the there were two bumpers missing and they were hardened. I used some foam tape instead to insulate the clear plastic lens. Thanks Dan!
- mk
- Blue Oval Fanatic
- Posts: 917
- Joined: Wed Mar 02, 2005 1:12 am
- Location: CANADA, central Alberta
Re: NEW GAUGE BEZEL DENNIS CARPENTER INSTALL PICS AND TIPS
That fresh chrome and black look pretty good. I realize our trucks will probably never be concours judged so these carpenter bezels are generally acceptable. However, it's apparent that guys wanting correct 67/68 custom cab/ranger and '69 ranger bezels are on their own for getting replacements/rechroming as the carpenter bezels are basically correct for only the '69 custom cab and 70-72 trucks. Dark woodgrain appplicable to 70-72 ranger xlt only.
mike
mike
Always drink upstream from the herd...
~Will Rogers
Mercury truck ID thread:
http://www.fordification.com/forum/view ... =2&t=35331
Ford truck model history:
http://www.fordification.com/forum/view ... =2&t=37394
Using dentside fender liners:
http://fordification.com/forum/viewtopi ... =7&t=35675
Matchbox diecast bumps:
http://www.fordification.com/forum/view ... =2&t=45618
- Nitekruizer
- Blue Oval Fan
- Posts: 545
- Joined: Mon Mar 07, 2011 1:43 pm
- Location: Manitoba, Canada
Re: NEW GAUGE BEZEL DENNIS CARPENTER INSTALL PICS AND TIPS
I have a couple of bezels that I pulled at the boneyard. I noticed that one of them doesn't have the metal piece or the extra holes either. It must have been an earlier thing. I think the first bezel with the metal piece is from a '67 or '68 and the one with the dark woodgrain is from a '71. My '69 bezel has the metal and has a lighter color of woodgrain.
390 FE IN A "BUMP" / 383 WEDGE IN A 2 DOOR C-BODY / 351W IN A FULL-SIZE MERCURY / 194 CHEVY 6 IN A DUECE / 2.4 DOHC CHRYSLER IN A PLASTIC BUBBLE (Driver)