Calf's 69 Crew build, and CNM67's 67 shorty build
Moderator: FORDification
-
BobbyFord

- 100% FORDified!

- Posts: 5383
- Joined: Sun Feb 04, 2007 9:52 am
- Location: Chatsworth, California
Re: Calf's 69 Crew build, and CNM67's 67 shorty build
That looks great. What's a roll of that stuff cost?
-
Calfdemon

- 100% FORDified!
- Posts: 2672
- Joined: Tue May 25, 2010 11:31 pm
- Location: California, Santa Clarita
Re: Calf's 69 Crew build, and CNM67's 67 shorty build
It looks like you can get about a 25 square foot roll for about $40 and a 50 sq ft roll for about 80 shipped on eBay. I dont remember how much I paid but it was right around that amount. All I know is I bought too much. haha! Probably going to have enough left over to do Caleb's truck if he wants to. Doubt it though since we already have his entire interior together.
I think at the time I bought it straight from Zilla Mat, but their site no longer has a purchase option, just a "contact us" number: http://www.zillamat.com/
Here is where it is sold on Ebay in various amounts with free shipping: http://www.ebay.com/sch/i.html?_sacat=S ... d+deadener
I chose Zilla Mat based on the low price (compared to other brands) and the positive reviews both Robroy and Terry1167 gave when they used it: http://www.fordification.com/forum/view ... =6&t=59182 and http://www.fordification.com/forum/view ... 22&t=55418
-Rich
Current toys -
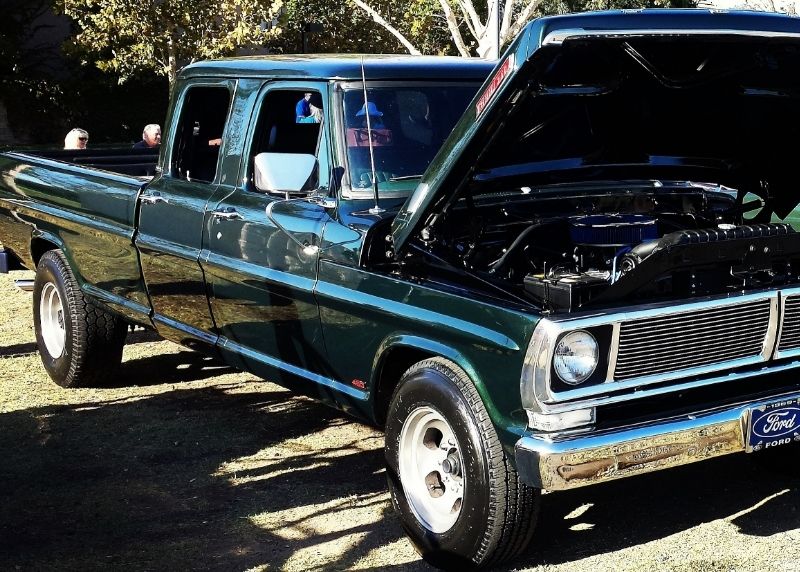
69 Ford F350 Crew Cab - 460 / C6 - http://i253.photobucket.com/albums/hh67 ... lqgskp.jpg
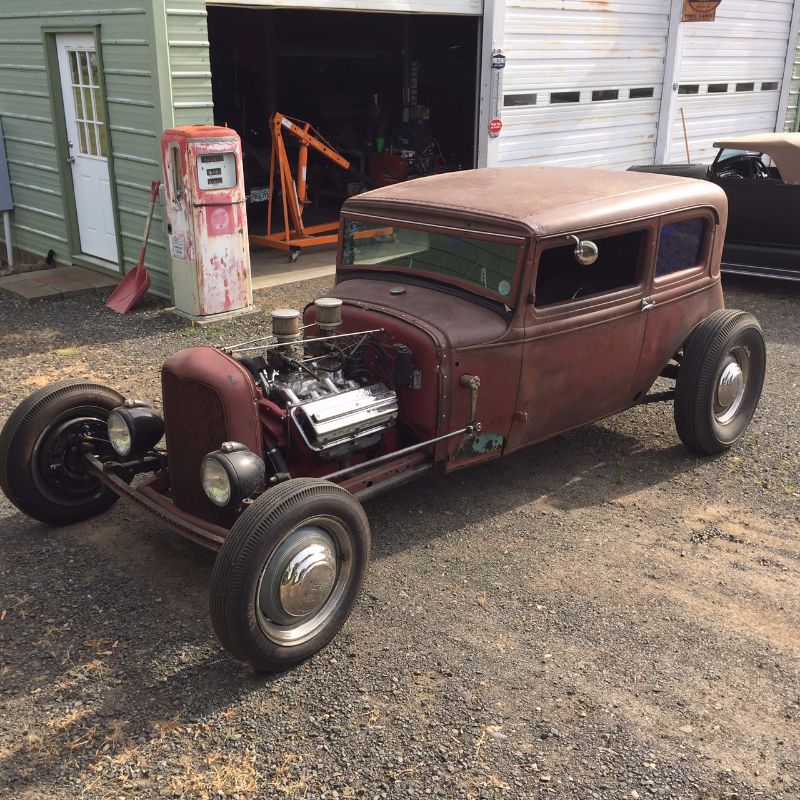
31 Ford Vicky - 1955 270 Red Ram Hemi / 4 speed - http://i253.photobucket.com/albums/hh67 ... bsibvn.jpg
Former toys -
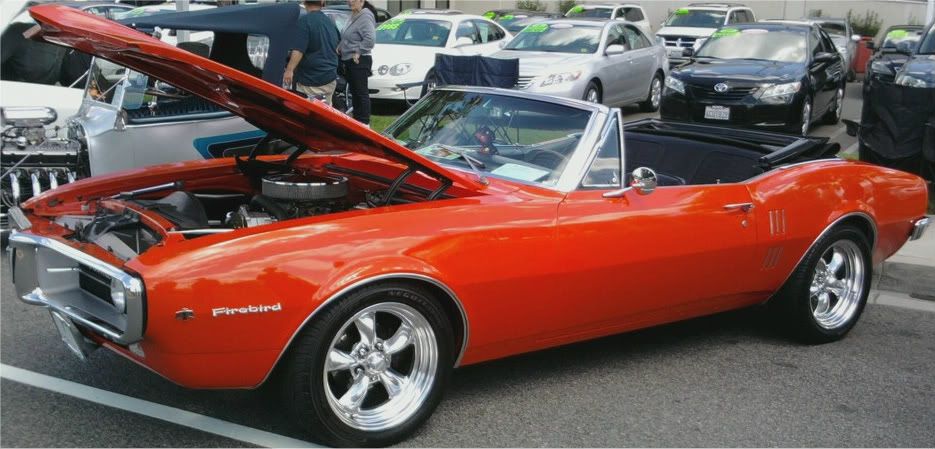
67 Pontiac Firebird 400 convertible (sold 9/13) - http://i253.photobucket.com/albums/hh67 ... bird-1.jpg
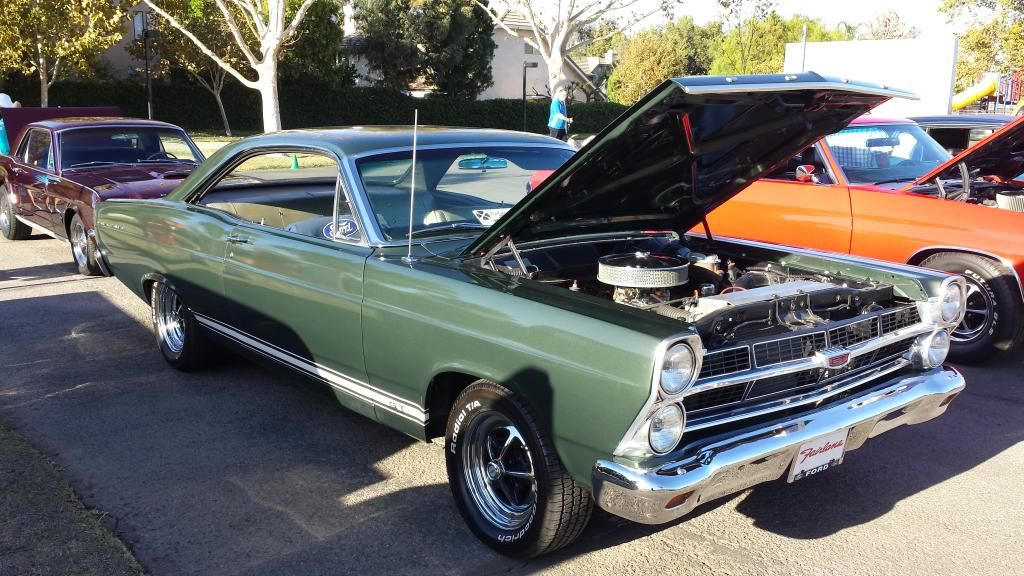
67 Ford Fairlane GT - 390 / 4 speed (sold 7/15) - http://i253.photobucket.com/albums/hh67 ... c5hu8z.jpg
Current toys -
69 Ford F350 Crew Cab - 460 / C6 - http://i253.photobucket.com/albums/hh67 ... lqgskp.jpg
31 Ford Vicky - 1955 270 Red Ram Hemi / 4 speed - http://i253.photobucket.com/albums/hh67 ... bsibvn.jpg
Former toys -
67 Pontiac Firebird 400 convertible (sold 9/13) - http://i253.photobucket.com/albums/hh67 ... bird-1.jpg
67 Ford Fairlane GT - 390 / 4 speed (sold 7/15) - http://i253.photobucket.com/albums/hh67 ... c5hu8z.jpg
-
Calfdemon
- 100% FORDified!
- Posts: 2672
- Joined: Tue May 25, 2010 11:31 pm
- Location: California, Santa Clarita
Re: Calf's 69 Crew build, and CNM67's 67 shorty build
Finished up the soundproofing today. Had enough to do inside all 4 doors, the entire roof, the whole floor, behind the in-cab tank and both rear corners. Still have half a roll left but will be doing the inside of the door panels and still undecided on the firewall.
Not exactly sure what my next step will be but probably will start figuring out the wiring and getting it run. The front and rear glass is up soon too. Won't be doing the door glass just yet as I am putting in power windows and need to get all of that squared away before I deal with the glass.
Not exactly sure what my next step will be but probably will start figuring out the wiring and getting it run. The front and rear glass is up soon too. Won't be doing the door glass just yet as I am putting in power windows and need to get all of that squared away before I deal with the glass.
-Rich
Current toys -
69 Ford F350 Crew Cab - 460 / C6 - http://i253.photobucket.com/albums/hh67 ... lqgskp.jpg
31 Ford Vicky - 1955 270 Red Ram Hemi / 4 speed - http://i253.photobucket.com/albums/hh67 ... bsibvn.jpg
Former toys -
67 Pontiac Firebird 400 convertible (sold 9/13) - http://i253.photobucket.com/albums/hh67 ... bird-1.jpg
67 Ford Fairlane GT - 390 / 4 speed (sold 7/15) - http://i253.photobucket.com/albums/hh67 ... c5hu8z.jpg
-
Calfdemon
- 100% FORDified!
- Posts: 2672
- Joined: Tue May 25, 2010 11:31 pm
- Location: California, Santa Clarita
Re: Calf's 69 Crew build, and CNM67's 67 shorty build
Unfortunately I have not had a ton of time to work on the truck between work and the NHL Playoffs with my LA Kings still playing. So no work gets done on hockey nights. Tonight, the Kings were not playing and I got home early enough to at least do something.
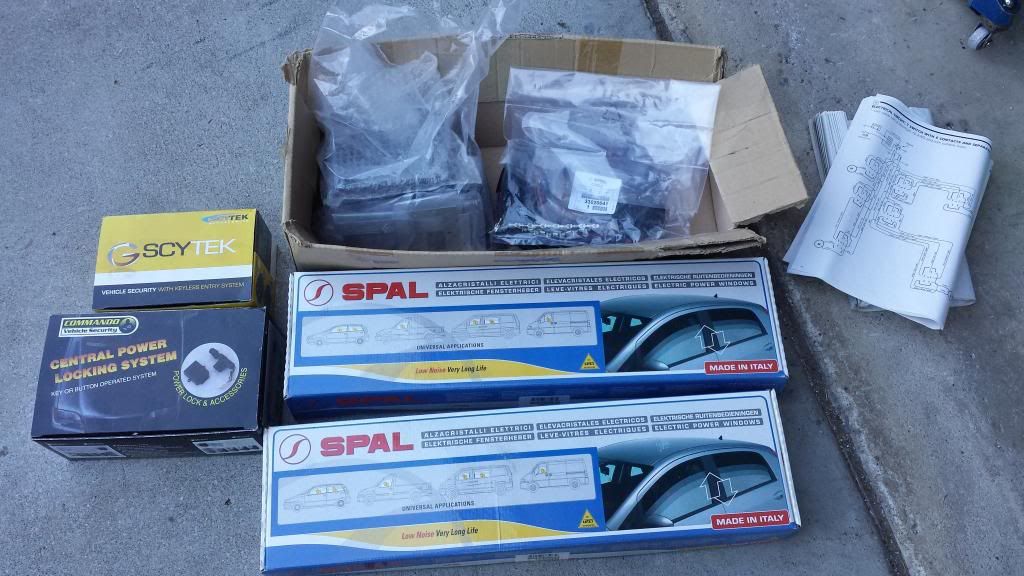
I have been looking at my wiring kit and mentally planning out how I was going to wire the truck. Then figured that I should probably start with some of my smaller wired projects that will ultimately be hooking into the main wiring harness. I decided that I am going to start with all 4 of the doors first and get them squared away. I went up to the rafters in the garage where I have been squirreling away some of the items I bought over the past 2 years and pulled down my power window kits, power door lock kit, and my keyless entry/alarm kit.
After reading everything and studying the wiring schematics to see how everything will work together, I started the wiring for the power windows first since it is the most work. I bought a 7 switch wiring system so that I can have control of all 4 windows from the drivers seat, and then each window will have its own switch as well. I will be mounting these in pods that will mount over the hole where the window cranks normally go. There is no need for the window cranks due to the power window kits. The kits I bought work with the existing window regulators and everything goes back in place except the crank. So switch pods will make good covers.
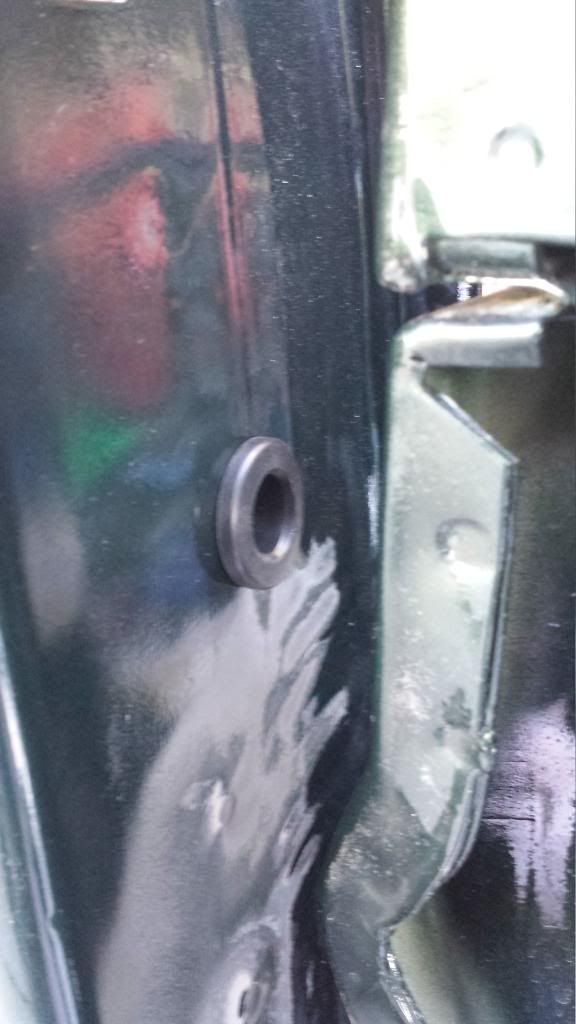
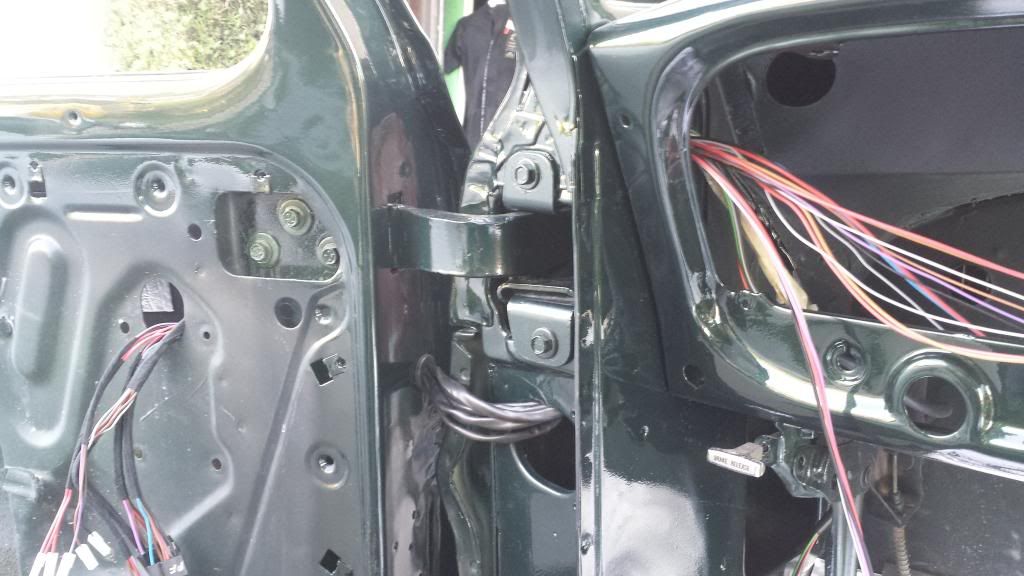
In order to wire up doors that never had wires running to them, I decided to drill out a 1 inch hole in the door jam of each front door which lines up with the large hole in the cab between the 2 door hinges. I used a 1 inch PVC grommet in the holes to protect the wiring from the bare metal.
I temporarily have the wiring for all 4 window switches at the driver's door hanging from the window crank hole. This is obviously not where they will be coming through as that hole will be occupied when everything else is installed. So once I get the rest of the window assembly installed, I will figure out a good spot to cut a hole in the inner door to run the wires up to this location under the door panel.

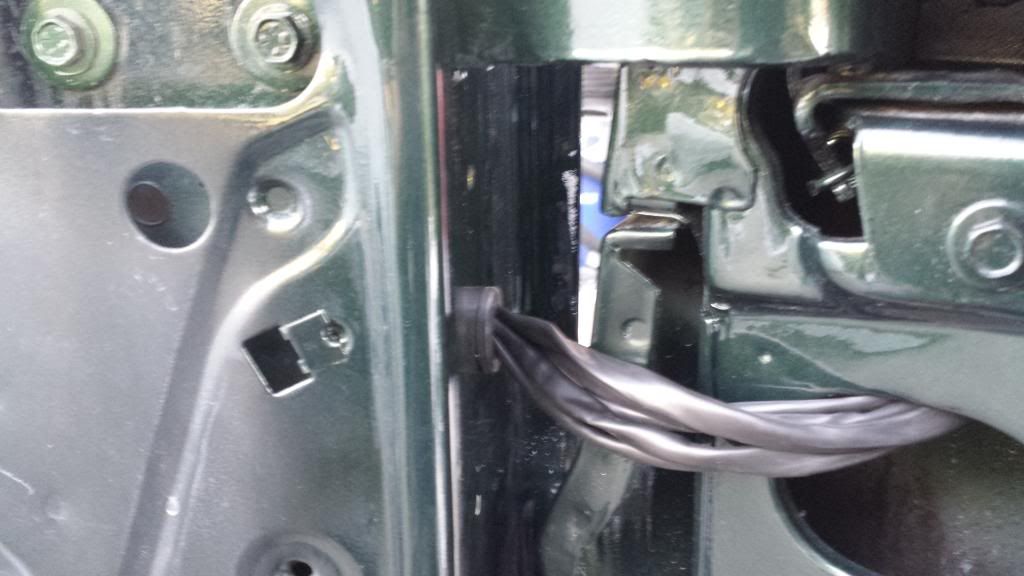
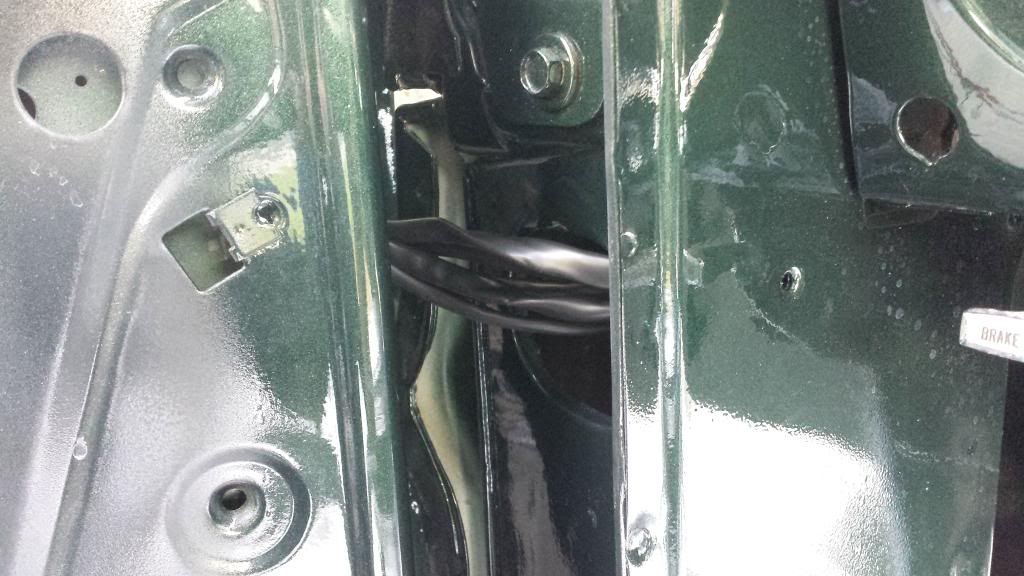
It is a tight fit, but I got all of the wiring for the power windows through the 1 inch grommet and run to the cab. The upper picture is with the door all the way open. Because the wires are tight in the grommet, they move with the door when I shut the door and the extra wire goes into the hole in the cab side. So the wires do not get pinched as all and everything closes nicely. The only problem is I still need to run the door lock actuator wires to this door and it is going to be a tight squeeze. However, I am fairly certain I can get them in there. If not, I can always drill another hole.
Once I ran the wiring from the door into the cab, I ran it up to come through where the cab light wire and fuel sending wire come into the cab. Plenty of room there and once the wires came into the cab, I was able to route them to the other 3 doors easily.
I ran the front passenger door wires along the firewall under the dash and they go into the door using the same route as the driver door. I drilled another 1 inch hole and used another grommet in that door which has plenty of room since there will only be the 1 window switch and 1 door lock actuator in that door. The wires that you see hanging out of the dash area marked with blue tape are the wires for the power, lighting (lit switches), and ground which will get hooked into the main wiring harness for the truck.
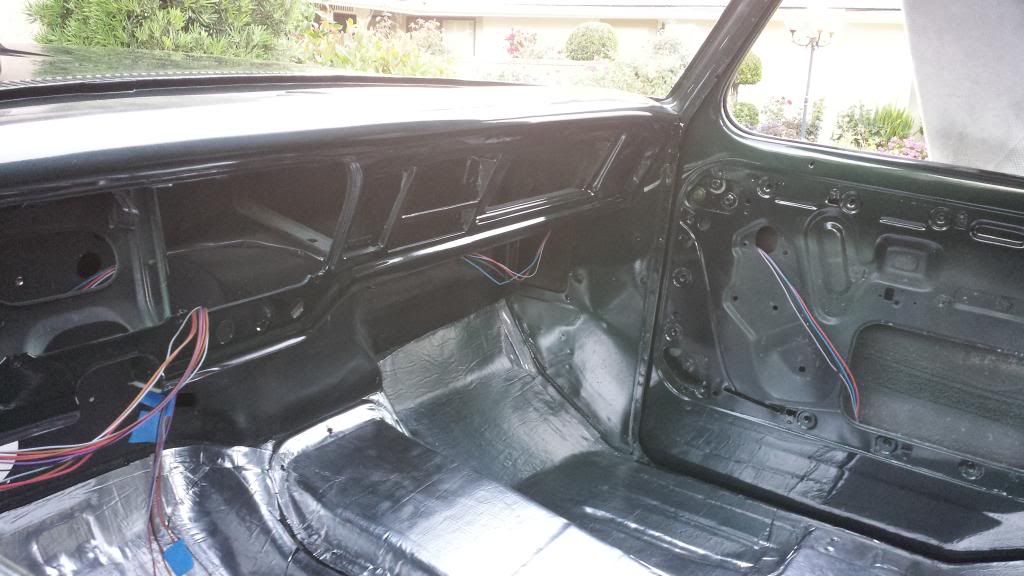
The wiring for the rear passenger door window will be run under the carpet, under the front seats as it sits here in the cab. The only way to run the wires into the rear doors will be from under the carpet at the rear door jam and then into the door through the lower hinge holes. There is no way to get into the pillar between the front and rear doors for a cleaner installation. But using the carpet and the rear door sills, I think I can make this work pretty well.
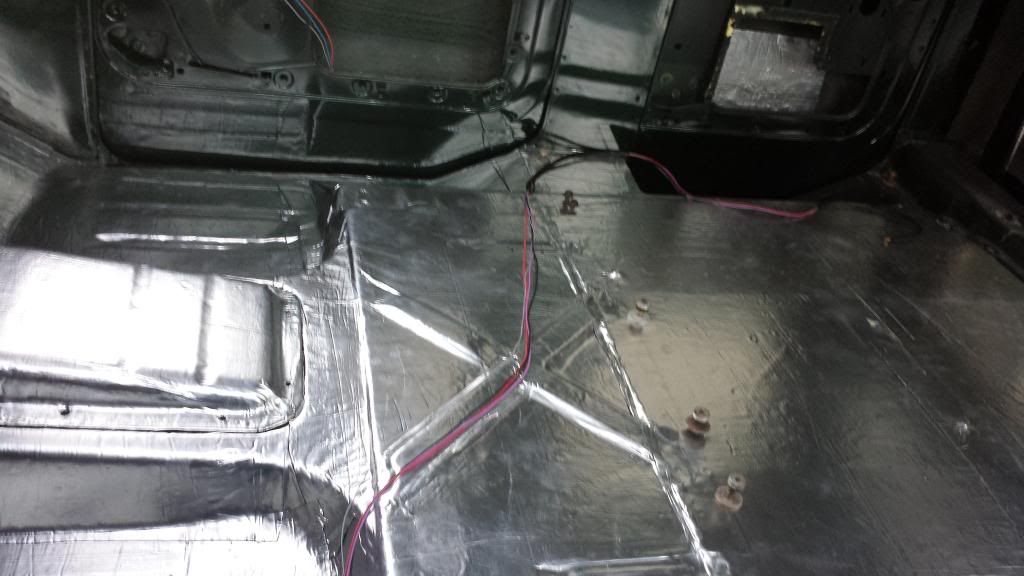
Both rear door harnesses drop out of the hole into the cab and then go behind the parking brake bracket to hold them in place. I will then run the under the carpet along the driver's door. At the front seat, I will have the passenger rear branch off to cut across the cab under the carpet while the driver rear will continue back and enter the rear door at the same lower hinge area. The wiring harnesses are laid out in this manner.
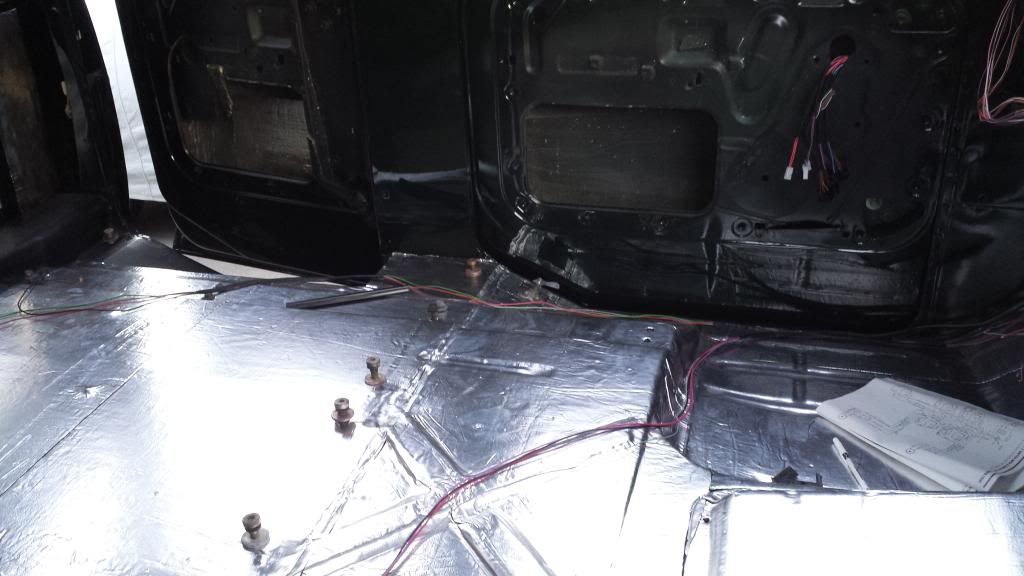
Thats it for now.. Doesn't seem like a lot, but took a few hours to figure it all out and then get everything run cleanly. This is the way I am going to have to tackle putting this truck back together as I just don't have a ton of time all at once. It would be great to take a couple of weeks off, but that isn't happening anytime soon. Anyway, no progress will be made tomorrow as the Kings will be playing the Ducks in game 7 and there is no way I am going to miss that game. Hopefully I can get a few hours on Saturday to get some stuff done, but there is already a lot on the calendar. We will see... Sunday is looking good though!
I have been looking at my wiring kit and mentally planning out how I was going to wire the truck. Then figured that I should probably start with some of my smaller wired projects that will ultimately be hooking into the main wiring harness. I decided that I am going to start with all 4 of the doors first and get them squared away. I went up to the rafters in the garage where I have been squirreling away some of the items I bought over the past 2 years and pulled down my power window kits, power door lock kit, and my keyless entry/alarm kit.

After reading everything and studying the wiring schematics to see how everything will work together, I started the wiring for the power windows first since it is the most work. I bought a 7 switch wiring system so that I can have control of all 4 windows from the drivers seat, and then each window will have its own switch as well. I will be mounting these in pods that will mount over the hole where the window cranks normally go. There is no need for the window cranks due to the power window kits. The kits I bought work with the existing window regulators and everything goes back in place except the crank. So switch pods will make good covers.
In order to wire up doors that never had wires running to them, I decided to drill out a 1 inch hole in the door jam of each front door which lines up with the large hole in the cab between the 2 door hinges. I used a 1 inch PVC grommet in the holes to protect the wiring from the bare metal.

I temporarily have the wiring for all 4 window switches at the driver's door hanging from the window crank hole. This is obviously not where they will be coming through as that hole will be occupied when everything else is installed. So once I get the rest of the window assembly installed, I will figure out a good spot to cut a hole in the inner door to run the wires up to this location under the door panel.

It is a tight fit, but I got all of the wiring for the power windows through the 1 inch grommet and run to the cab. The upper picture is with the door all the way open. Because the wires are tight in the grommet, they move with the door when I shut the door and the extra wire goes into the hole in the cab side. So the wires do not get pinched as all and everything closes nicely. The only problem is I still need to run the door lock actuator wires to this door and it is going to be a tight squeeze. However, I am fairly certain I can get them in there. If not, I can always drill another hole.


Once I ran the wiring from the door into the cab, I ran it up to come through where the cab light wire and fuel sending wire come into the cab. Plenty of room there and once the wires came into the cab, I was able to route them to the other 3 doors easily.

I ran the front passenger door wires along the firewall under the dash and they go into the door using the same route as the driver door. I drilled another 1 inch hole and used another grommet in that door which has plenty of room since there will only be the 1 window switch and 1 door lock actuator in that door. The wires that you see hanging out of the dash area marked with blue tape are the wires for the power, lighting (lit switches), and ground which will get hooked into the main wiring harness for the truck.

The wiring for the rear passenger door window will be run under the carpet, under the front seats as it sits here in the cab. The only way to run the wires into the rear doors will be from under the carpet at the rear door jam and then into the door through the lower hinge holes. There is no way to get into the pillar between the front and rear doors for a cleaner installation. But using the carpet and the rear door sills, I think I can make this work pretty well.

Both rear door harnesses drop out of the hole into the cab and then go behind the parking brake bracket to hold them in place. I will then run the under the carpet along the driver's door. At the front seat, I will have the passenger rear branch off to cut across the cab under the carpet while the driver rear will continue back and enter the rear door at the same lower hinge area. The wiring harnesses are laid out in this manner.

Thats it for now.. Doesn't seem like a lot, but took a few hours to figure it all out and then get everything run cleanly. This is the way I am going to have to tackle putting this truck back together as I just don't have a ton of time all at once. It would be great to take a couple of weeks off, but that isn't happening anytime soon. Anyway, no progress will be made tomorrow as the Kings will be playing the Ducks in game 7 and there is no way I am going to miss that game. Hopefully I can get a few hours on Saturday to get some stuff done, but there is already a lot on the calendar. We will see... Sunday is looking good though!
Last edited by Calfdemon on Fri May 16, 2014 1:45 pm, edited 1 time in total.
-Rich
Current toys -
69 Ford F350 Crew Cab - 460 / C6 - http://i253.photobucket.com/albums/hh67 ... lqgskp.jpg
31 Ford Vicky - 1955 270 Red Ram Hemi / 4 speed - http://i253.photobucket.com/albums/hh67 ... bsibvn.jpg
Former toys -
67 Pontiac Firebird 400 convertible (sold 9/13) - http://i253.photobucket.com/albums/hh67 ... bird-1.jpg
67 Ford Fairlane GT - 390 / 4 speed (sold 7/15) - http://i253.photobucket.com/albums/hh67 ... c5hu8z.jpg
Current toys -
69 Ford F350 Crew Cab - 460 / C6 - http://i253.photobucket.com/albums/hh67 ... lqgskp.jpg
31 Ford Vicky - 1955 270 Red Ram Hemi / 4 speed - http://i253.photobucket.com/albums/hh67 ... bsibvn.jpg
Former toys -
67 Pontiac Firebird 400 convertible (sold 9/13) - http://i253.photobucket.com/albums/hh67 ... bird-1.jpg
67 Ford Fairlane GT - 390 / 4 speed (sold 7/15) - http://i253.photobucket.com/albums/hh67 ... c5hu8z.jpg
-
67mann

- 100% FORDified!
- Posts: 1706
- Joined: Thu Feb 07, 2008 7:19 am
- Location: NY..Mt.Morris 3rdgen. homestead
Re: Calf's 69 Crew build, and CNM67's 67 shorty build
I've had enough and I'm not alone
http://s267.photobucket.com/albums/ii304/67mann/
http://s267.photobucket.com/albums/ii304/67mann/
-
Calfdemon
- 100% FORDified!
- Posts: 2672
- Joined: Tue May 25, 2010 11:31 pm
- Location: California, Santa Clarita
Re: Calf's 69 Crew build, and CNM67's 67 shorty build
67mann wrote:Got one of those Spal kits myself so
Go Kings
they gotta stop draggin it out till the end
Hey Jerry, did you install them already? Just curious about a few things... Do you like them and how well do they work with our stock windows? Also, do you have any pictures of how you installed the motors and pulleys? I have some ideas on how I am going to do it, but if you had photos of a working installation, I would use the same mounting points that you did. From what I have seen of the instructions and online, it is a fairly easy installation and there are plenty of documented installations. But, that being said, I have not found ANYTHING on a bumpside. So I am just curious what the "best" installation method would be on one of our trucks.
-Rich
Current toys -
69 Ford F350 Crew Cab - 460 / C6 - http://i253.photobucket.com/albums/hh67 ... lqgskp.jpg
31 Ford Vicky - 1955 270 Red Ram Hemi / 4 speed - http://i253.photobucket.com/albums/hh67 ... bsibvn.jpg
Former toys -
67 Pontiac Firebird 400 convertible (sold 9/13) - http://i253.photobucket.com/albums/hh67 ... bird-1.jpg
67 Ford Fairlane GT - 390 / 4 speed (sold 7/15) - http://i253.photobucket.com/albums/hh67 ... c5hu8z.jpg
Current toys -
69 Ford F350 Crew Cab - 460 / C6 - http://i253.photobucket.com/albums/hh67 ... lqgskp.jpg
31 Ford Vicky - 1955 270 Red Ram Hemi / 4 speed - http://i253.photobucket.com/albums/hh67 ... bsibvn.jpg
Former toys -
67 Pontiac Firebird 400 convertible (sold 9/13) - http://i253.photobucket.com/albums/hh67 ... bird-1.jpg
67 Ford Fairlane GT - 390 / 4 speed (sold 7/15) - http://i253.photobucket.com/albums/hh67 ... c5hu8z.jpg
-
BobbyFord
- 100% FORDified!
- Posts: 5383
- Joined: Sun Feb 04, 2007 9:52 am
- Location: Chatsworth, California
Re: Calf's 69 Crew build, and CNM67's 67 shorty build
Gonna use Painless Powerbraid to wrap the wires?
-
Calfdemon
- 100% FORDified!
- Posts: 2672
- Joined: Tue May 25, 2010 11:31 pm
- Location: California, Santa Clarita
Re: Calf's 69 Crew build, and CNM67's 67 shorty build
I was actually looking at the Techflex heat-shrink loom that tylerb43 used in his build. I haven't bought it yet, but was pricing it at a few places. However, the Techflex needs to be on the wires ahead of time where I was reading on the Painless that you can put it on after you have run the wires? Is the painless split so you can put it on after the fact? If so, that might be the route I go...BobbyFord wrote:Gonna use Painless Powerbraid to wrap the wires?
Last edited by Calfdemon on Fri May 16, 2014 9:05 pm, edited 2 times in total.
-Rich
Current toys -
69 Ford F350 Crew Cab - 460 / C6 - http://i253.photobucket.com/albums/hh67 ... lqgskp.jpg
31 Ford Vicky - 1955 270 Red Ram Hemi / 4 speed - http://i253.photobucket.com/albums/hh67 ... bsibvn.jpg
Former toys -
67 Pontiac Firebird 400 convertible (sold 9/13) - http://i253.photobucket.com/albums/hh67 ... bird-1.jpg
67 Ford Fairlane GT - 390 / 4 speed (sold 7/15) - http://i253.photobucket.com/albums/hh67 ... c5hu8z.jpg
Current toys -
69 Ford F350 Crew Cab - 460 / C6 - http://i253.photobucket.com/albums/hh67 ... lqgskp.jpg
31 Ford Vicky - 1955 270 Red Ram Hemi / 4 speed - http://i253.photobucket.com/albums/hh67 ... bsibvn.jpg
Former toys -
67 Pontiac Firebird 400 convertible (sold 9/13) - http://i253.photobucket.com/albums/hh67 ... bird-1.jpg
67 Ford Fairlane GT - 390 / 4 speed (sold 7/15) - http://i253.photobucket.com/albums/hh67 ... c5hu8z.jpg
-
BobbyFord
- 100% FORDified!
- Posts: 5383
- Joined: Sun Feb 04, 2007 9:52 am
- Location: Chatsworth, California
Re: Calf's 69 Crew build, and CNM67's 67 shorty build
Yes, Powerbraid is split. Available in different diameters. I got mine from Summit.Calfdemon wrote:I was actually looking at the Teleflex heat-shrink loom that tylerb43 used in his build. I haven't bought it yet, but was pricing it at a few places. However, the Teleflex needs to be on the wires ahead of time where I was reading on the Painless that you can put it on after you have run the wires? Is the painless split so you can put it on after the fact? If so, that might be the route I go...BobbyFord wrote:Gonna use Painless Powerbraid to wrap the wires?
-
Calfdemon
- 100% FORDified!
- Posts: 2672
- Joined: Tue May 25, 2010 11:31 pm
- Location: California, Santa Clarita
Re: Calf's 69 Crew build, and CNM67's 67 shorty build
I spent a few hours each day the last few days getting the innards of the doors situated. Getting the lock actuators set up and mounted for the power door locks took the most time once I remembered the proper order to reassemble the doors.  I took everything apart so long ago, it took a while to remember the proper order to put it all back together. I had to bend the rods for the door lock knobs so there was a vertical location to mount the connectors for the actuators, and of course, this vertical location had to be directly above where the actuators were going to mount and at the right distance. So after quite a bit of trial and error, I finally was able to get them all right and got everything put back together. Of course, there is PLENTY of room in the front doors of a crew cab which are the same as a standard bump, but the insides of the rear doors really pose a problem as there is a LOT less room, and all the innards were re-designed and ass-backwards from what you see in the front doors. Getting additional parts in these doors that were not put there in the first place is a real challenge, but I got it done.
Here is the location where I mounted all 4 of the actuators. This is the front driver's door and it is mounted directly below where the door lock rod is inside the door, about halfway between the actual knob, and the door latch.
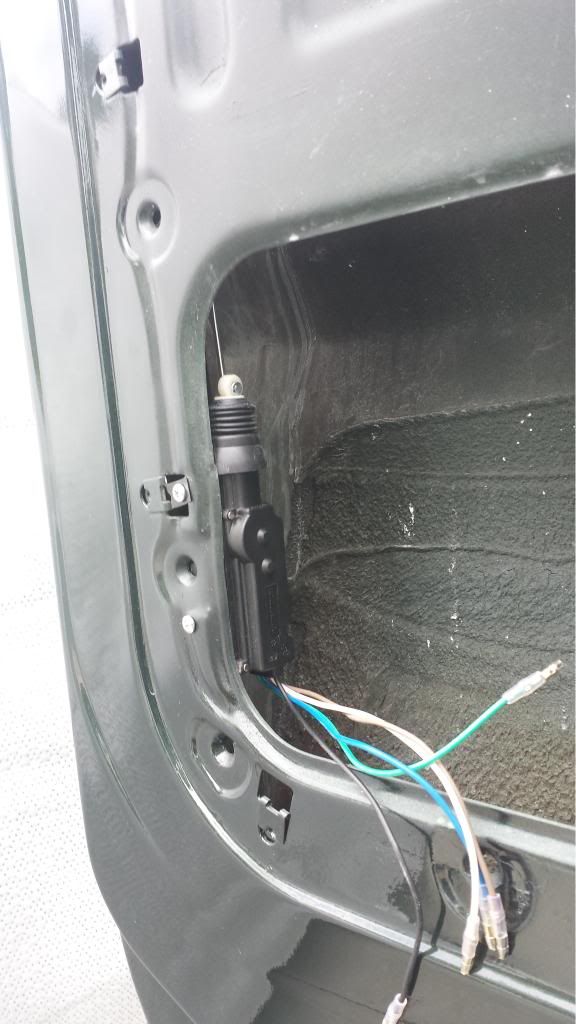
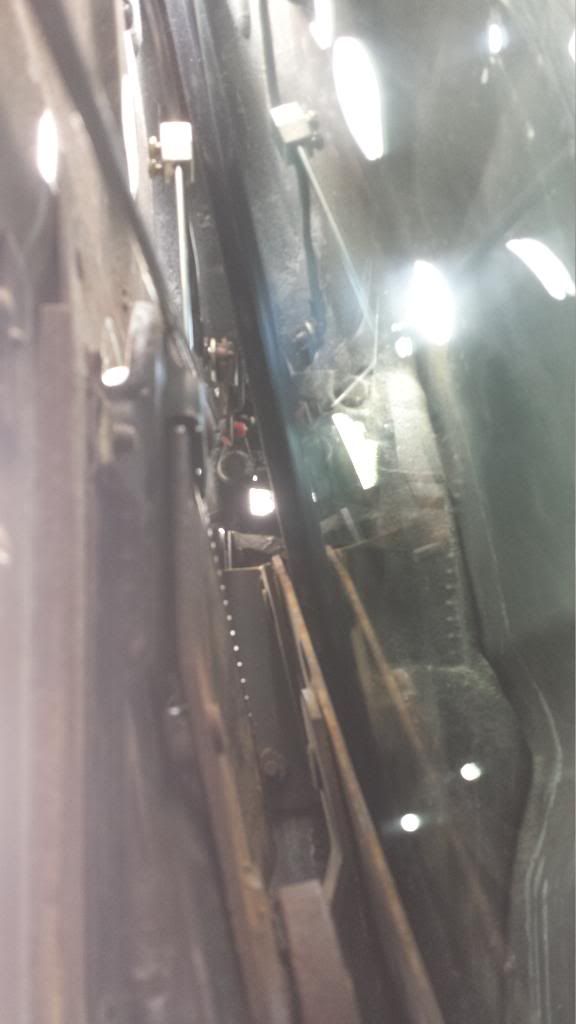
Looking down the window channel (no glass in this door at the time of the picture), with the door lock knob in the upper left, you can see the lock rod where I had to bend a vertical spot to connect the actuator connector (gold box looking thingie). The actuator rod then travels straight down to the actuator which is mounted to the inside of the door.
Here is a look from inside the door towards the door lock mechanics. Again, the window regulator and glass are not yet in this door when I took the picture.
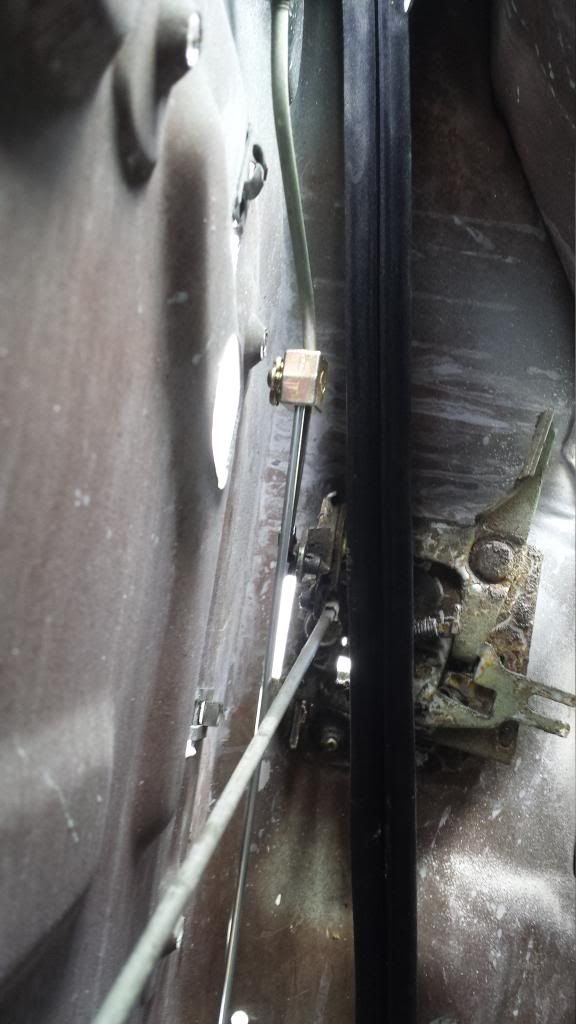
Now, here is the actuator on the crew cab rear drivers side door. You can see with a crew cab that while the window regulator and crank are towards the front of the door on a standard door, the rear crew cab doors are backwards and the regulator is towards the back of the door. This puts it right up against the door lock/latch mechanics making it extremely difficult to get things accomplished.
From inside the door towards the mechanics. You can see the actuator is just below and right up against the window regulator. The crew cab rear door regulator use a custom "Z" type of regulator as opposed to the standard door's straight bar. Everything is compact in there.
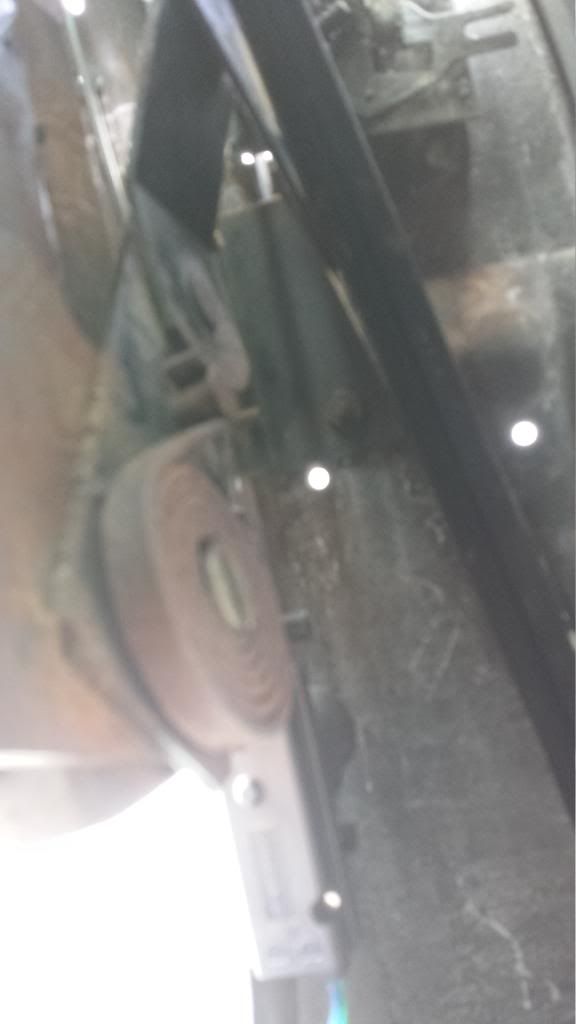
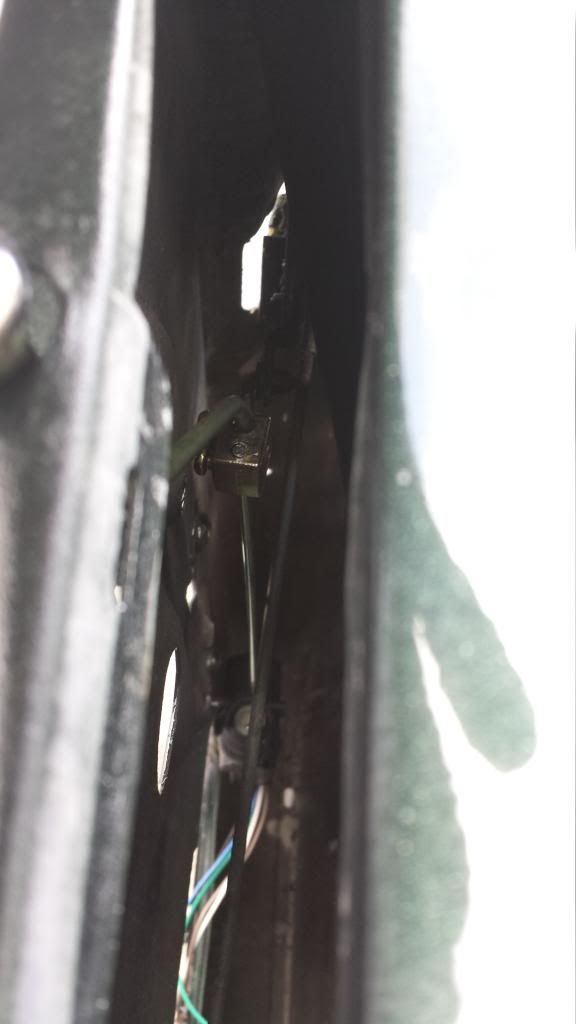
And another shot from inside the door, only angled higher showing the actuator rod coming out from above the window regulator and attached to the door lock rod (gold box thingie). The window is in this door which accounts for the reflection on the right side.
And looking straight down the window channel on the crew cab rear door, you can see the door lock rod going from left to right at the very top of the picture, and then the vertical bend and the attachment to the actuator connector. Then the actuator rod goes straight down through the window regulator to the top of the actuator which you can see in this picture. This one gives a good idea of just how cramped everything is in these rear doors.

Anyway, everything is hooked up now except the window motors, which I will be doing next. Of course, I will have no idea if any of this stuff works until everything is hooked up and done as the truck is not wired yet. But in theory, everything should work. I probably have about 9 hours into these doors already at this point. If I have to take them all apart down the road, I will be homicidal.
Here is the location where I mounted all 4 of the actuators. This is the front driver's door and it is mounted directly below where the door lock rod is inside the door, about halfway between the actual knob, and the door latch.

Looking down the window channel (no glass in this door at the time of the picture), with the door lock knob in the upper left, you can see the lock rod where I had to bend a vertical spot to connect the actuator connector (gold box looking thingie). The actuator rod then travels straight down to the actuator which is mounted to the inside of the door.

Here is a look from inside the door towards the door lock mechanics. Again, the window regulator and glass are not yet in this door when I took the picture.

Now, here is the actuator on the crew cab rear drivers side door. You can see with a crew cab that while the window regulator and crank are towards the front of the door on a standard door, the rear crew cab doors are backwards and the regulator is towards the back of the door. This puts it right up against the door lock/latch mechanics making it extremely difficult to get things accomplished.

From inside the door towards the mechanics. You can see the actuator is just below and right up against the window regulator. The crew cab rear door regulator use a custom "Z" type of regulator as opposed to the standard door's straight bar. Everything is compact in there.

And another shot from inside the door, only angled higher showing the actuator rod coming out from above the window regulator and attached to the door lock rod (gold box thingie). The window is in this door which accounts for the reflection on the right side.

And looking straight down the window channel on the crew cab rear door, you can see the door lock rod going from left to right at the very top of the picture, and then the vertical bend and the attachment to the actuator connector. Then the actuator rod goes straight down through the window regulator to the top of the actuator which you can see in this picture. This one gives a good idea of just how cramped everything is in these rear doors.

Anyway, everything is hooked up now except the window motors, which I will be doing next. Of course, I will have no idea if any of this stuff works until everything is hooked up and done as the truck is not wired yet. But in theory, everything should work. I probably have about 9 hours into these doors already at this point. If I have to take them all apart down the road, I will be homicidal.
-Rich
Current toys -
69 Ford F350 Crew Cab - 460 / C6 - http://i253.photobucket.com/albums/hh67 ... lqgskp.jpg
31 Ford Vicky - 1955 270 Red Ram Hemi / 4 speed - http://i253.photobucket.com/albums/hh67 ... bsibvn.jpg
Former toys -
67 Pontiac Firebird 400 convertible (sold 9/13) - http://i253.photobucket.com/albums/hh67 ... bird-1.jpg
67 Ford Fairlane GT - 390 / 4 speed (sold 7/15) - http://i253.photobucket.com/albums/hh67 ... c5hu8z.jpg
Current toys -
69 Ford F350 Crew Cab - 460 / C6 - http://i253.photobucket.com/albums/hh67 ... lqgskp.jpg
31 Ford Vicky - 1955 270 Red Ram Hemi / 4 speed - http://i253.photobucket.com/albums/hh67 ... bsibvn.jpg
Former toys -
67 Pontiac Firebird 400 convertible (sold 9/13) - http://i253.photobucket.com/albums/hh67 ... bird-1.jpg
67 Ford Fairlane GT - 390 / 4 speed (sold 7/15) - http://i253.photobucket.com/albums/hh67 ... c5hu8z.jpg
-
Calfdemon
- 100% FORDified!
- Posts: 2672
- Joined: Tue May 25, 2010 11:31 pm
- Location: California, Santa Clarita
Re: Calf's 69 Crew build, and CNM67's 67 shorty build
For today's update, I got 3 of the 4 window motors installed before it started raining and I stopped to cover the truck. Yeah... Southern California where it did not rain all winter long while my truck was still in the shop. I get the truck back and it has already rained twice during times I had to work on the wiring. Oh well, anyway... Here are a few pictures of the window motors installed. This is the Spal power window kit that works with our existing regulators and hardware. They were fairly easy to install and hopefully everything works well. There is no binding and everything turns freely using the "emergency" window handle they give with the kit, so I am sure they will work fine once they are powered.
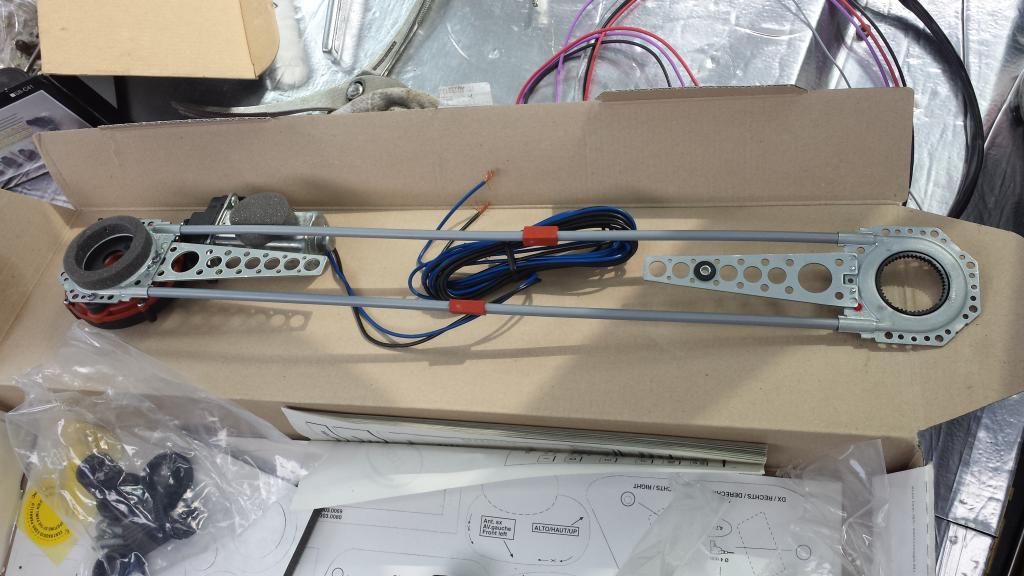
Here is a picture of one of the systems prior to install. The motor and transmission mount in the door while the other end attaches to you existing window crank with supplied adapters.
Here is one of the motors installed in the front passenger door. And yes, the crossover of the cables is the proper way to install it per the instructions.
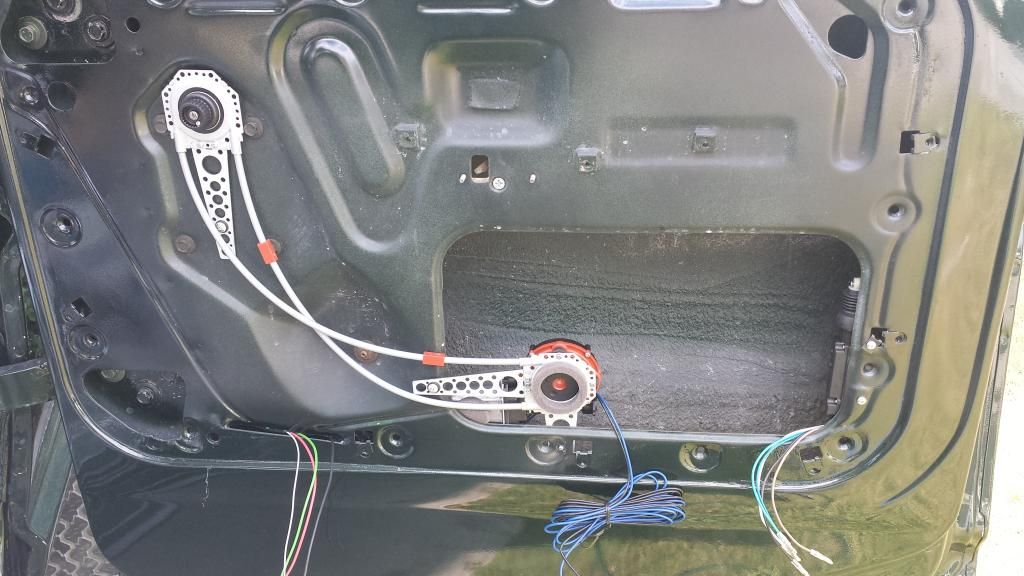
And here it is installed in the rear passenger door.

I got the front drivers door done and just reversed the motor and transmission mounting on the cable assembly so that the motor would still be down (per the instructions) since it twists and mounts the opposite way. I was setting up the rear door when the rain started. So I will finish that one up tomorrow and then work on buttoning up all of the door wiring. I have to extend a few harnesses and get everything connected inside the doors. Then on to the door panels which I will have to cut somewhere to run the window switch wires through. I hate cutting perfectly good door panels, but thats what I have to do with these upgrades. I also need to mount the switch panels to the panels. So mocking those up will be a bit of work. I want to make sure I have everything right before I cut and drill.
Here is a picture of one of the systems prior to install. The motor and transmission mount in the door while the other end attaches to you existing window crank with supplied adapters.

Here is one of the motors installed in the front passenger door. And yes, the crossover of the cables is the proper way to install it per the instructions.

And here it is installed in the rear passenger door.

I got the front drivers door done and just reversed the motor and transmission mounting on the cable assembly so that the motor would still be down (per the instructions) since it twists and mounts the opposite way. I was setting up the rear door when the rain started. So I will finish that one up tomorrow and then work on buttoning up all of the door wiring. I have to extend a few harnesses and get everything connected inside the doors. Then on to the door panels which I will have to cut somewhere to run the window switch wires through.
-Rich
Current toys -
69 Ford F350 Crew Cab - 460 / C6 - http://i253.photobucket.com/albums/hh67 ... lqgskp.jpg
31 Ford Vicky - 1955 270 Red Ram Hemi / 4 speed - http://i253.photobucket.com/albums/hh67 ... bsibvn.jpg
Former toys -
67 Pontiac Firebird 400 convertible (sold 9/13) - http://i253.photobucket.com/albums/hh67 ... bird-1.jpg
67 Ford Fairlane GT - 390 / 4 speed (sold 7/15) - http://i253.photobucket.com/albums/hh67 ... c5hu8z.jpg
Current toys -
69 Ford F350 Crew Cab - 460 / C6 - http://i253.photobucket.com/albums/hh67 ... lqgskp.jpg
31 Ford Vicky - 1955 270 Red Ram Hemi / 4 speed - http://i253.photobucket.com/albums/hh67 ... bsibvn.jpg
Former toys -
67 Pontiac Firebird 400 convertible (sold 9/13) - http://i253.photobucket.com/albums/hh67 ... bird-1.jpg
67 Ford Fairlane GT - 390 / 4 speed (sold 7/15) - http://i253.photobucket.com/albums/hh67 ... c5hu8z.jpg
-
BobbyFord
- 100% FORDified!
- Posts: 5383
- Joined: Sun Feb 04, 2007 9:52 am
- Location: Chatsworth, California
Re: Calf's 69 Crew build, and CNM67's 67 shorty build
I'm following this thread. Nice work.
-
cole71
- Preferred User

- Posts: 442
- Joined: Tue Aug 02, 2011 11:27 pm
- Location: Tallapoosa, Georgia
Re: Calf's 69 Crew build, and CNM67's 67 shorty build
I agree, nice work. I also am a fan of the powerbraid that's what I used under the hood of mine
My build thread...http://www.fordification.com/forum/view ... 22&t=67317
-
pedro69ford

- New Member

- Posts: 115
- Joined: Sat Jan 10, 2009 1:02 pm
- Location: tennesse red boiling springs
Re: Calf's 69 Crew build, and CNM67's 67 shorty build
That sir, is some good work.lots of thought goes into such a job, great accomplishment.
-
Calfdemon
- 100% FORDified!
- Posts: 2672
- Joined: Tue May 25, 2010 11:31 pm
- Location: California, Santa Clarita
Re: Calf's 69 Crew build, and CNM67's 67 shorty build
No real updates this week as there has been a East and West finals hockey game each night except today, and I have been glued to each game. I have family coming into town Monday for my daughter's high school graduation, so this weekend will be spent cleaning the house and the Western Conference game 7 tomorrow (Go KIngs!).
Anyway, between the Stanley Cup Conference finals and finals, and visiting family, my truck has had to wait and will continue to wait another week.
The only question I still am asking myself and the mystery that is driving me crazy is HOW THE F*** DID I MISPLACE MY BACK WINDOW?!?!?!?!? I had acquired 5 total back windows over the past 3 years. The slider was put in CNM67's truck, and I had 4 solid rears. I sat the best of the 4 off to the side in a certain spot in the garage because that was the one I was going to run on my crew. I gave the other 3 windows away to local bump owners in need. Now that I am putting my glass back in, I cannot for the life of me find the back window that I planned on running. I have been through my entire garage, the rafters, every spot in the house where I might have squirreled away parts, and my storage locker. That window just is no where to be found. I can't remember giving it away or selling it, nor would I have. And where I had it sitting was not easily accessible for anyone to come in and take it. The fricken thing grew legs and walked away!
-Rich
Current toys -
69 Ford F350 Crew Cab - 460 / C6 - http://i253.photobucket.com/albums/hh67 ... lqgskp.jpg
31 Ford Vicky - 1955 270 Red Ram Hemi / 4 speed - http://i253.photobucket.com/albums/hh67 ... bsibvn.jpg
Former toys -
67 Pontiac Firebird 400 convertible (sold 9/13) - http://i253.photobucket.com/albums/hh67 ... bird-1.jpg
67 Ford Fairlane GT - 390 / 4 speed (sold 7/15) - http://i253.photobucket.com/albums/hh67 ... c5hu8z.jpg
Current toys -
69 Ford F350 Crew Cab - 460 / C6 - http://i253.photobucket.com/albums/hh67 ... lqgskp.jpg
31 Ford Vicky - 1955 270 Red Ram Hemi / 4 speed - http://i253.photobucket.com/albums/hh67 ... bsibvn.jpg
Former toys -
67 Pontiac Firebird 400 convertible (sold 9/13) - http://i253.photobucket.com/albums/hh67 ... bird-1.jpg
67 Ford Fairlane GT - 390 / 4 speed (sold 7/15) - http://i253.photobucket.com/albums/hh67 ... c5hu8z.jpg