Hackster's F100 #2 CV Swap 6 speed manual and Coyote
Moderator: FORDification
- sargentrs
- 100% FORDified!

- Posts: 9866
- Joined: Fri Jun 22, 2007 9:30 am
- Location: Georgia, Jasper
Re: Hackster's F100 #2 CV Swap 6 speed manual and Coyote
Amazing work!
Randy
1970 F100 Sport Custom Limited LWB, 302cid, 3 on the tree. NO A/C, NO P/S, NO P/B. Currently in 1000 pcs while rebuilding. Project thread: http://www.fordification.com/forum/view ... 22&t=59995 Plan: 351w, C4, LSD, pwr front disc, p/s, a/c, bucket seats, new interior and paint.
1987 F-150 XLT Lariat, 5.0/C6 auto.
- BossGB385
- New Member

- Posts: 22
- Joined: Thu May 21, 2015 10:25 pm
- Location: Ga
Re: Hackster's F100 #2 CV Swap 6 speed manual and Coyote
I have to say I'm somewhat jealous. But, I have thoroughly enjoyed watching your builds. You do top shelf work. I most likely will read back through this thread at least 100 more times. Thank you for the great pics and details. I love this truck. 

Graham
Graham
-
hackster
- Preferred User

- Posts: 317
- Joined: Fri Oct 18, 2013 11:21 am
Re: Hackster's F100 #2 CV Swap 6 speed manual and Coyote
Thank yousargentrs wrote:Amazing work!
That is awesome and thank you for the nice words. I sure enjoy building this stuff and I am growing pretty fond of the truck myself!!BossGB385 wrote:I have to say I'm somewhat jealous. But, I have thoroughly enjoyed watching your builds. You do top shelf work. I most likely will read back through this thread at least 100 more times. Thank you for the great pics and details. I love this truck.

Graham
Had a great night last night and have some damn talented friends.
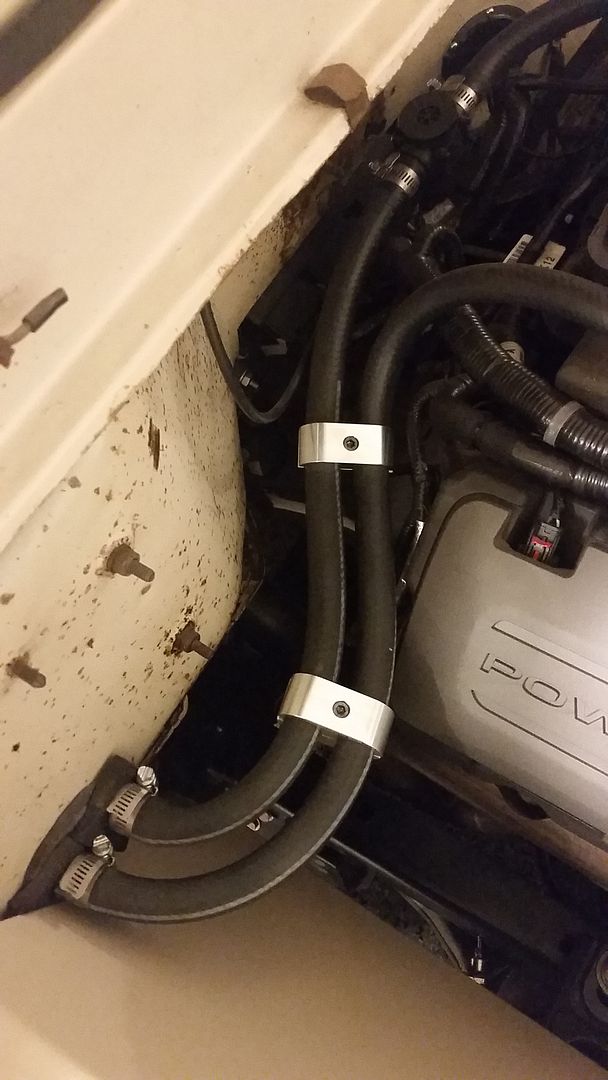
My friend Scott Becker from STS Machining dropped off my hose clamps for the heater hoses and I have to tell you its pretty amazing what they can make in a CNC machine these days. He runs a small shop from his house and cranked these out in less than a week. I think he is going to try some hood hinges next. Amazing work.
I have been buggin my buddy Andrew to help me with a console for a long time and I am about to that point now so he came over and we made a huge dent in the project
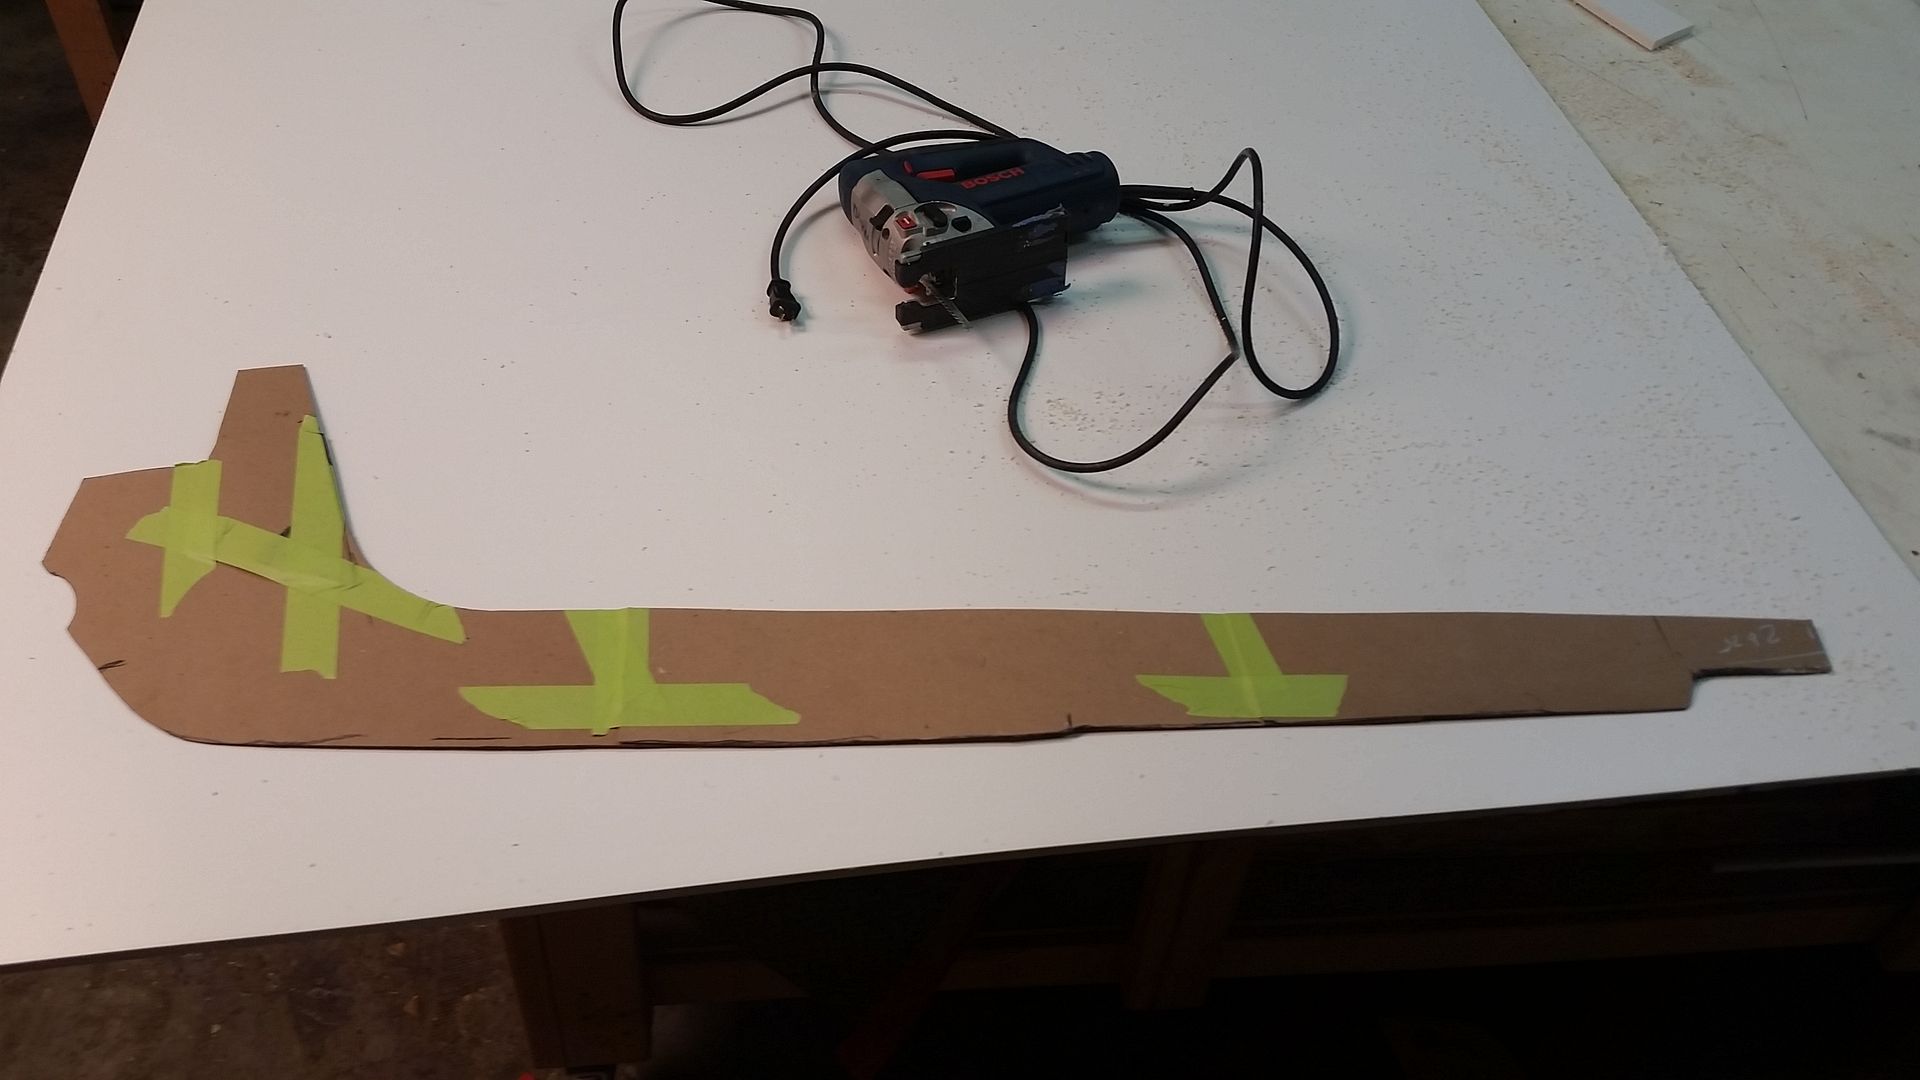
We started off by making templates in chip board of the floor and then built the upper surface on it. The templates looked like this.
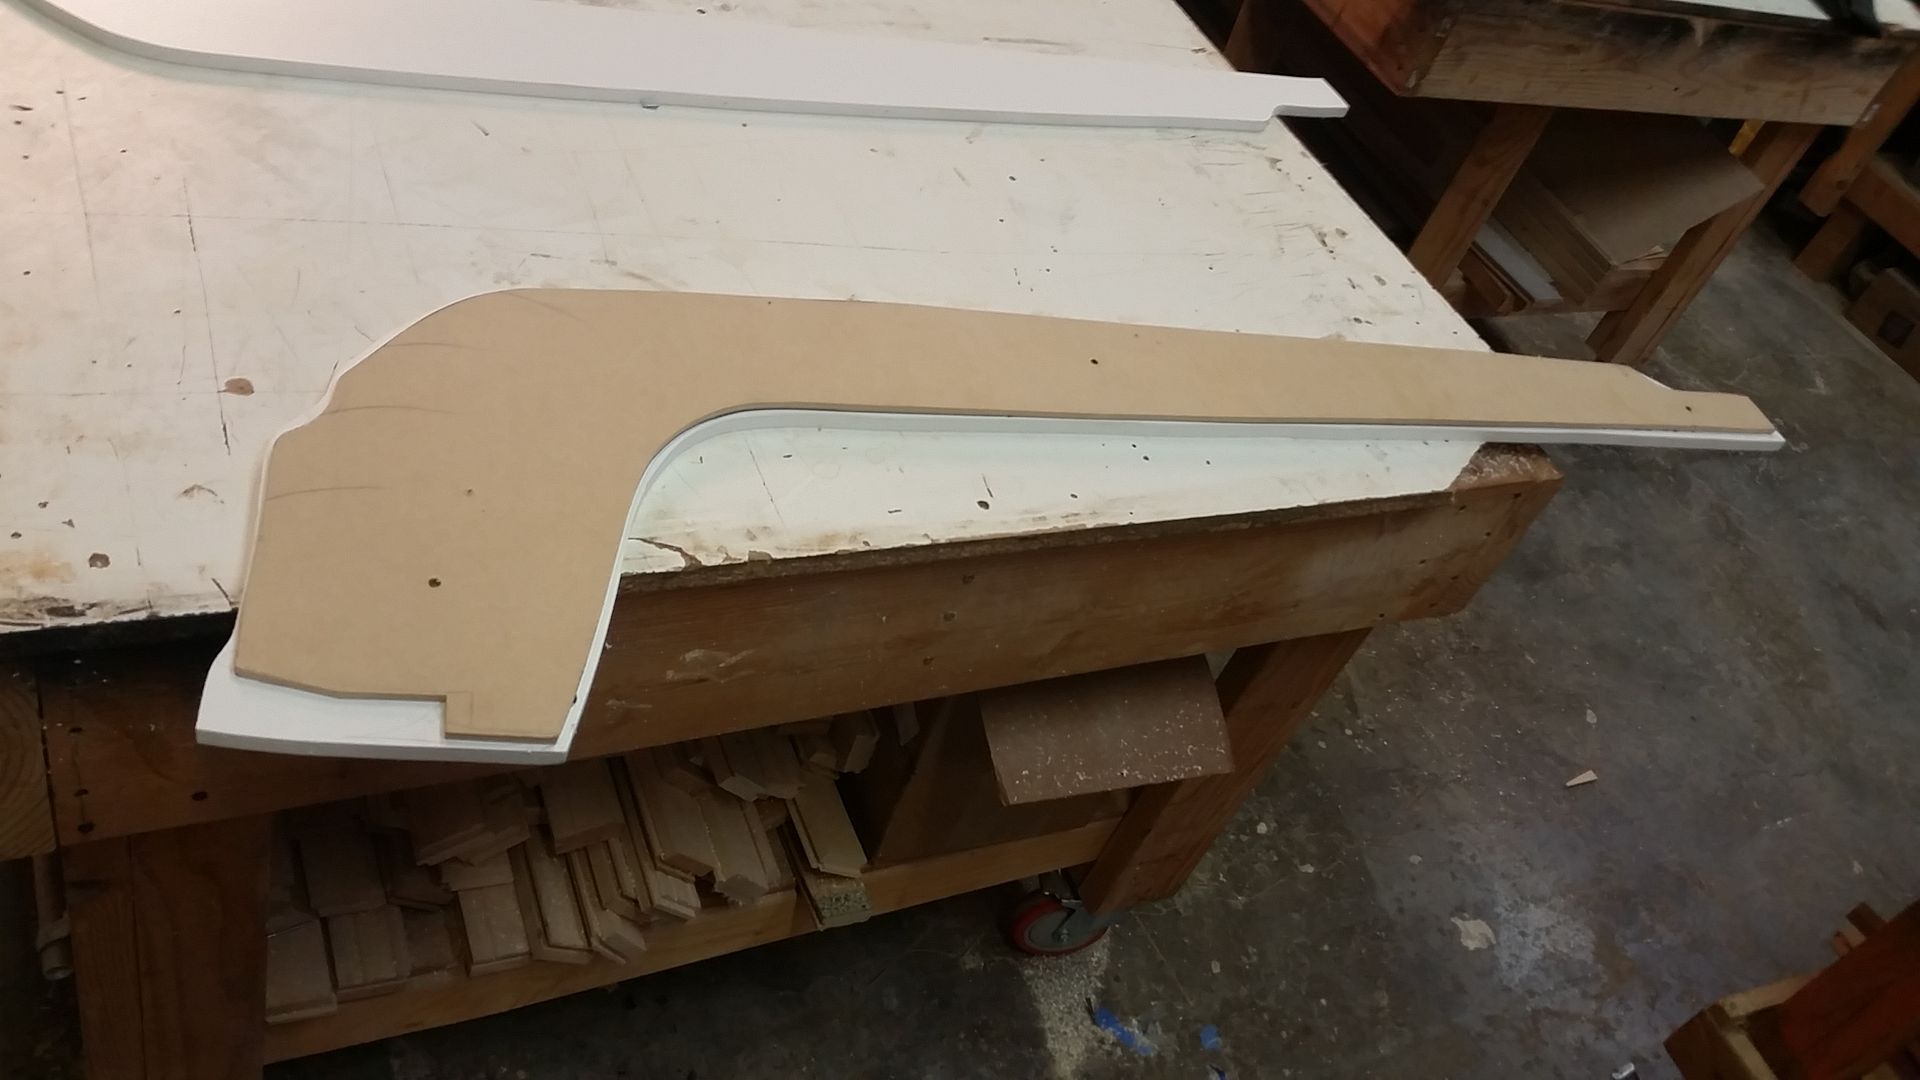
Then we cut out an exact replica of the carboard and did all our sanding and smoothing on that one before transfering it to the PVC Foam Board (It is very, very cool stuff if you have never worked with it before).
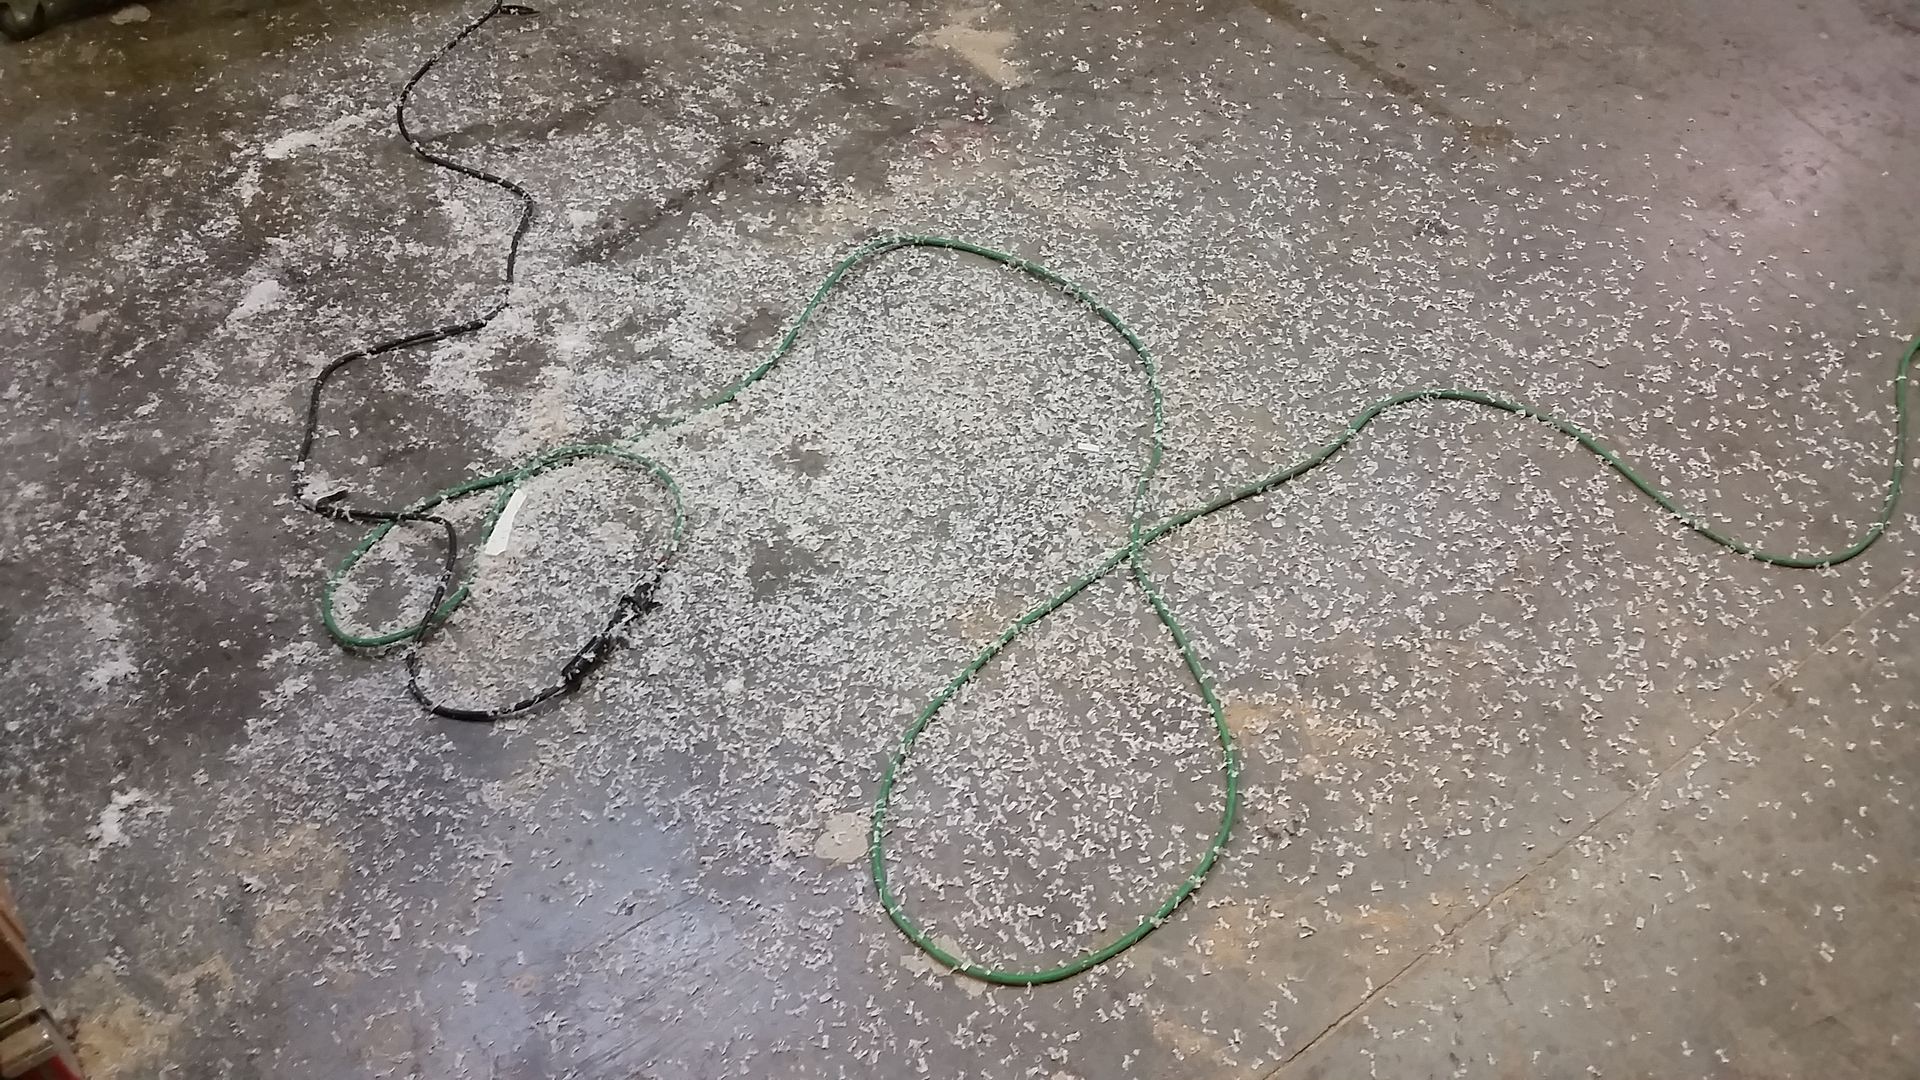
Once we had that done and were happy with them, we screwed that to the PVC and used a plunge router with a bearing guide on it to cut out the actual sides of the console. We used a 1/4 round bull nosed bit and gave the top edge a nice contour and made a huge mess with all the routing.
Here you can start to get an idea of what I am going for. Should look awesome when done and covered.
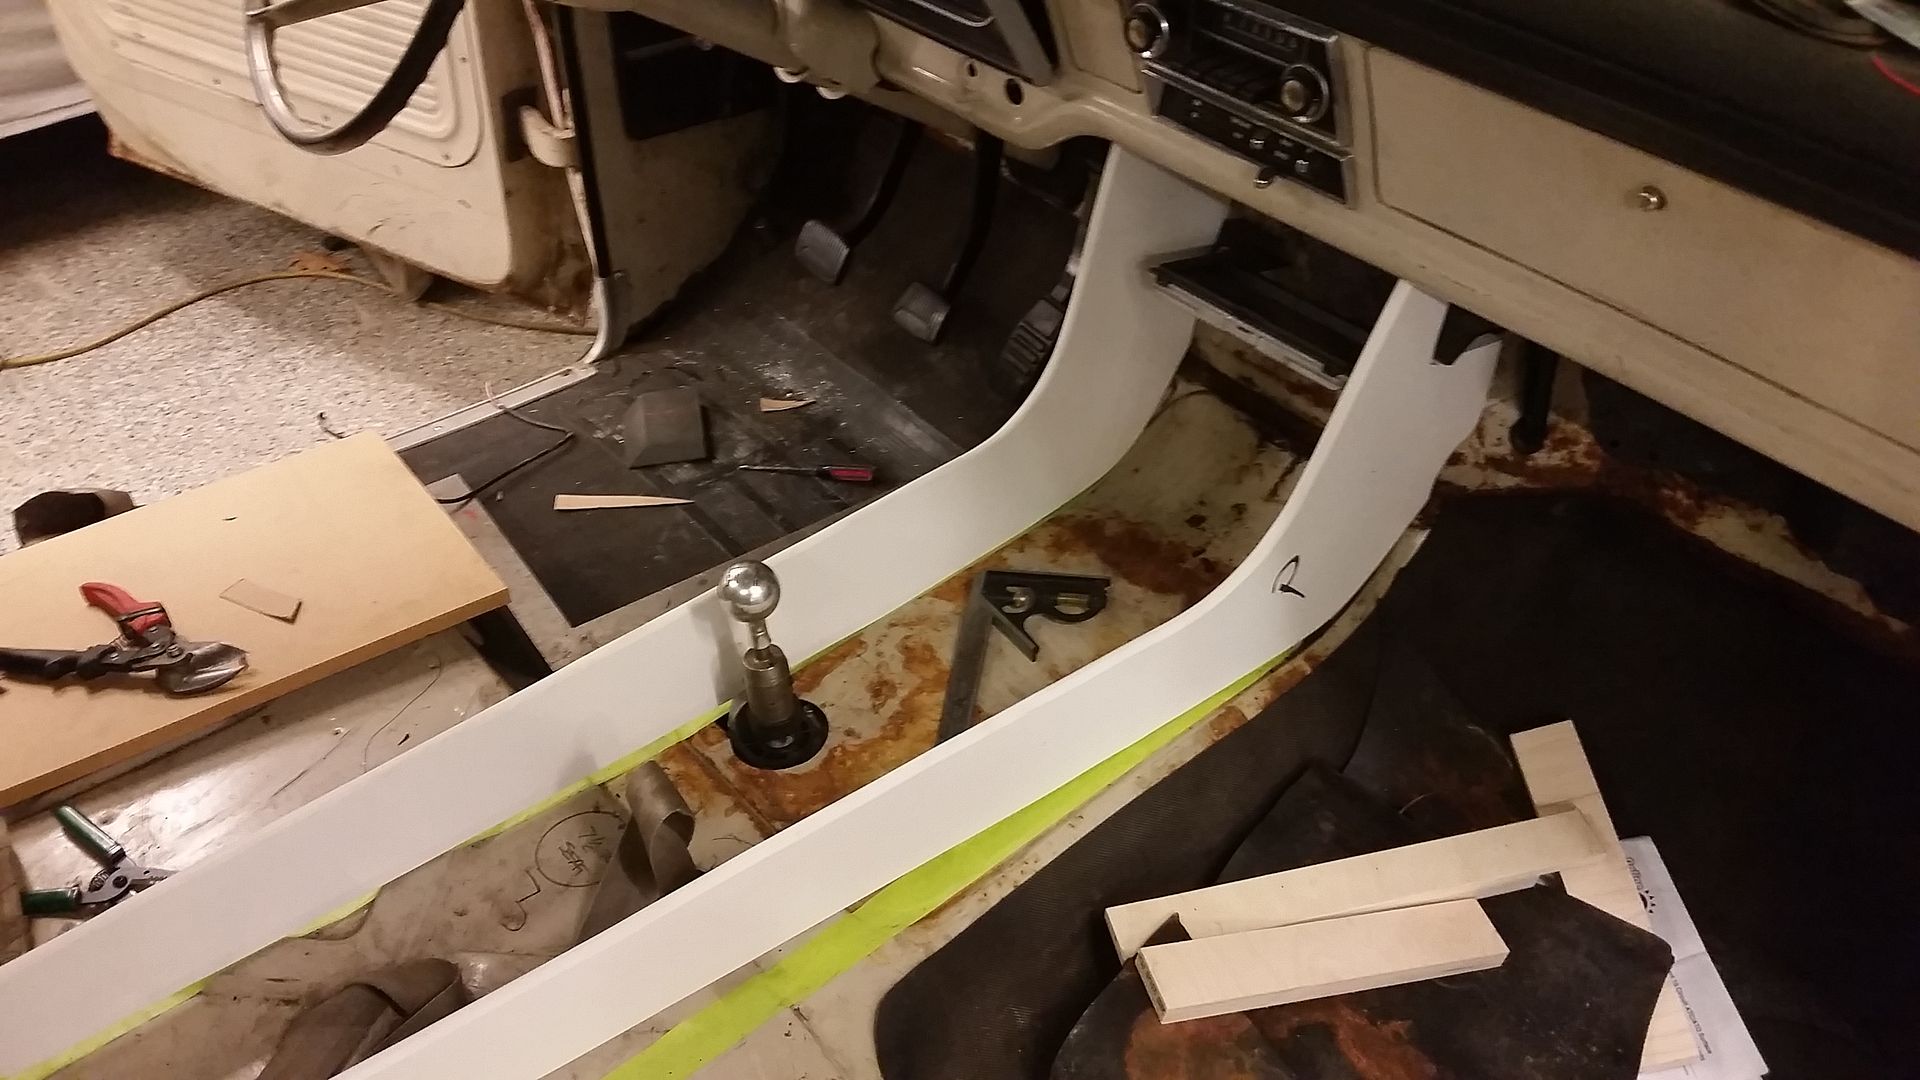
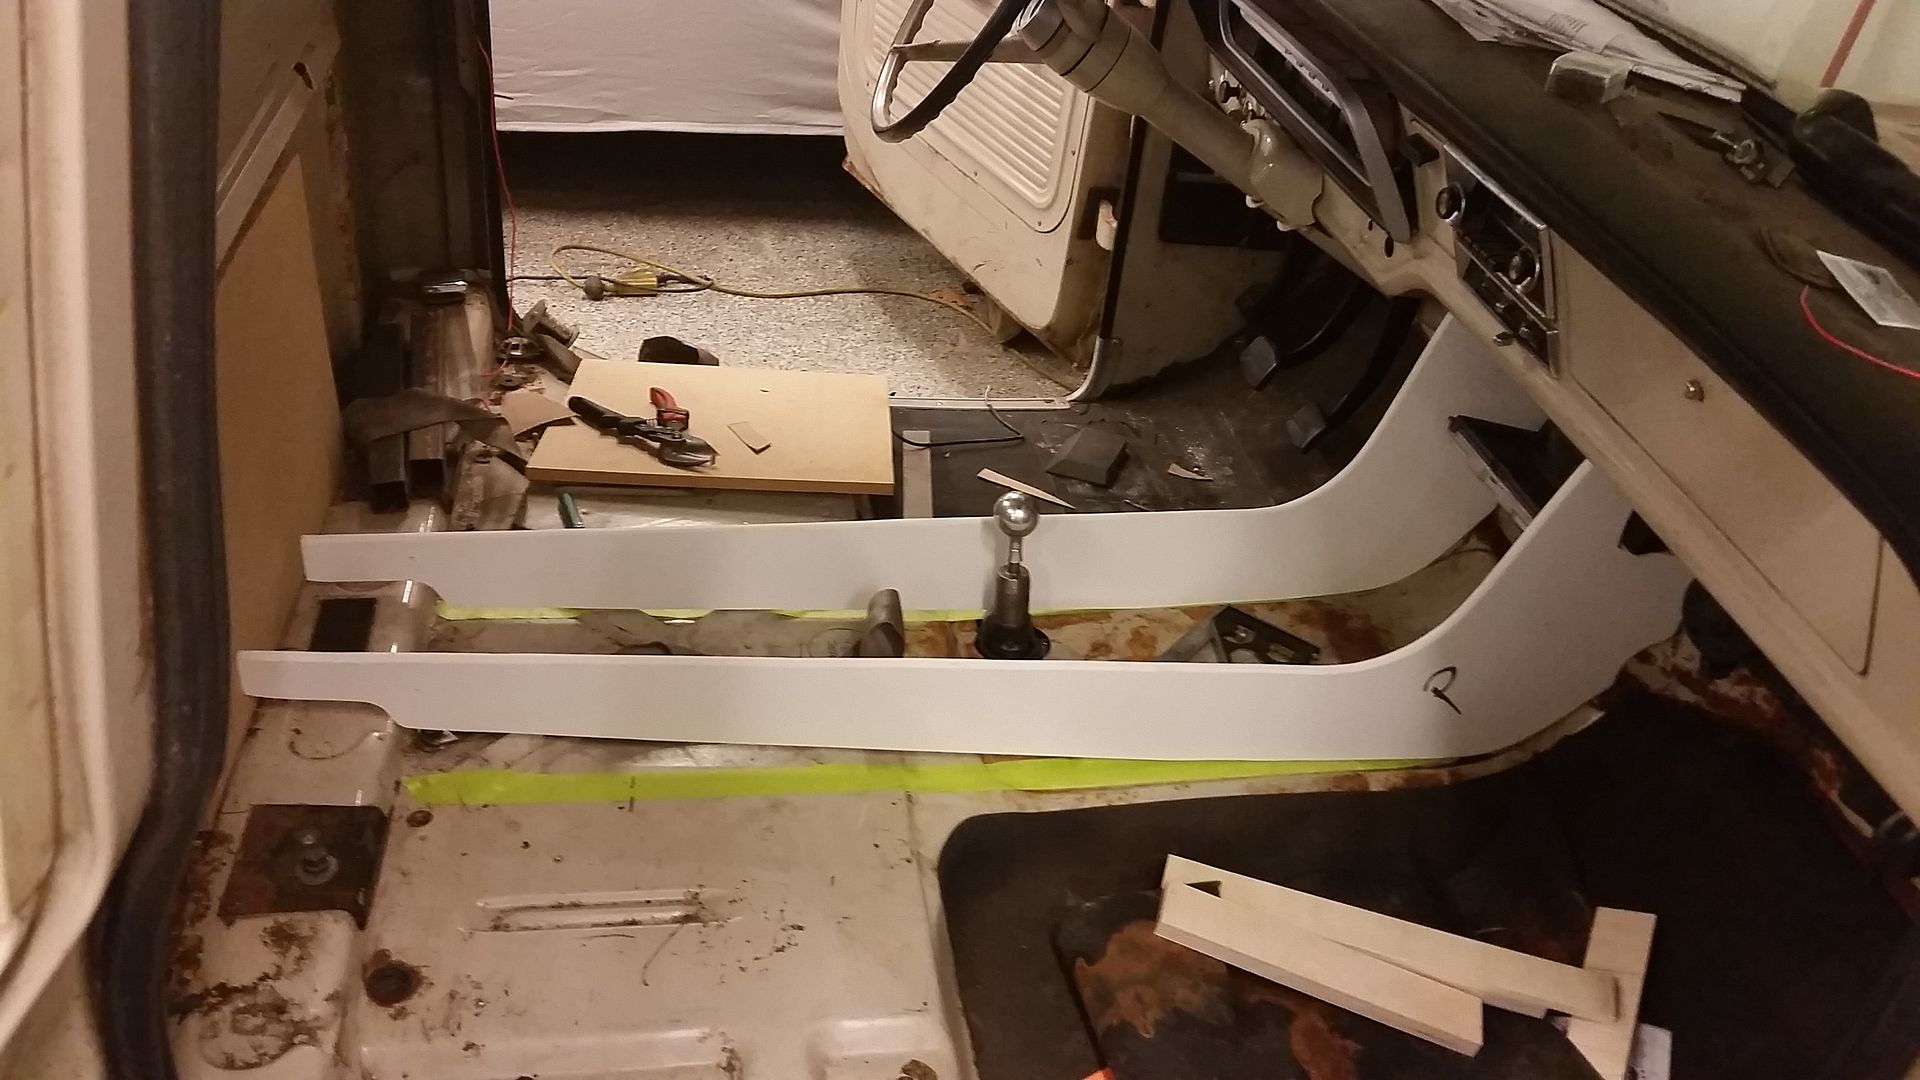
Center panel where the shifter is is going to get a couple of cup holders and maybe a little tray for stuff to go in It should frame the seats and stuff really well and bring the interior at least into the 2000's =)
Also ordered Seat Foams from TMI for the 67 mustang bucket seats, I got the R foams with the big bolsters.
Ordered the Seat belts as well from Seatbelt Planet, they should be here the end of next week.
Carpet is ordered, interior door handles are ordered and I think that is about it.
Parts for the cooling system should be here this afternoon so I can keep progress going. I need to get shorter struts for the front still, mine are too long.
Sean
-
redmcode
- New Member

- Posts: 16
- Joined: Sun Dec 15, 2013 9:07 pm
Re: Hackster's F100 #2 CV Swap 6 speed manual and Coyote
Great work as usual, Sorry to go back to your first build but on your rims what the specs them as well as the back space did you go with on your front and rear? I have the CV front and the original 9" in the rear of my 69. Thanks again and keep the great pics and info coming.
-
michael9218
- New Member

- Posts: 35
- Joined: Tue Sep 29, 2015 8:07 pm
- Location: Woodstock, Ga
Re: Hackster's F100 #2 CV Swap 6 speed manual and Coyote
Center console looks great! I like where you're going with it. That's exactly what I had mulling around in my head as I've been scheming and dreaming (and getting inspiration from your build(s)).
Is the upward angle on the center console the same as the angle on the dash? I recall seeing that the dash is negative 22 degrees. I thought it would look good to match this angle and slope the center console at 22 degrees (positive slope versus negative slope).
Is the upward angle on the center console the same as the angle on the dash? I recall seeing that the dash is negative 22 degrees. I thought it would look good to match this angle and slope the center console at 22 degrees (positive slope versus negative slope).
- poke em
- New Member

- Posts: 63
- Joined: Wed Nov 26, 2014 1:58 am
- Location: Hayden Idaho
Re: Hackster's F100 #2 CV Swap 6 speed manual and Coyote
I looked for this the other day and I believe these are the measurements on Hackster's lsx truckredmcode wrote:Great work as usual, Sorry to go back to your first build but on your rims what the specs them as well as the back space did you go with on your front and rear? I have the CV front and the original 9" in the rear of my 69. Thanks again and keep the great pics and info coming.
Rear: 65" wide 20x10.5” wheel 6.75”bs 295/35 tire
Front: 67" wide 20x 8.5 wheel 5.5” bs 255/40 tire
Your axle is more like 61 1/2 or so wide in the rear.
-
Monkey-1
- New Member

- Posts: 52
- Joined: Mon Jan 06, 2014 10:29 pm
Re: Hackster's F100 #2 CV Swap 6 speed manual and Coyote
Sean,
I have been following you on Instagram for a while now and just ran across this build thread. I have read it from start to finish and am amazed at the finish work you are able to achieve with the tools you have. Inspiring work to say the least. Keep the progress pics and description coming!!
I have been following you on Instagram for a while now and just ran across this build thread. I have read it from start to finish and am amazed at the finish work you are able to achieve with the tools you have. Inspiring work to say the least. Keep the progress pics and description coming!!
-Monkey-1
1985 F-150 Build Thread (CV Swap, 4.6, Frame-Off) https://www.ford-trucks.com/forums/1519 ... 4-6-a.html
1977 F-100 Flareside Build Thread (CV Swap, 4.6, Frame-Off) https://www.ford-trucks.com/forums/1545 ... hread.html
Studmonkeyracing.com
studmonkey@bellsouth.net
1985 F-150 Build Thread (CV Swap, 4.6, Frame-Off) https://www.ford-trucks.com/forums/1519 ... 4-6-a.html
1977 F-100 Flareside Build Thread (CV Swap, 4.6, Frame-Off) https://www.ford-trucks.com/forums/1545 ... hread.html
Studmonkeyracing.com
studmonkey@bellsouth.net
-
hackster
- Preferred User

- Posts: 317
- Joined: Fri Oct 18, 2013 11:21 am
Re: Hackster's F100 #2 CV Swap 6 speed manual and Coyote
Its damn close to the reverse of the dash angle. Thank you rather like it as well.michael9218 wrote:Center console looks great! I like where you're going with it. That's exactly what I had mulling around in my head as I've been scheming and dreaming (and getting inspiration from your build(s)).
Is the upward angle on the center console the same as the angle on the dash? I recall seeing that the dash is negative 22 degrees. I thought it would look good to match this angle and slope the center console at 22 degrees (positive slope versus negative slope).
Thanks Monkey..I dont have much here to work with but I dont let that hold me back!! Hope to get a nice Tig machine this year but I am pretty cheap and don't want to spend the money.Monkey-1 wrote:Sean,
I have been following you on Instagram for a while now and just ran across this build thread. I have read it from start to finish and am amazed at the finish work you are able to achieve with the tools you have. Inspiring work to say the least. Keep the progress pics and description coming!!
First of all, I got the T fitting for the coolant hose today so I installed that today and got the coolant all filled up and let the truck Idle and warm up, burped the cooling system and checked for leaks. All good. Took it for the first little trip around the block and all seems alright. It has a little tick to it, it sounds like its pretty normal with these engines. Messed around with that for a bit, jacked the truck up and set the Fuel pressure to 55 lbs base.
Second trip out of the garage netted a big burnout in front of the house =) truck is going to be damn fun. The manual is where its at for sure.
Stay focused Sean...stay focused.
Back on center console build. Got the sides connected together to finish up the frame work and it fits well.
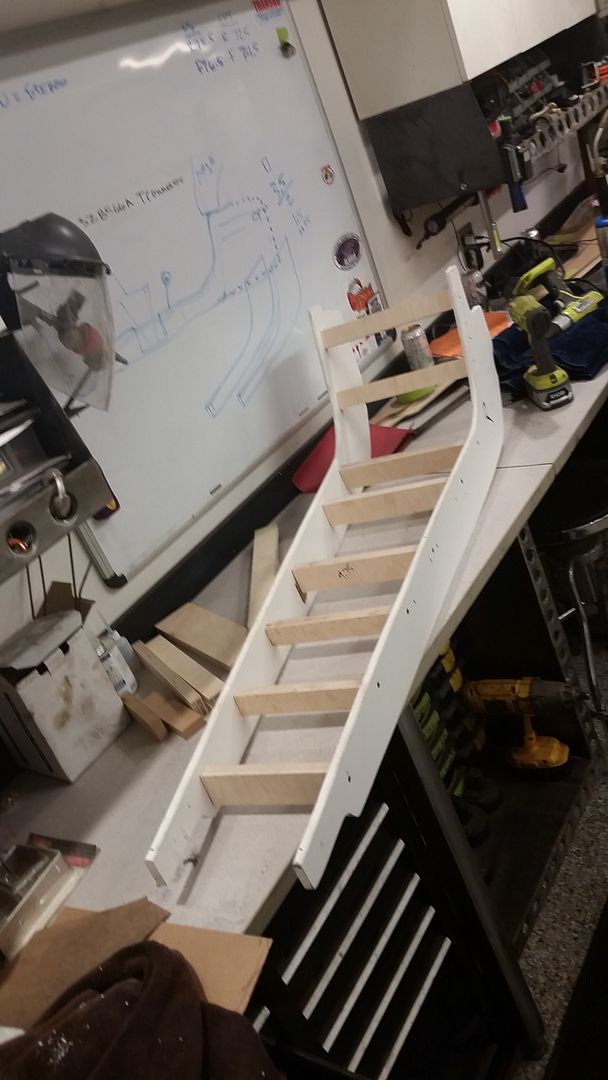
Then cut this piece out to fit and heated it up with a torch to get it warm enough to bend and held it in place till it cooled.
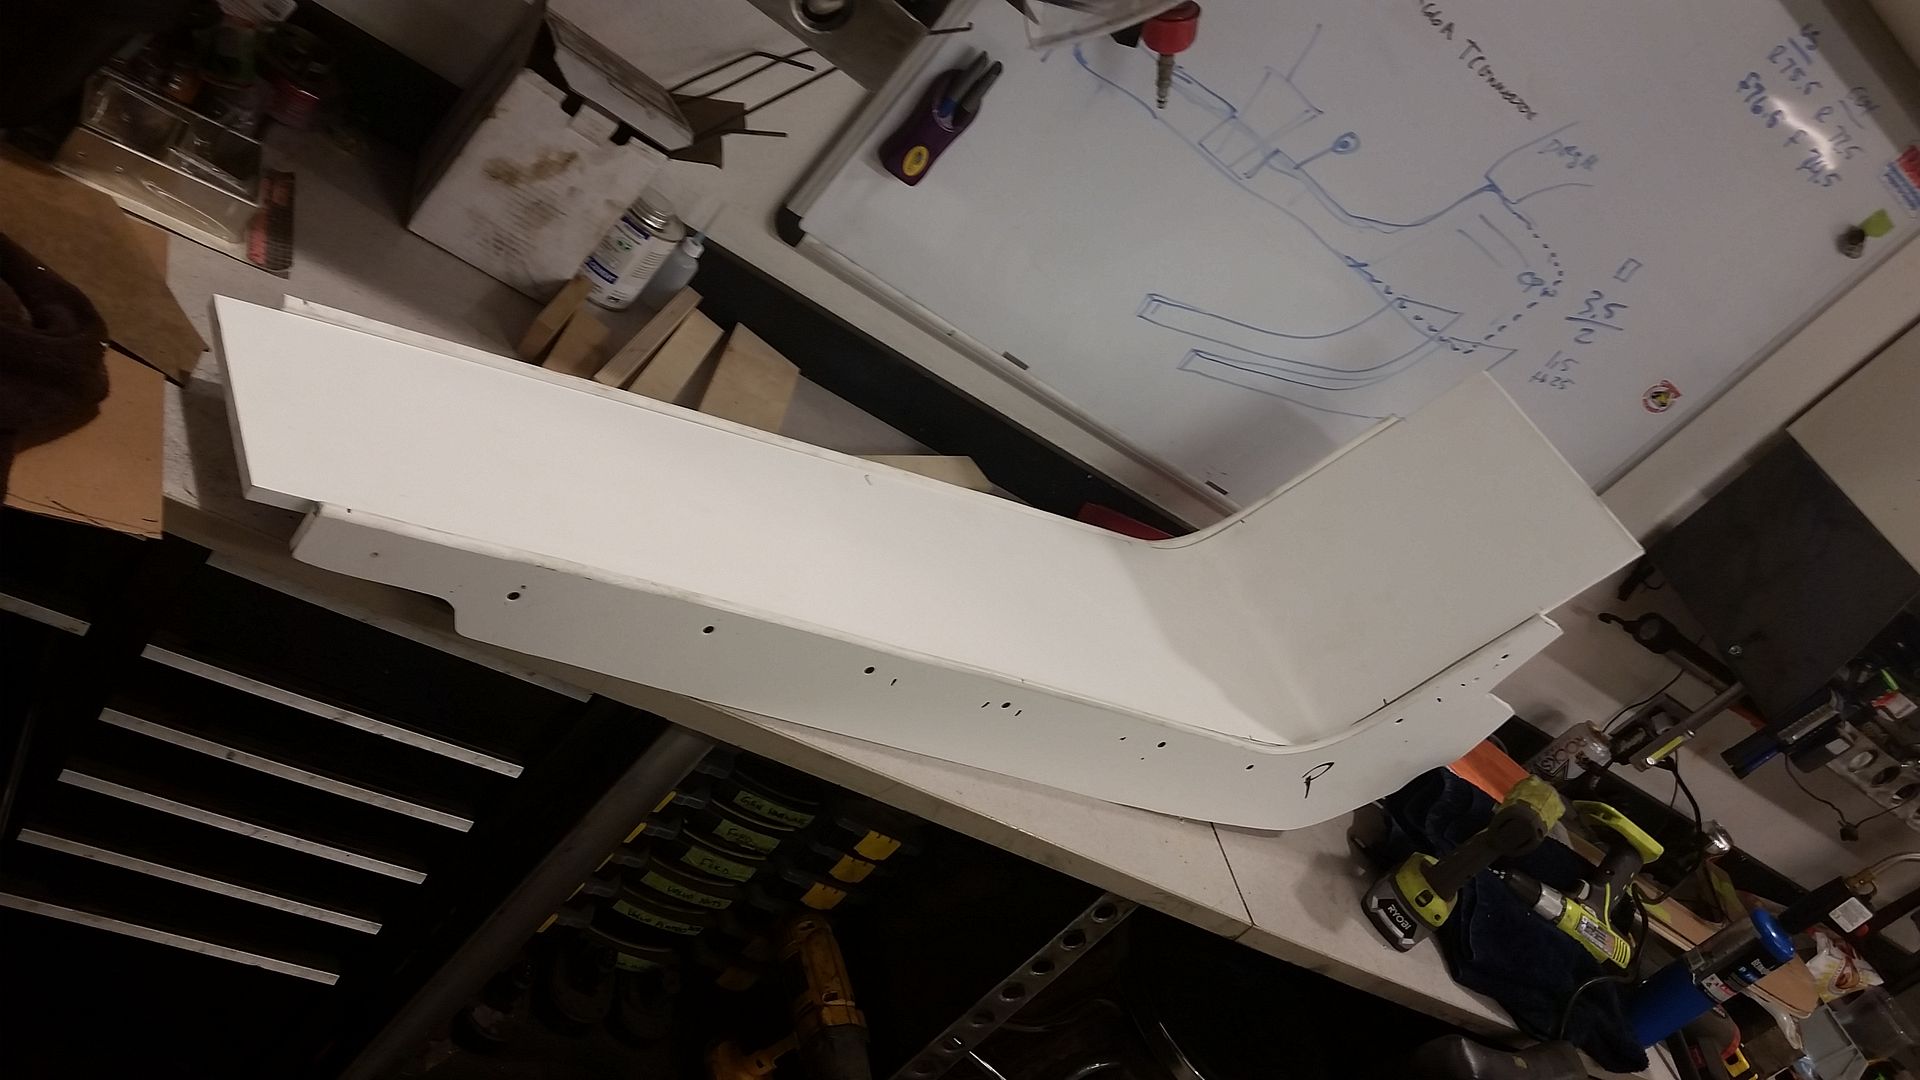
Trimmed the top piece to fit the ends and tried the first test fit in car to mark the shifter location.
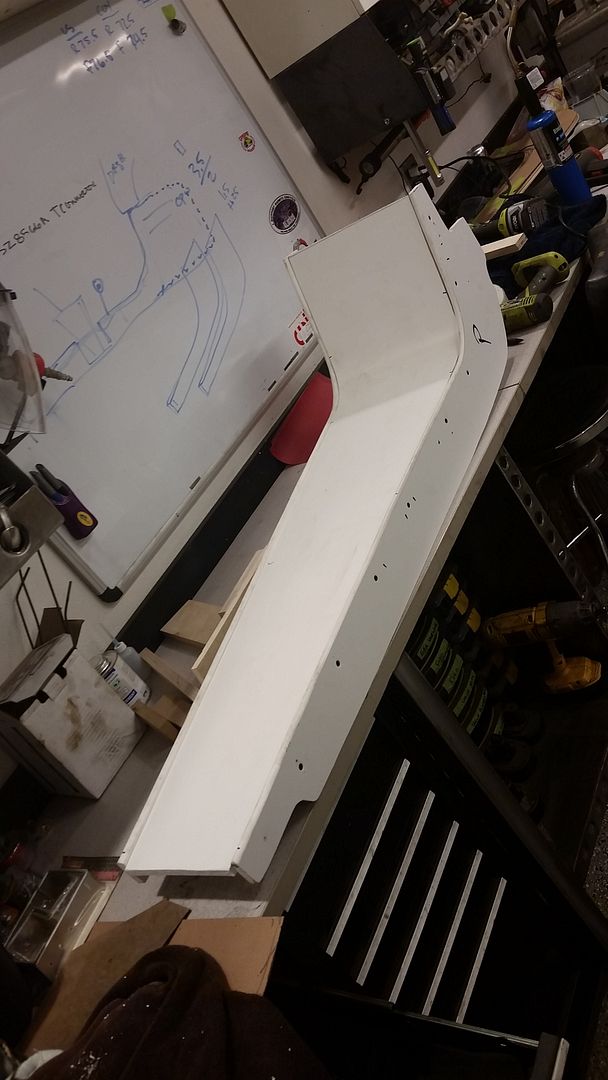
Cut the hole for the shifter and all lined up really well. Console is turning out awesome. I am not sure what I am doing up front but its getting cup holders right behind the shifter I know that for sure. I kind of like the super clean simple look of it and dont know if I want to mess it up with stuff. Maybe just do a really cool double french stitch right up the middle of the flat panel
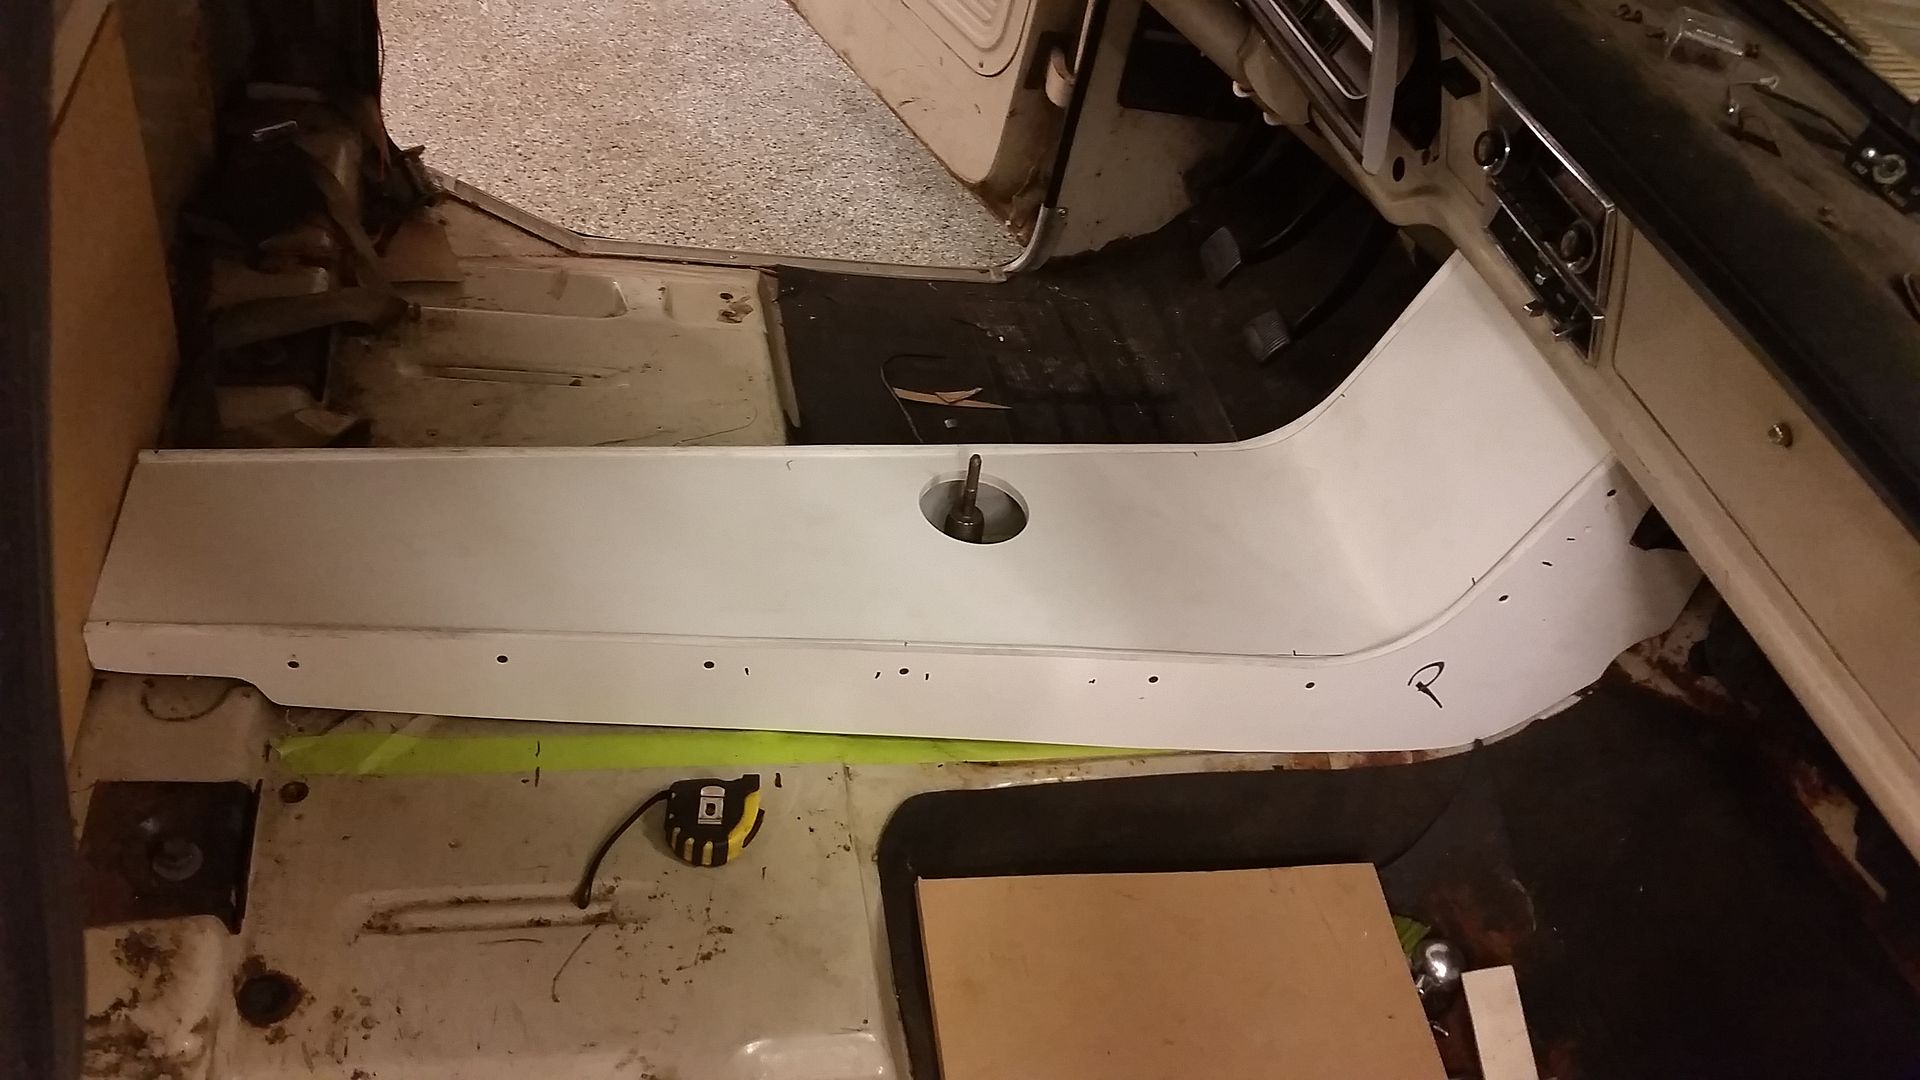
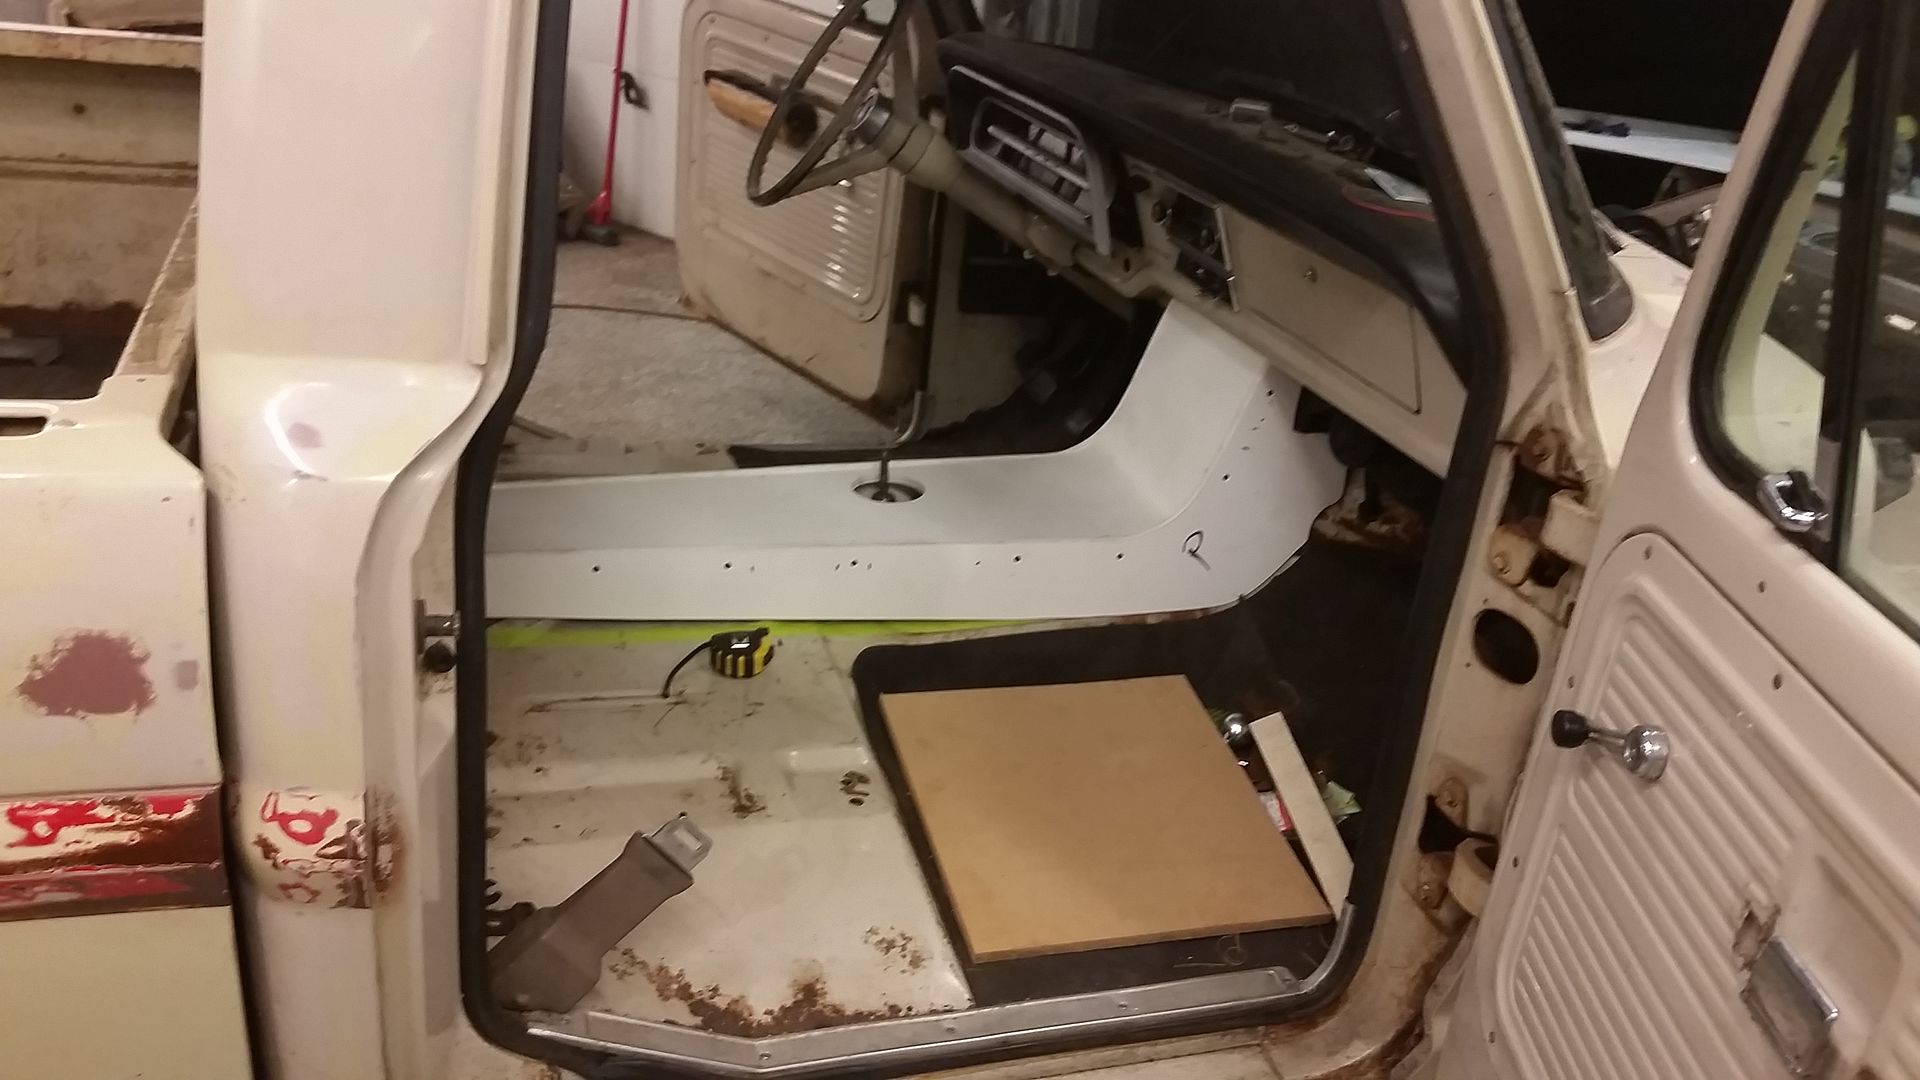
View from the drivers seat..
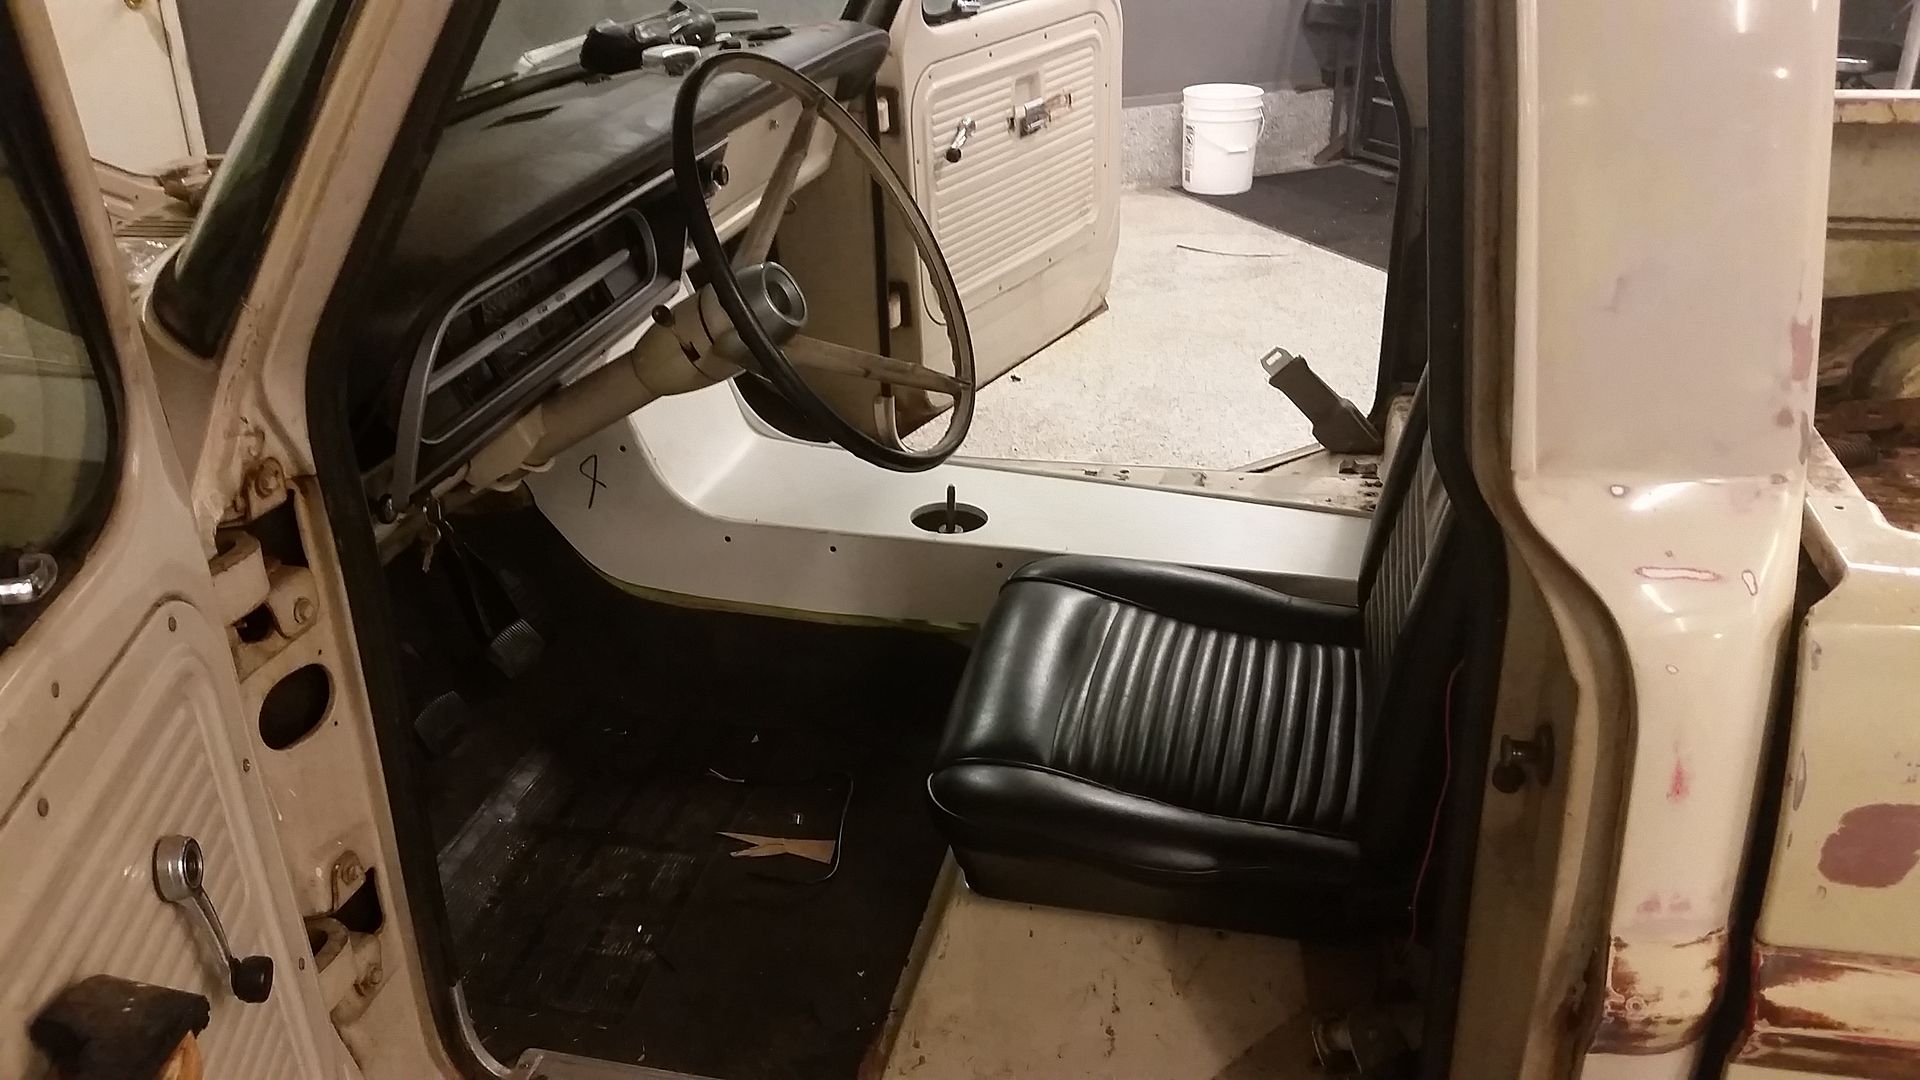
Truck has come a long way since I started it in September....
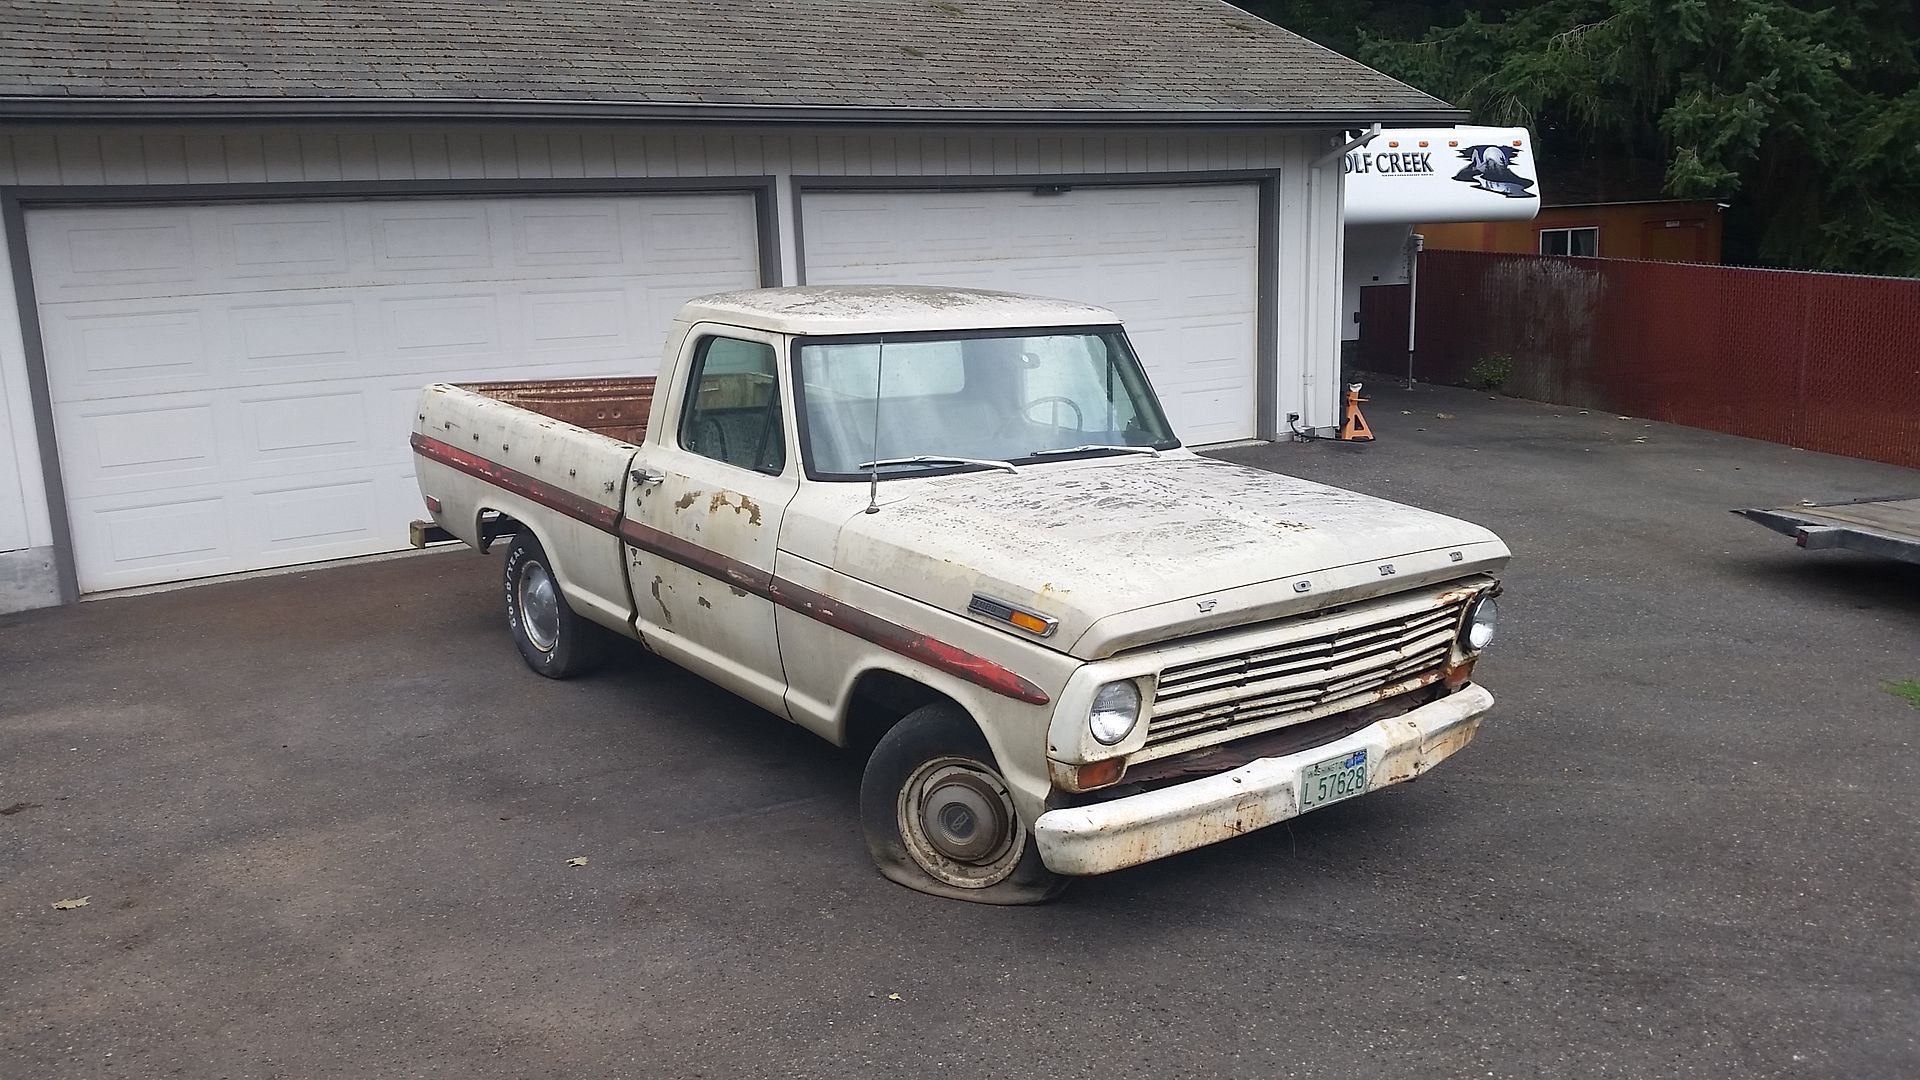
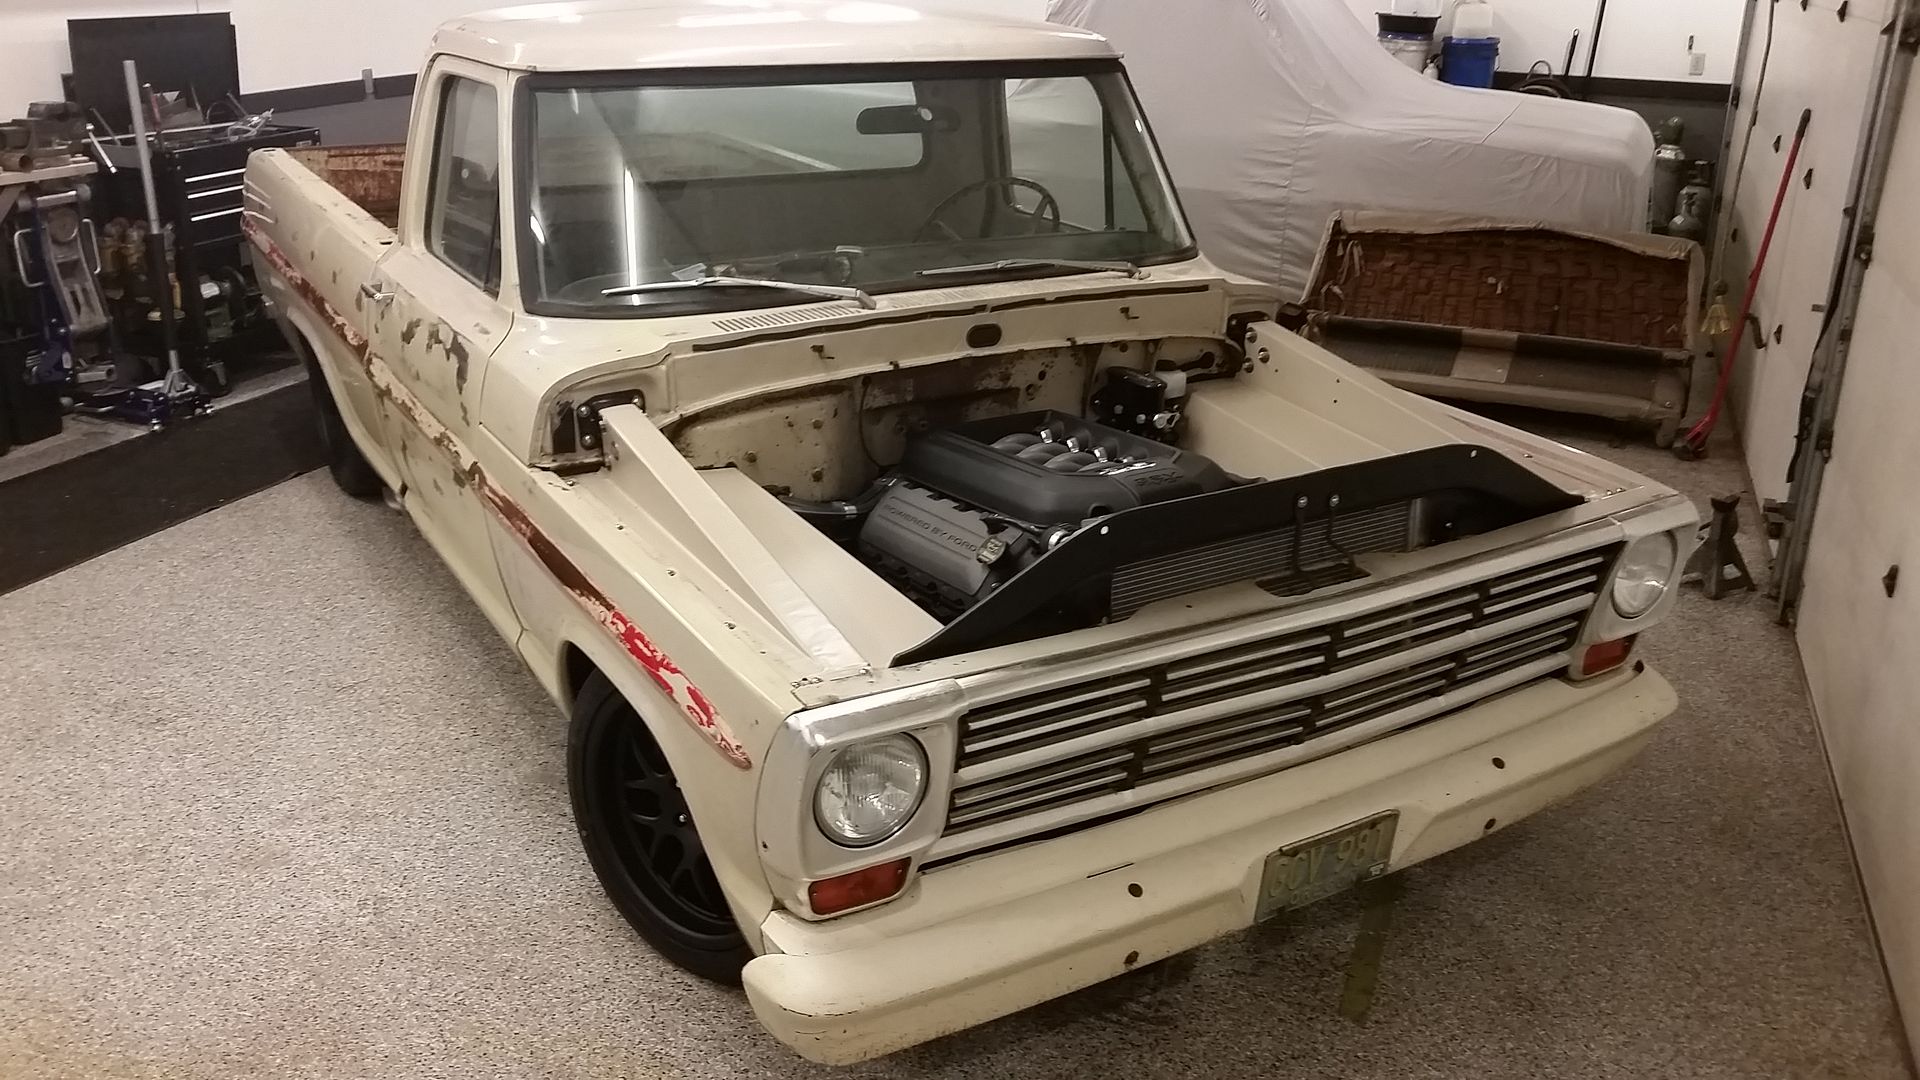
=)
Hope to pick up some steel tomorrow so I can build the seat brackets.
Sean
- redlinemotorsportts
- New Member

- Posts: 24
- Joined: Sat Aug 09, 2014 10:34 pm
- Location: Fingerlakes, NY
Re: Hackster's F100 #2 CV Swap 6 speed manual and Coyote
Looks amazing man, great hard work and dedication gets you good results 
Good motivation for me just reading it, makes me wanna work on my own junk.
Good motivation for me just reading it, makes me wanna work on my own junk.
'71 f100, 4.6 dohc, cab off, cv swap, IRS, and broke.
-
tripped38
- New Member

- Posts: 11
- Joined: Mon Jun 29, 2015 11:58 am
Re: Hackster's F100 #2 CV Swap 6 speed manual and Coyote
It looks so good. Thank you for documenting this build so well.
-
hackster
- Preferred User

- Posts: 317
- Joined: Fri Oct 18, 2013 11:21 am
Re: Hackster's F100 #2 CV Swap 6 speed manual and Coyote
And that is a good thing!! Appreciate the comments too....now go get to work.redlinemotorsportts wrote:Looks amazing man, great hard work and dedication gets you good results
Good motivation for me just reading it, makes me wanna work on my own junk.
My Pleasure my friend. Thank you for the compliments.tripped38 wrote:It looks so good. Thank you for documenting this build so well.
Only a little time tonight to work on the truck, had to go to a WInterhawks game with the wife.
Managed to pull these out of the bin and get some polish out and see if they would clean up. They polished out like new. I was pretty suprised.
Old on the left, polished up on the right.
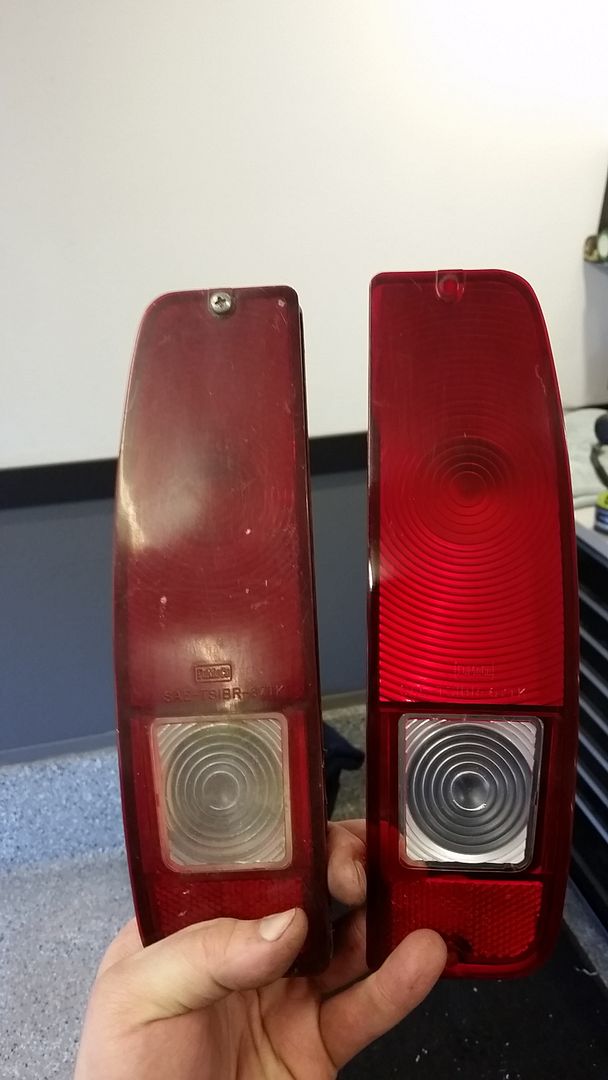
Also spent a little more time cleaning up the license plate from the 68 I parted out. I hope that the DMV will let me keep them on the truck.
Little hammer and dolly work on the license plate and cleaned it up really good and shot it with a coat of clear. Also got it on.
Rear of the truck looks cool...At this point, I have no plans to run a rear bumper.
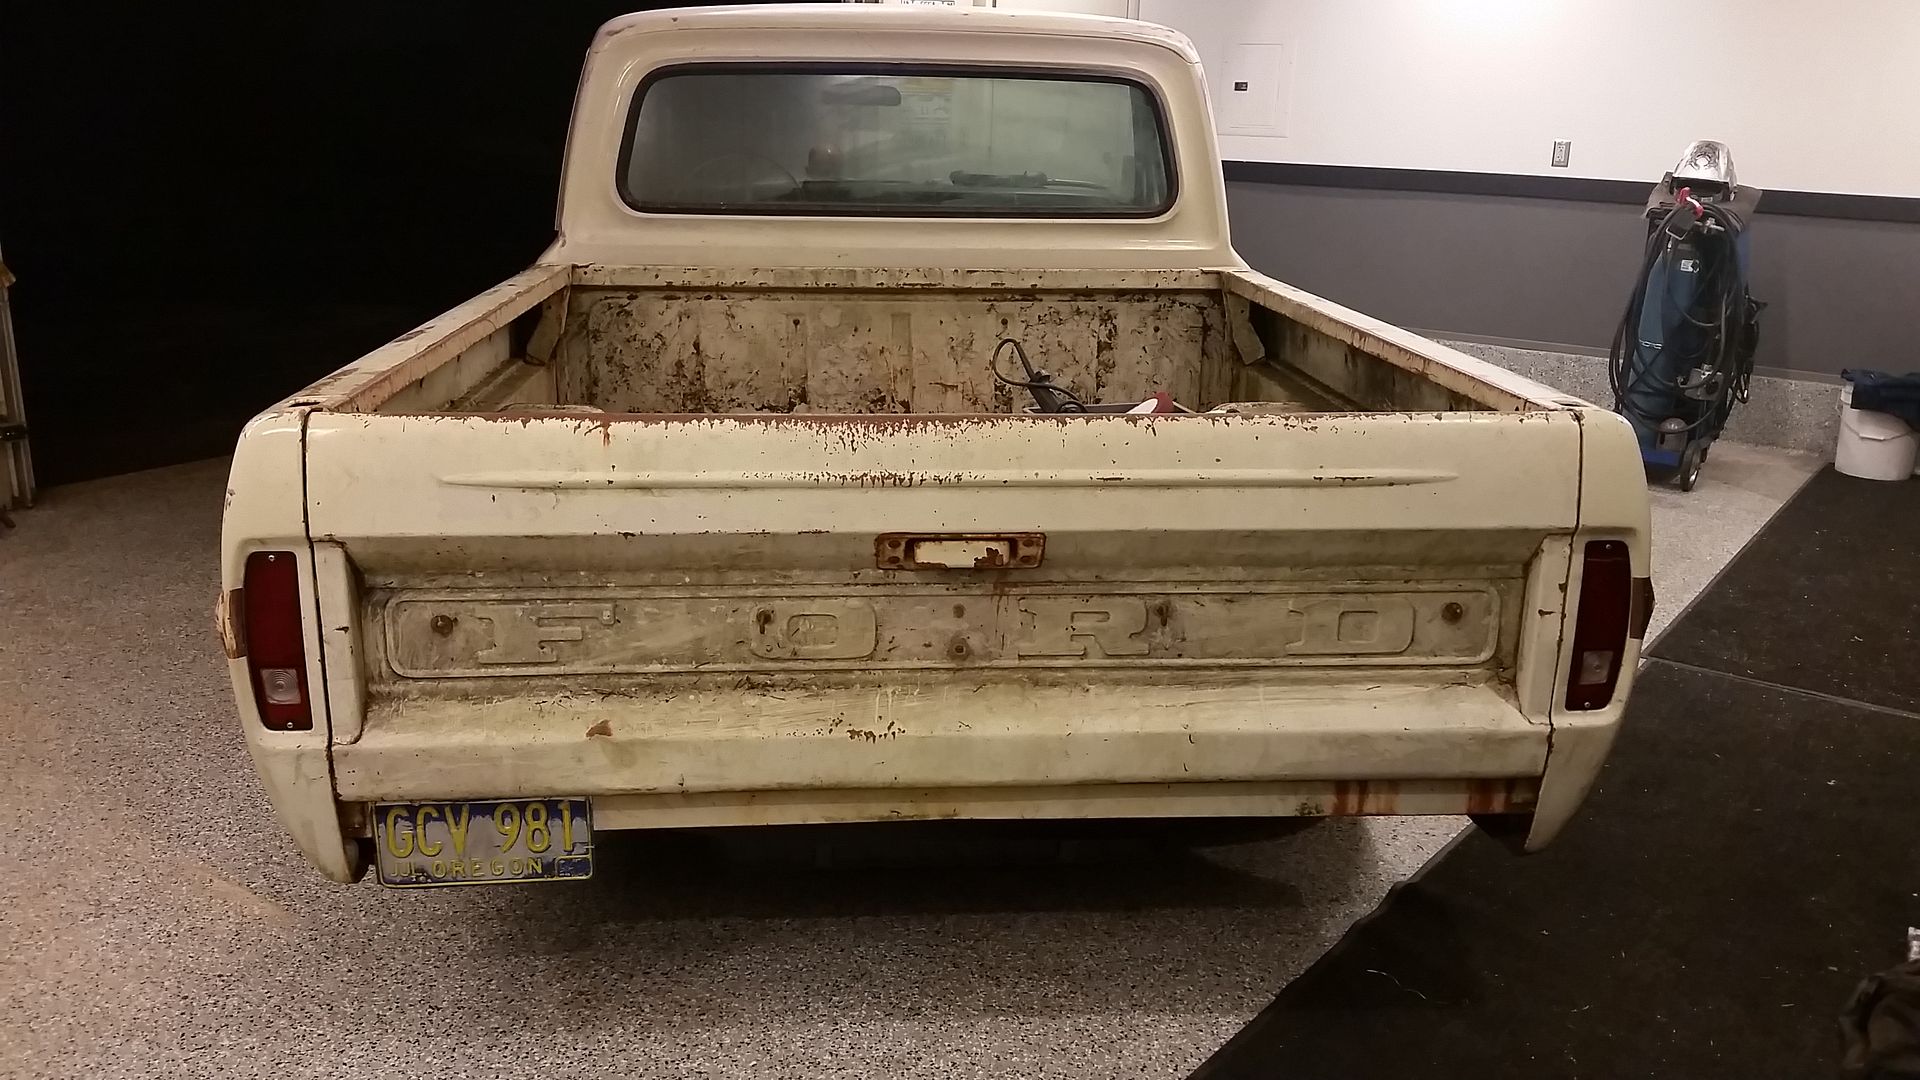
Also go the shifter adapter and lift kit built, welded up and bolted on. It has a little angle back and to the driver, forgot to snap a pic.
I was able to find some diagrams for the seat bracket and plotted them out at work actual size and printed out and picked up some steel.
1 of the seat foams showed up today, next week should be a barrage of parts. Seat foams, carpet and inner door handles, seat sliders, bolts and hardware, second seat foam and shorter front shocks....its go time fellas.
Damn near ready to take it for a trip to get some fuel for reals.
Sean
-
tripped38
- New Member

- Posts: 11
- Joined: Mon Jun 29, 2015 11:58 am
Re: Hackster's F100 #2 CV Swap 6 speed manual and Coyote
Keep up the great work! I'm always excited for updates!
-
hackster
- Preferred User

- Posts: 317
- Joined: Fri Oct 18, 2013 11:21 am
Re: Hackster's F100 #2 CV Swap 6 speed manual and Coyote
Thank you, I look forward to the updates as well =)
Well, today was interesting. Hands down the longest I have ever worked on a set of seat mounts in my life.
Not too sure everyone knows that they once made factory bucket seat mounts for these trucks but they were very, very rare and even more rare some 50 years later. I stumbled across someone that had taken the time to draw up the seat mounts in CAD and share them on one of the ford forums. I downloaded them at work and had one of our CAD guys print them out in actual size so I could use them as a template. (Thanks Eddie) Its one of the benefits of working in the HVAC Field =)
And here we go.
Started out with some 3/16" hot rolled plate. I sincerely believe these could be made with 1/8" and be plenty sturdy.
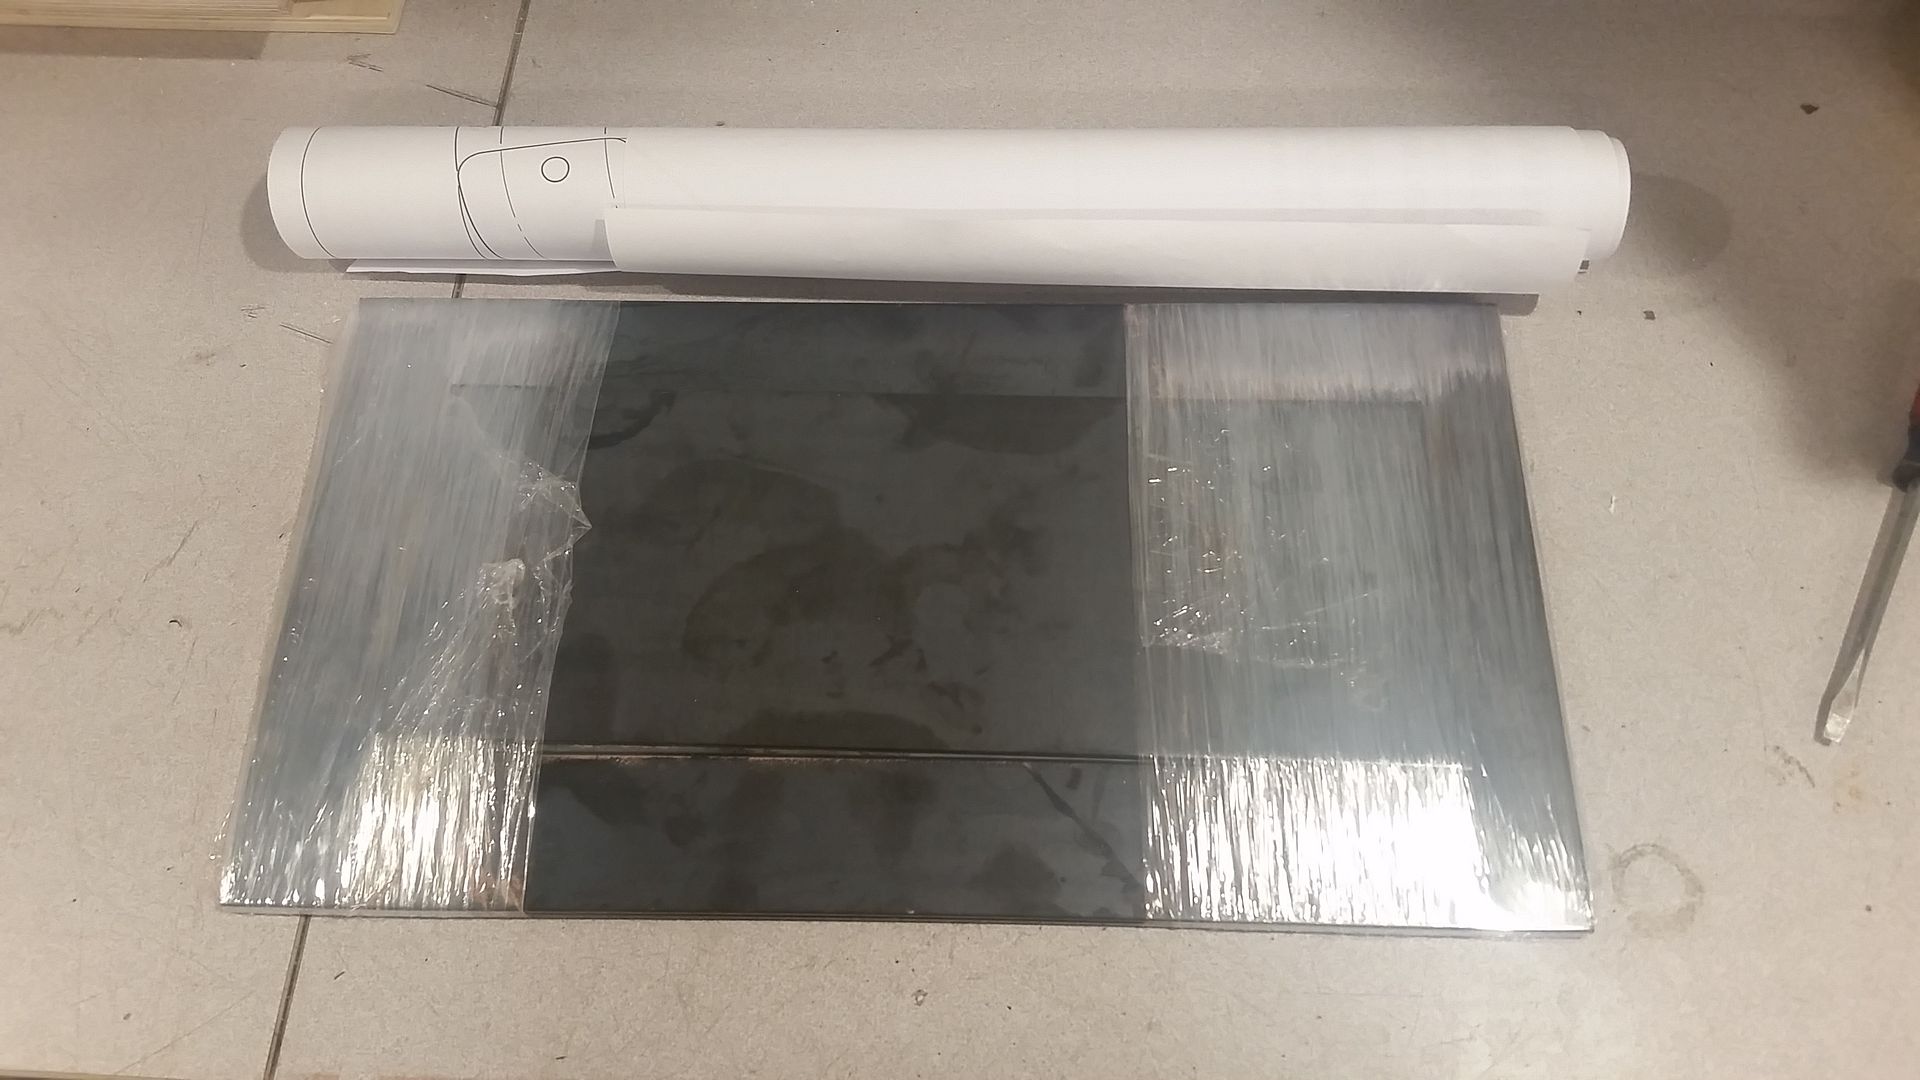
Laid out the template on the plate....I should mention here that I made a couple adjustments. As I am not running a fuel tank and am not necessarily a small person, in height and diameter I extended the brackets to the rear of the truck by about 3" and marked another set of holes in the brackets.
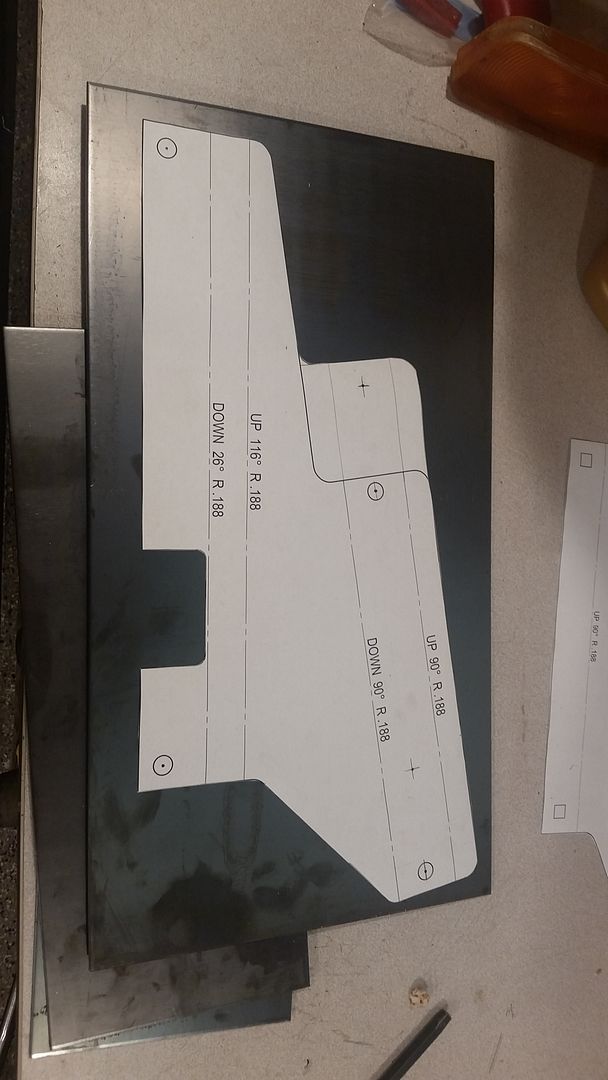
Got to work with the plasma, grinder and a flap disc and the drill press. I did a pilot hole, around 3/8 then the final 1/2" hole x 24 holes
Cut out and marked for holes. I also use a punch to mark the center of the holes before drilling.
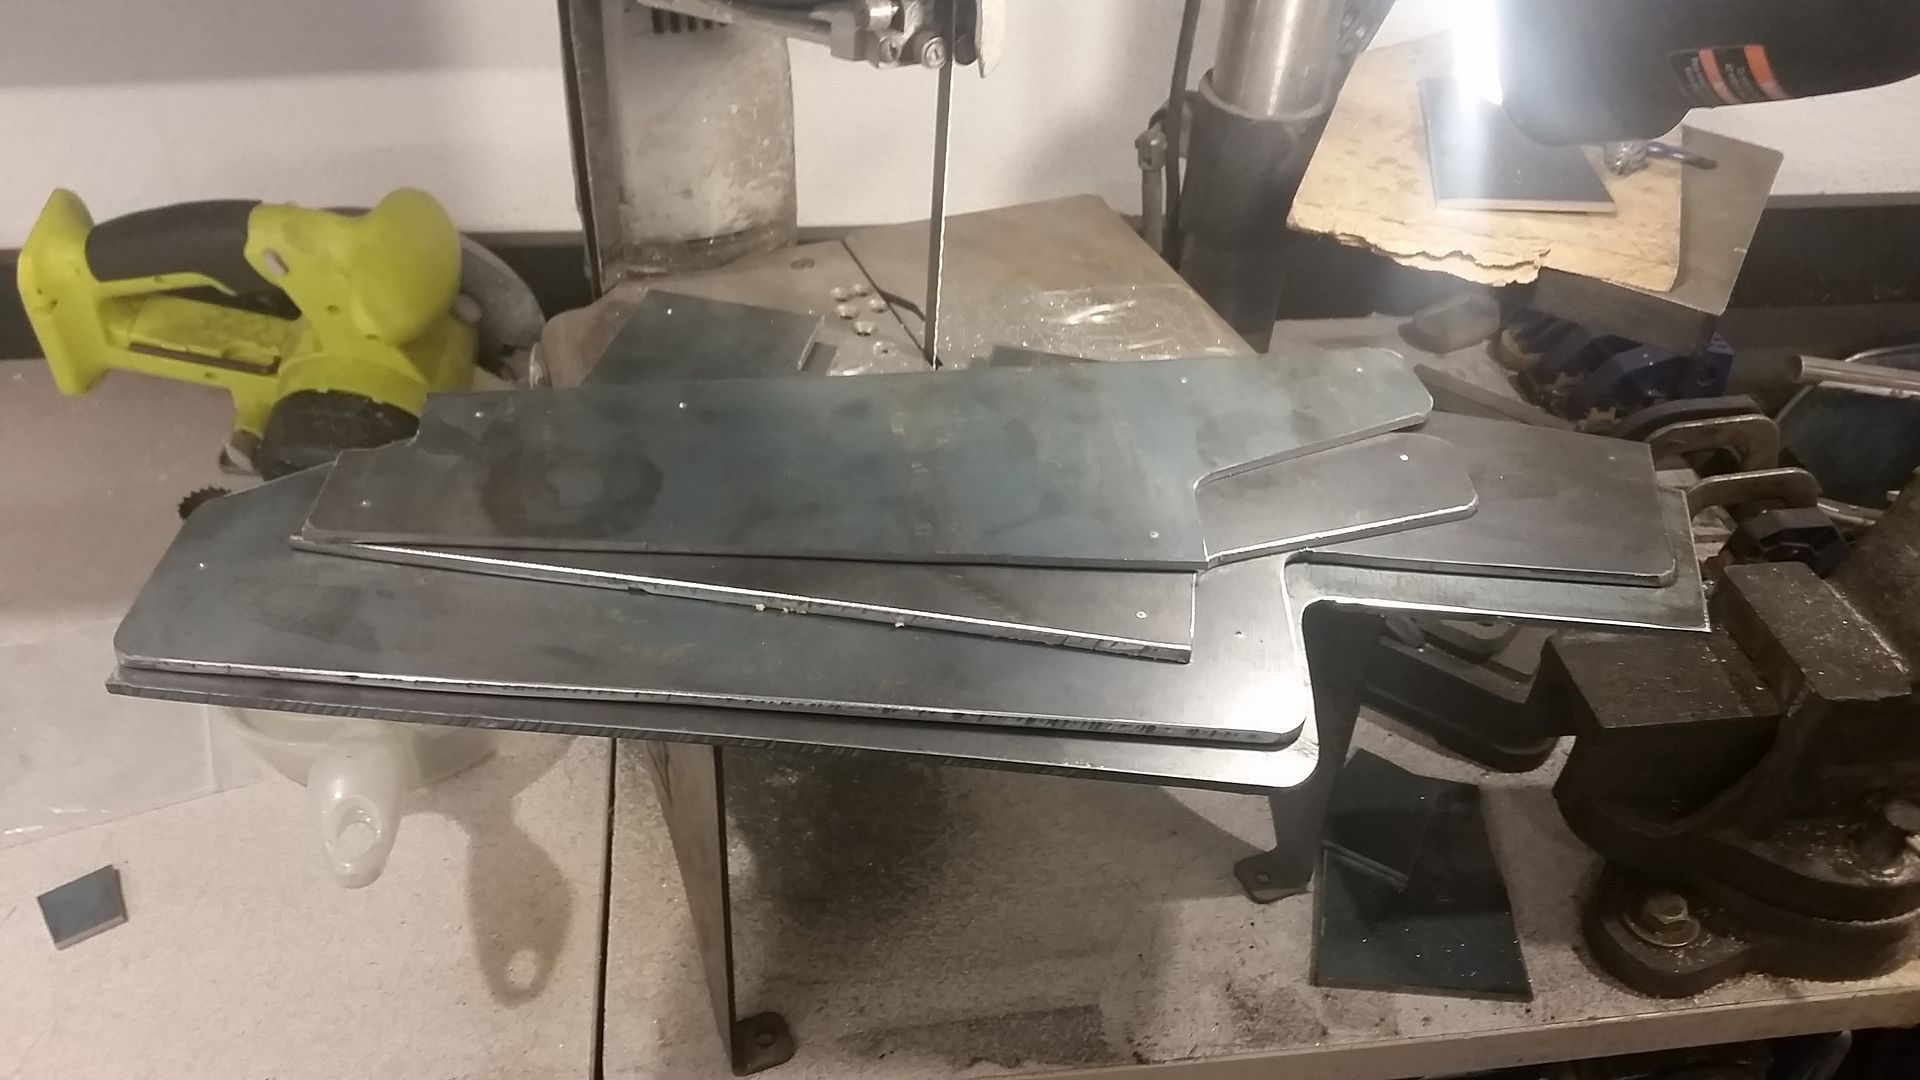
All drilled up and ready to mark them up and bend them the poor mans way
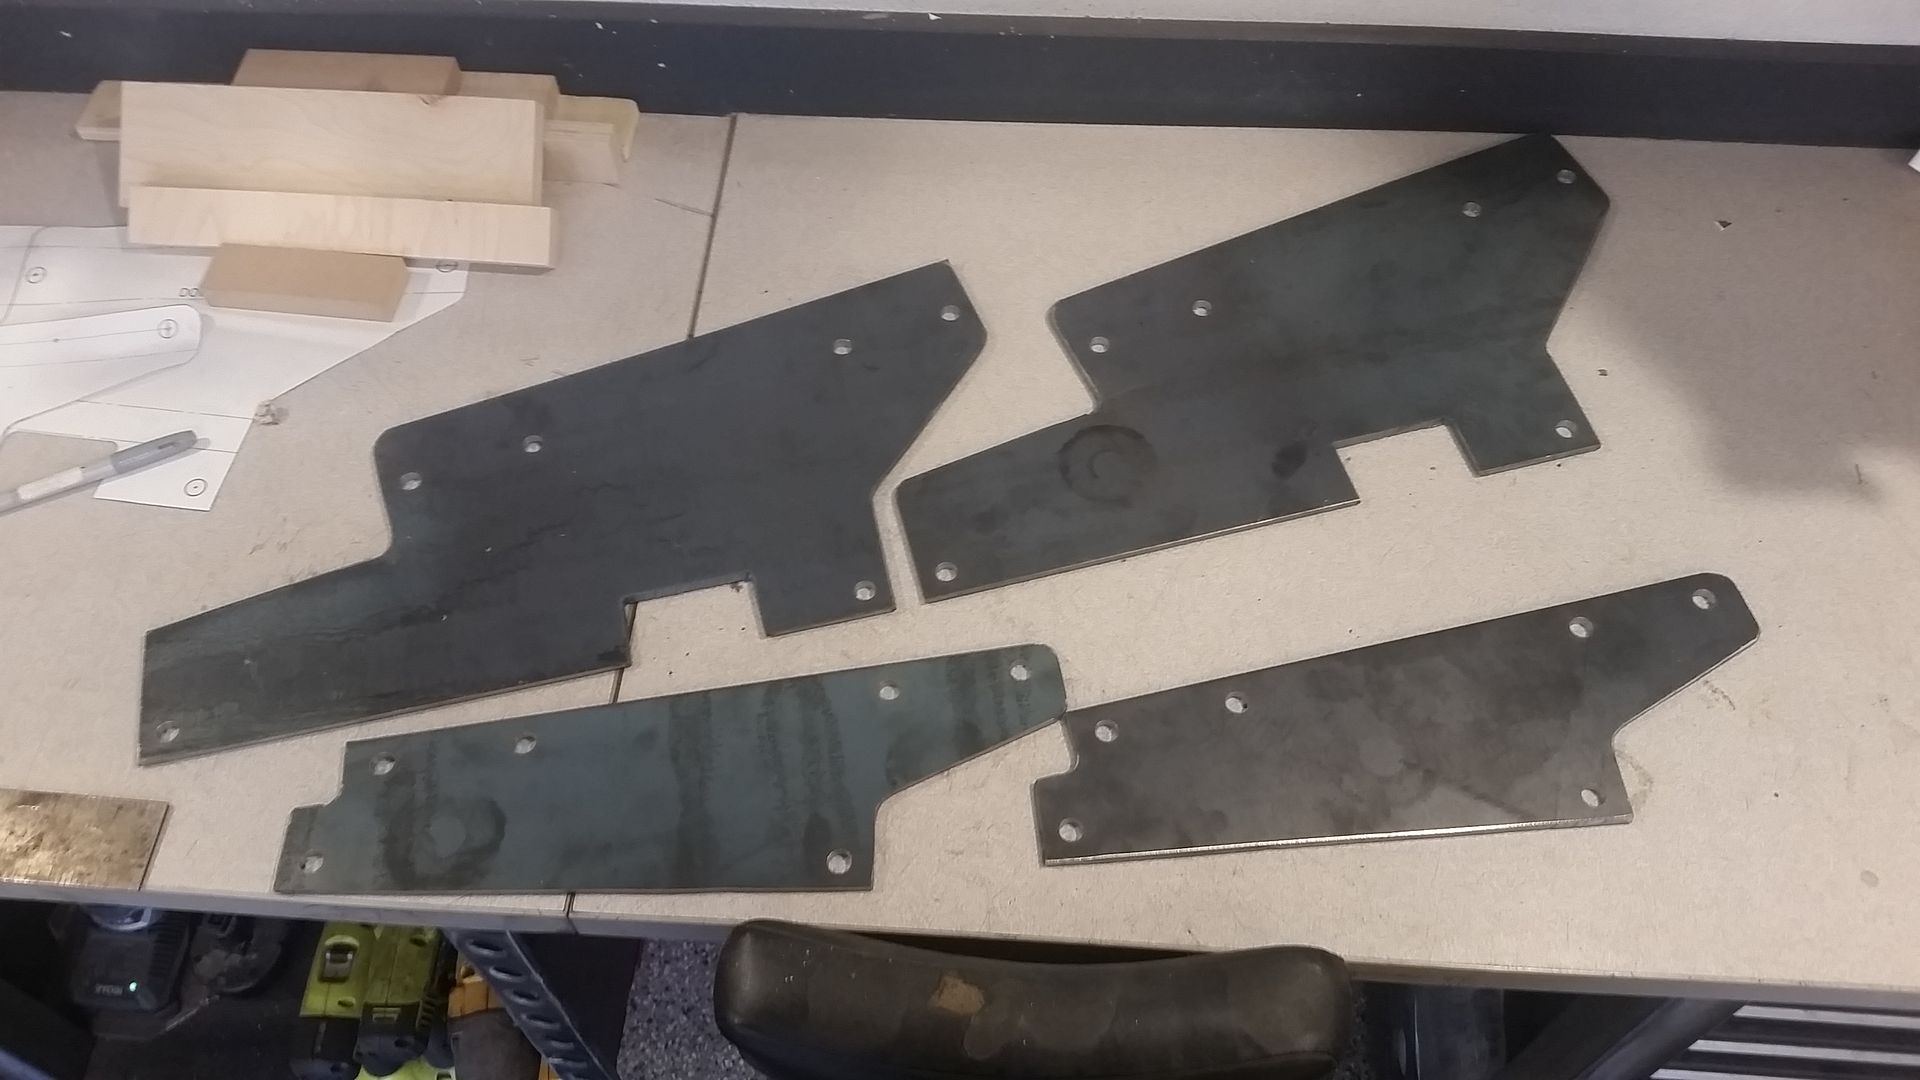
So.....I have no brake so I have to get a little more creative and its a lot more work this way but I get to the end and its a very strong good looking part. OEM, not exactly.
I marked out the lines to bend on.
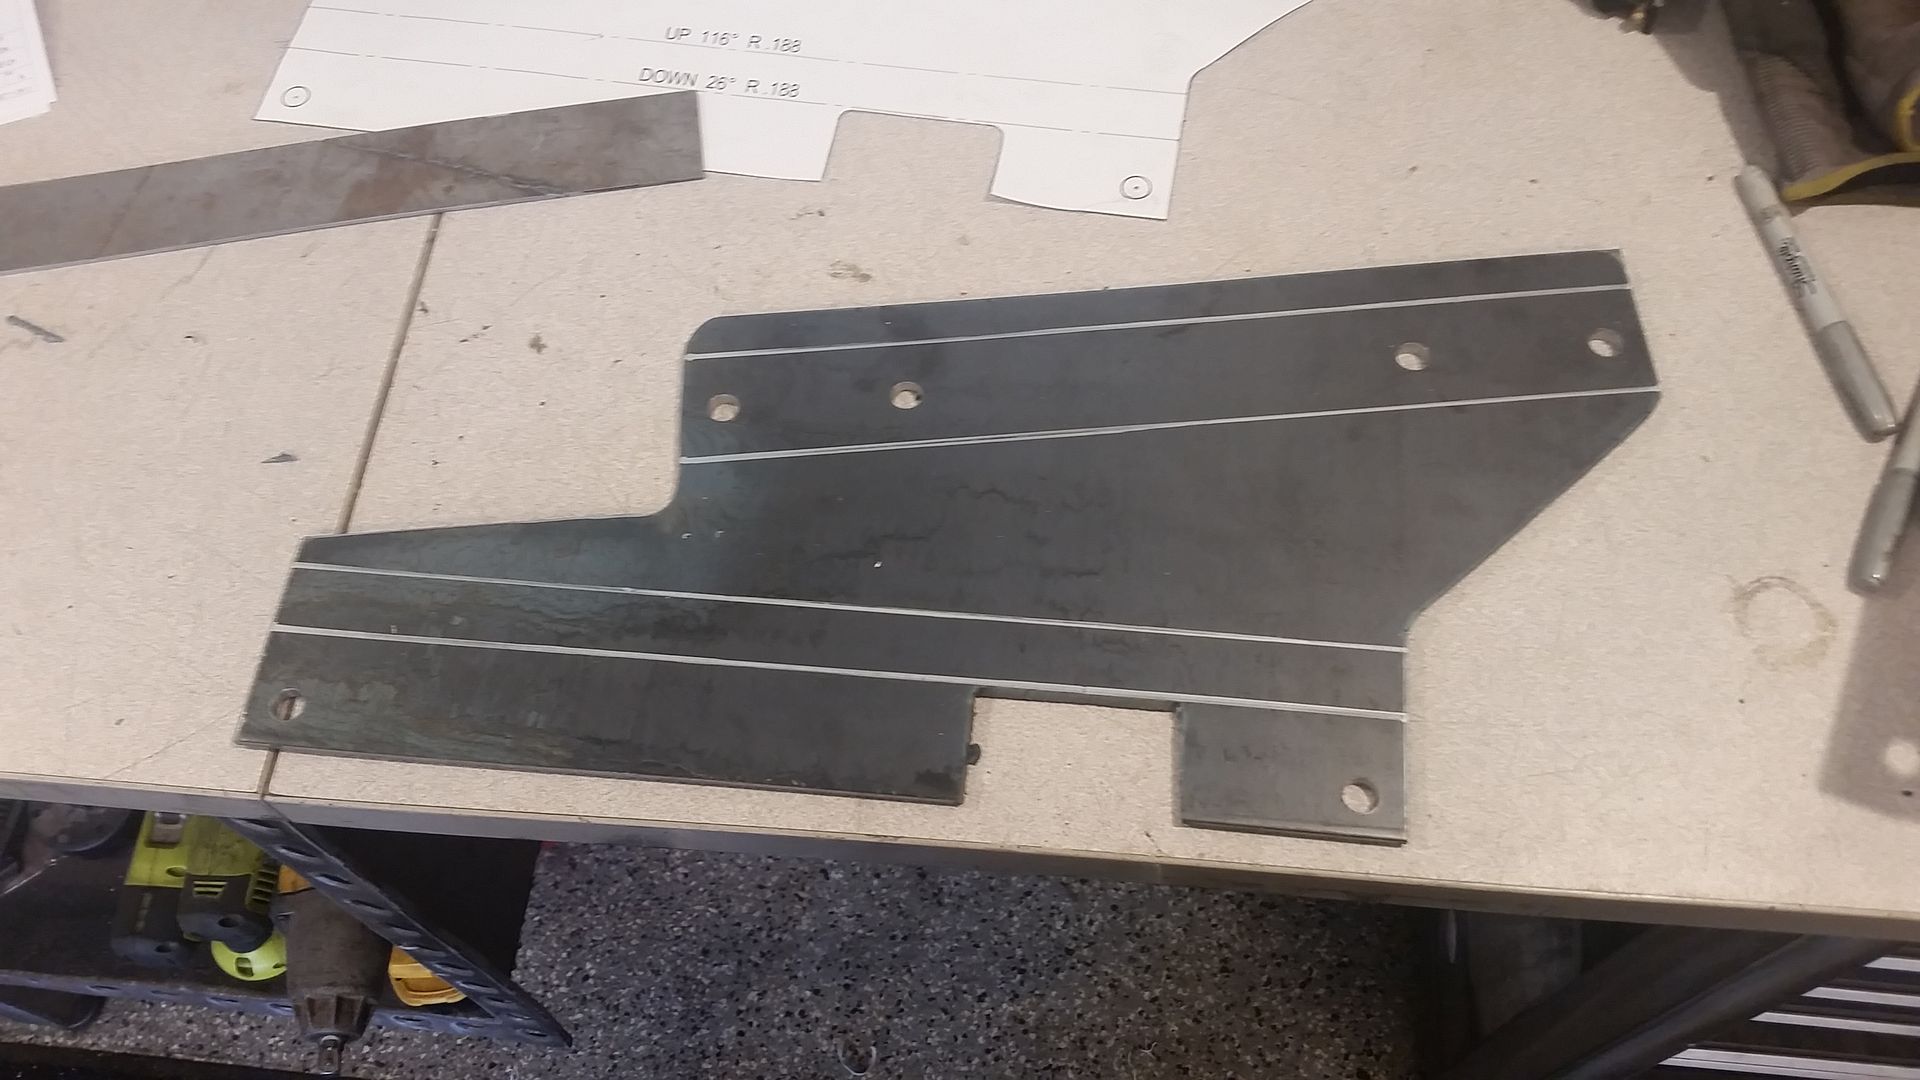
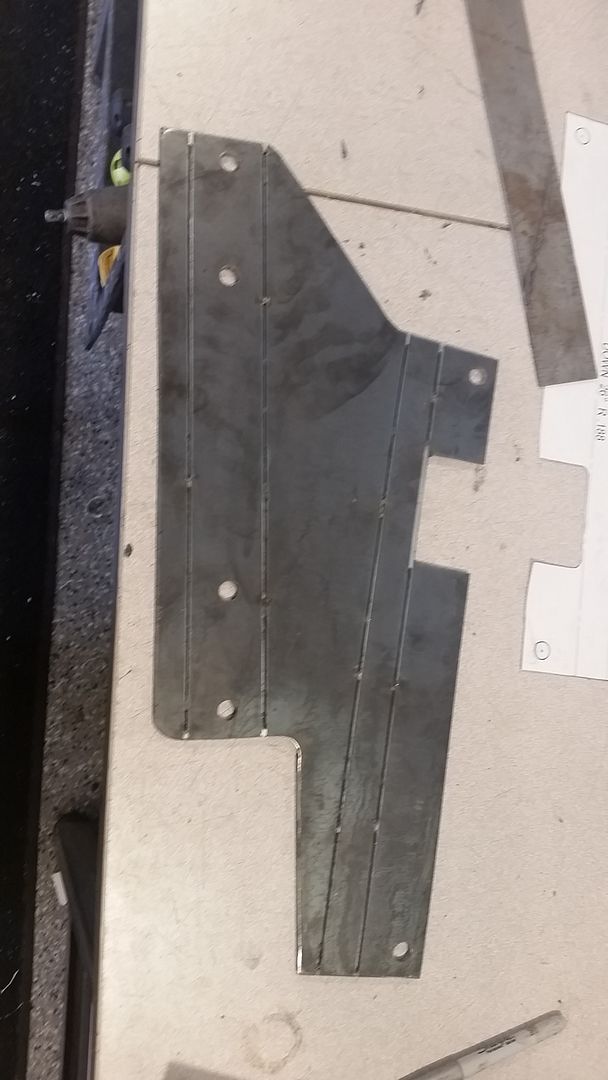
Then I use the plasma to cut the lines. I leave about 3/8" of uncut material at the end and about every three or four inches I skip a 1/4" section to keep the piece together allowing me to bend it but keep the part in one piece.
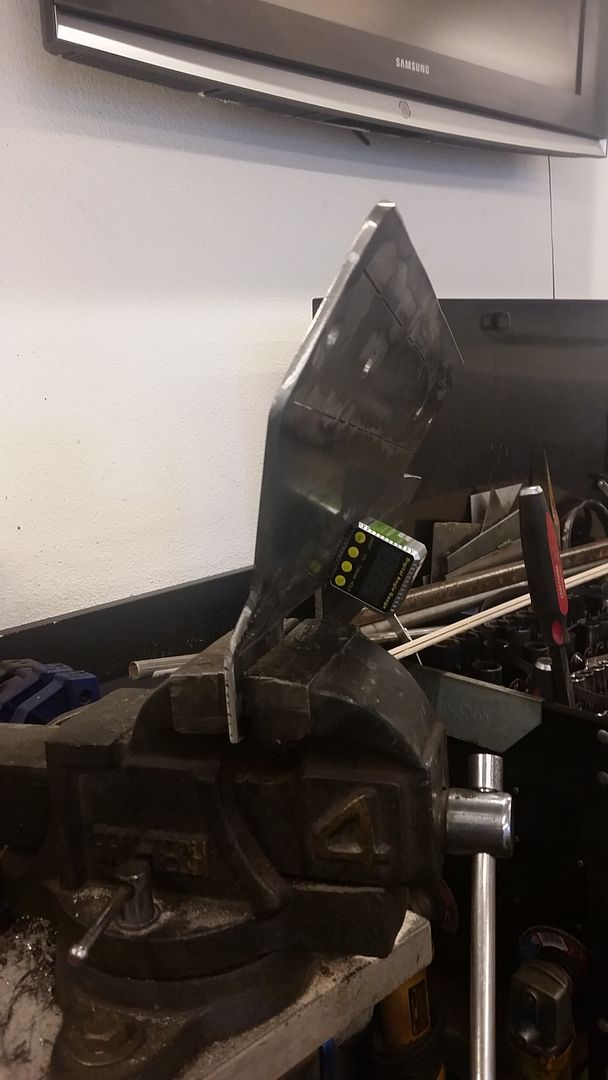
This is how I do my bends. This is a digital angle guage from Harbor Freight. It allows me to get dead on angles on my bends. I think this one was 26 degrees. I bent it to 26.2 degrees and can duplicate that over and over this way.
I wont bore you with the other bends.....and I did not take any photos of them either.
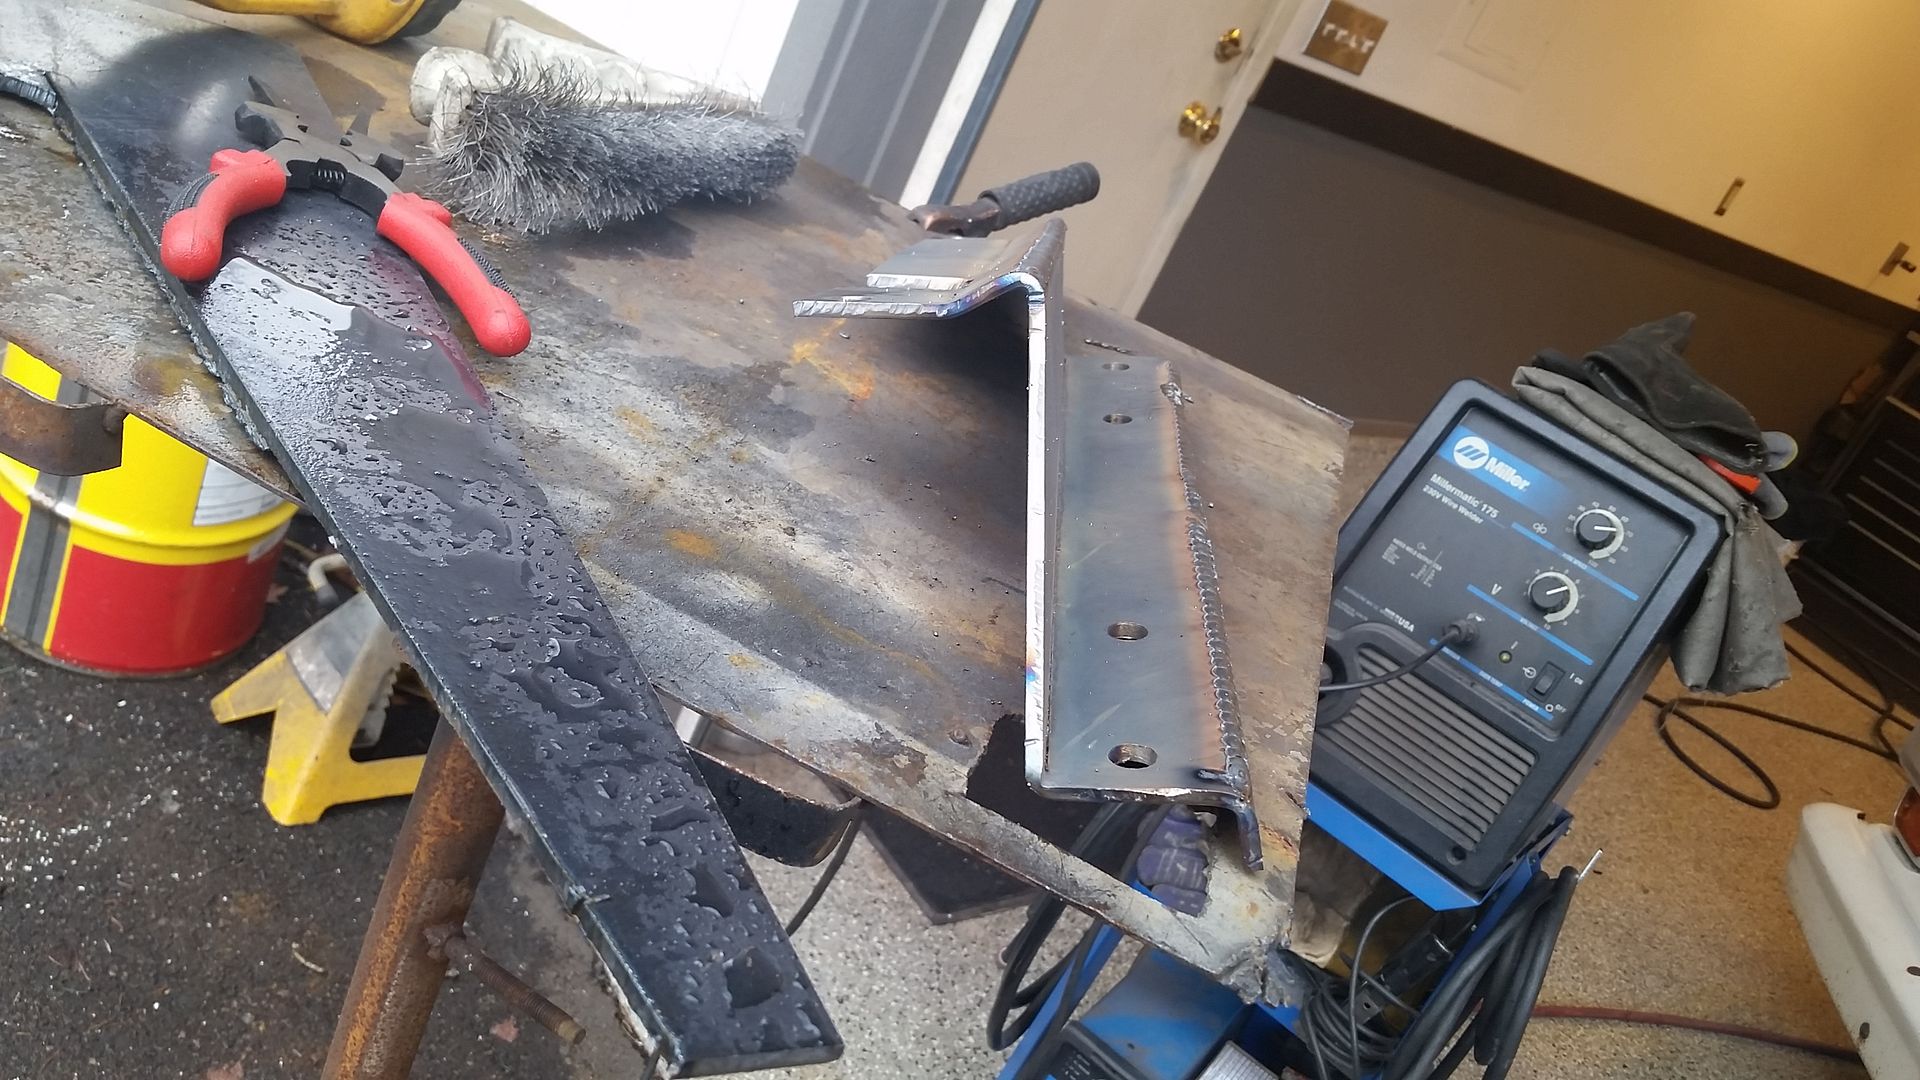
Here are the 4 brackets bent up and ready to weld. I know bending is the preferred way but this is doable at home and should be no issue with strength for seat brackets.
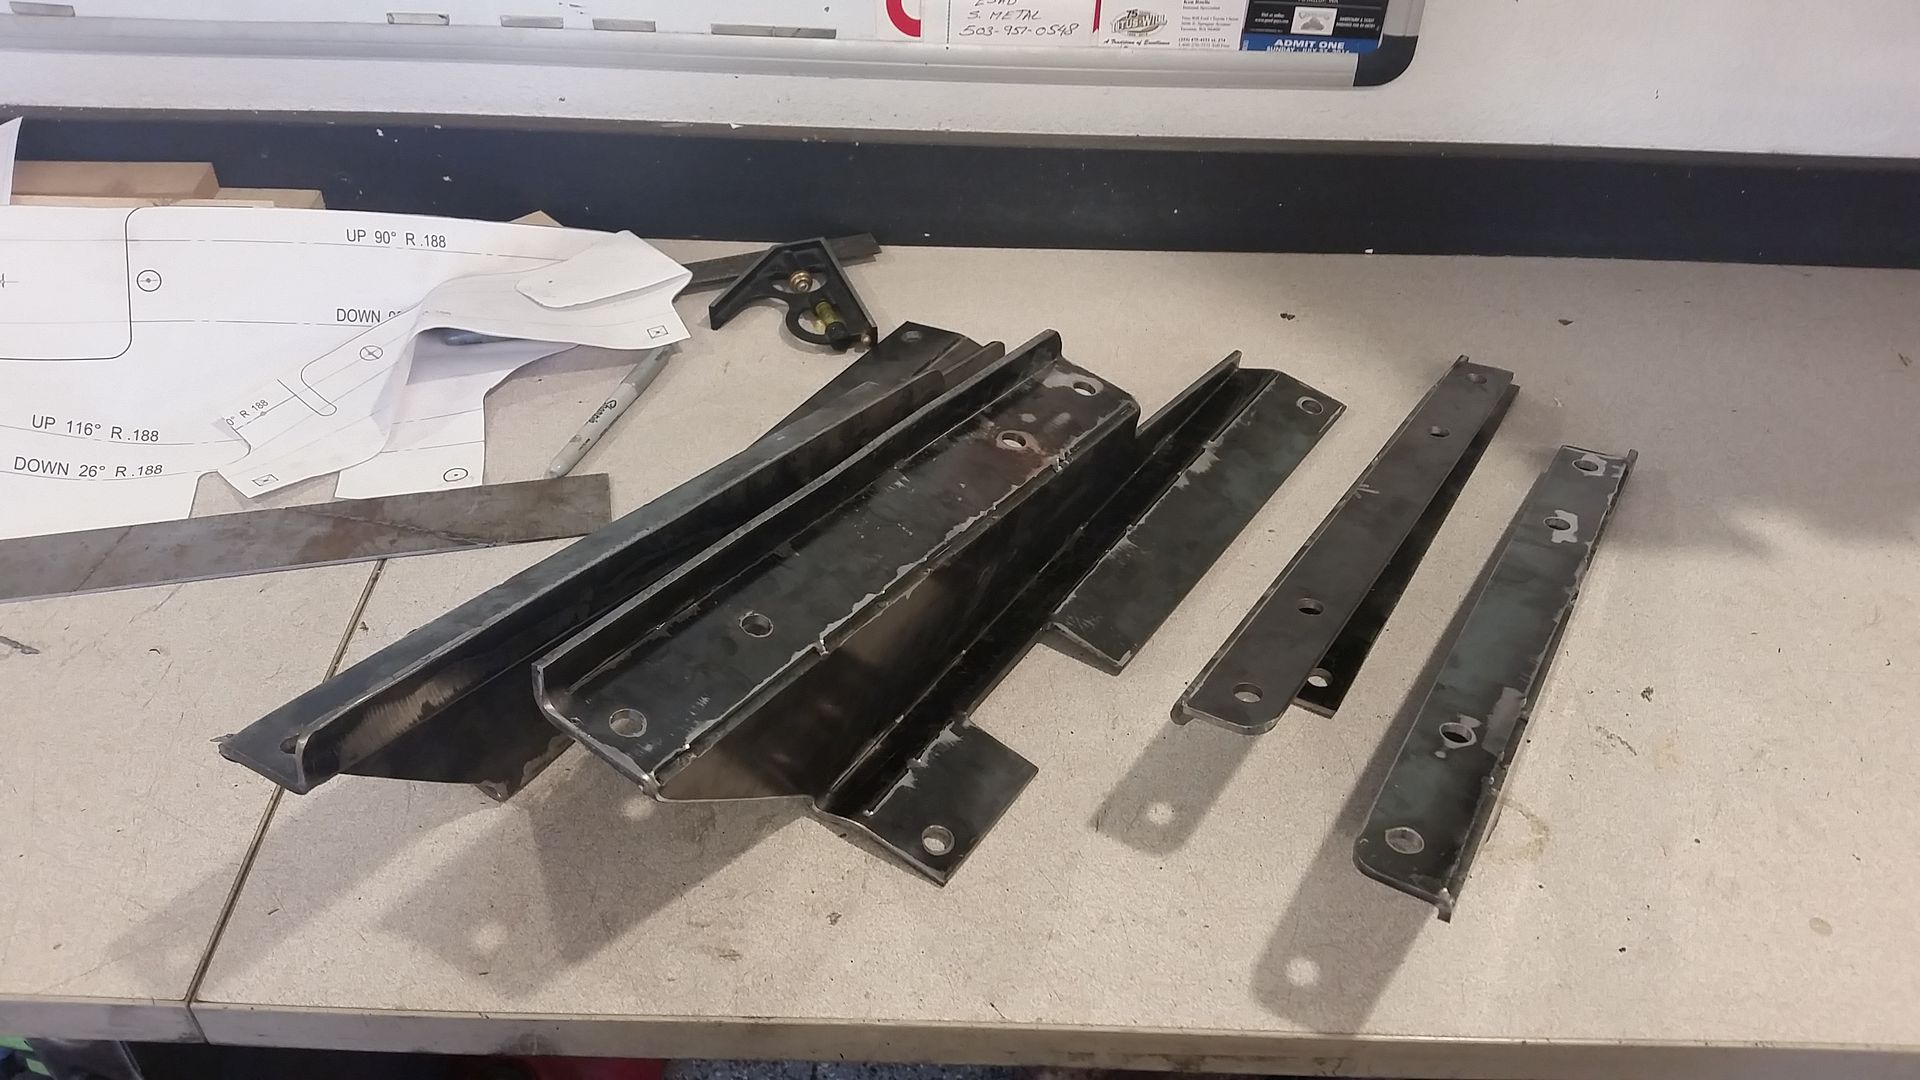
I went to work with the welder, turned the heat up a little bit and had 2 good setbacks. I forgot I had put Stainless wire, so I had to swap back to normal wire, then grabbed the hood and found it with dead batteries. So a quick trip for a rockstar, and some batteries for the hood. New lenses and batteries are good for the vision.
Now onto the weld.
You can see that there is some compound angles going on here.
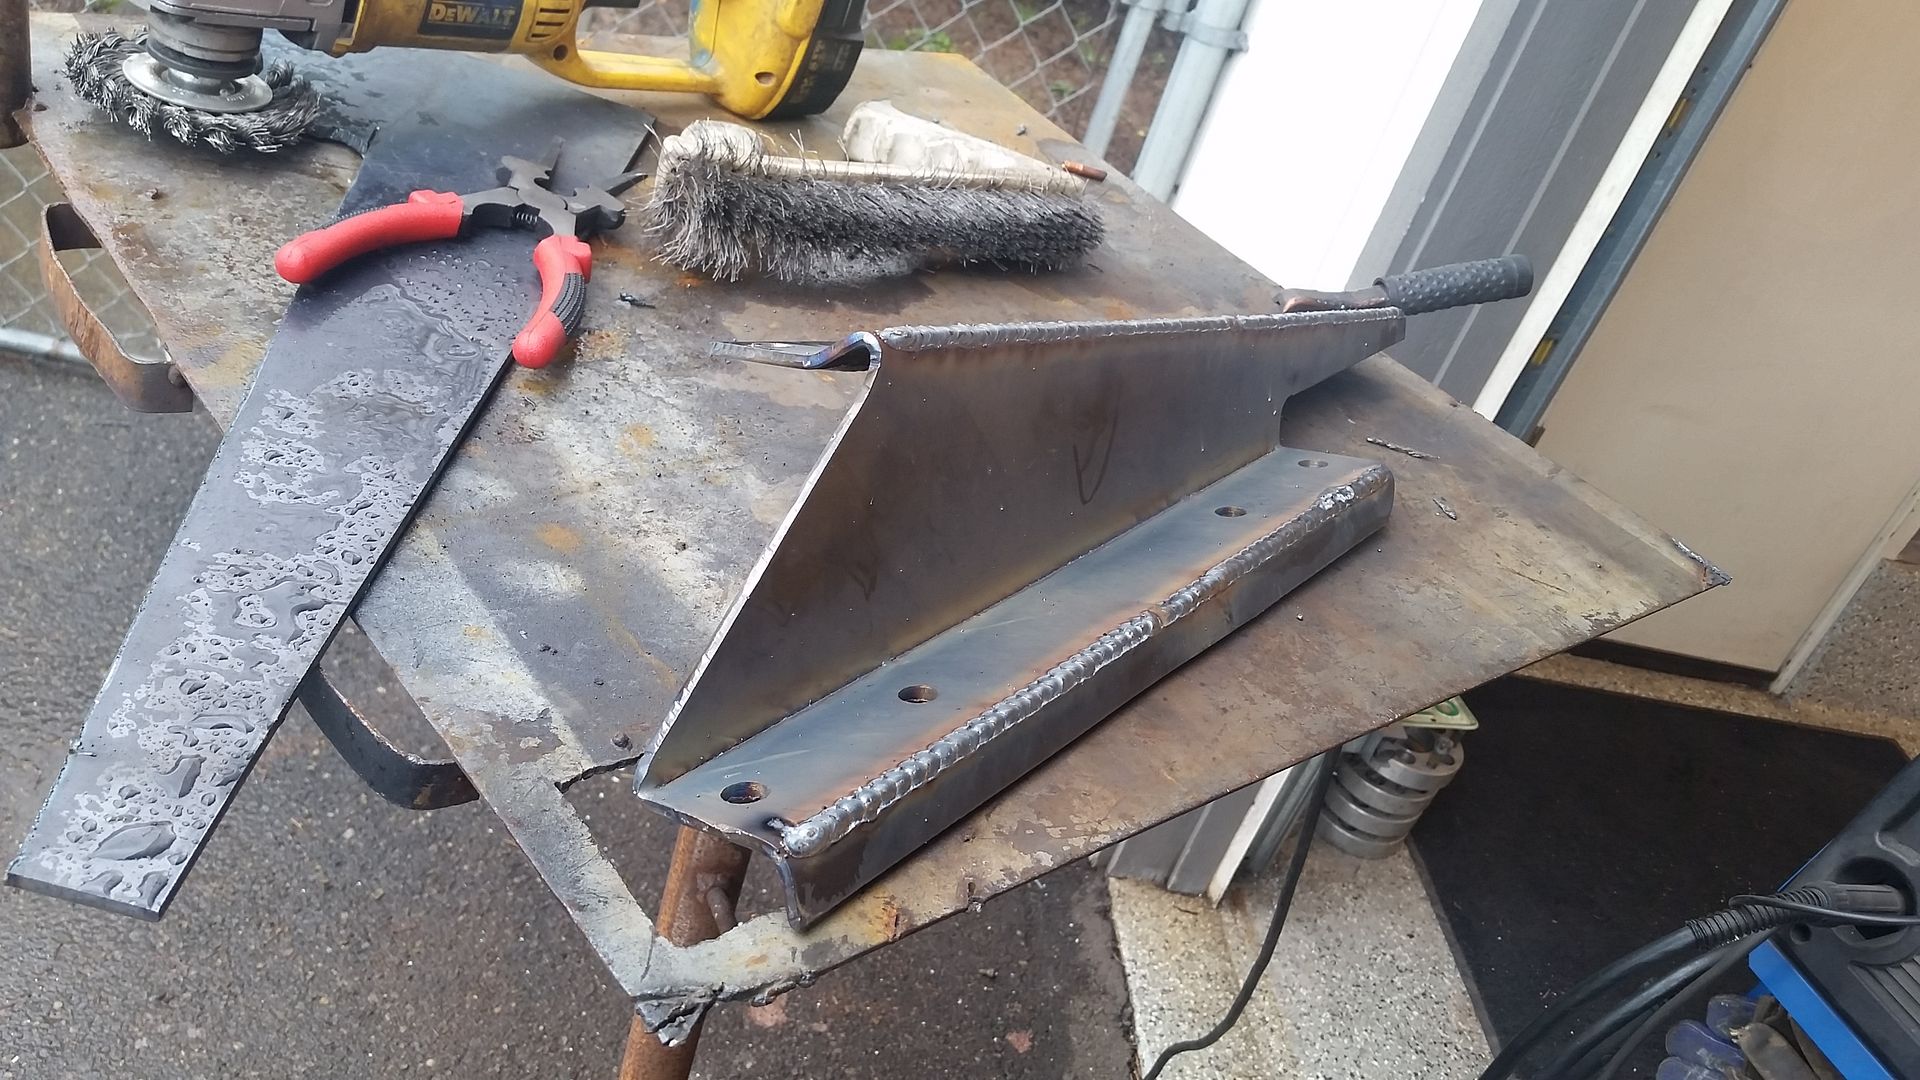
And there we have it, bucket seat brackets for your bumpside in about a half a day's work.
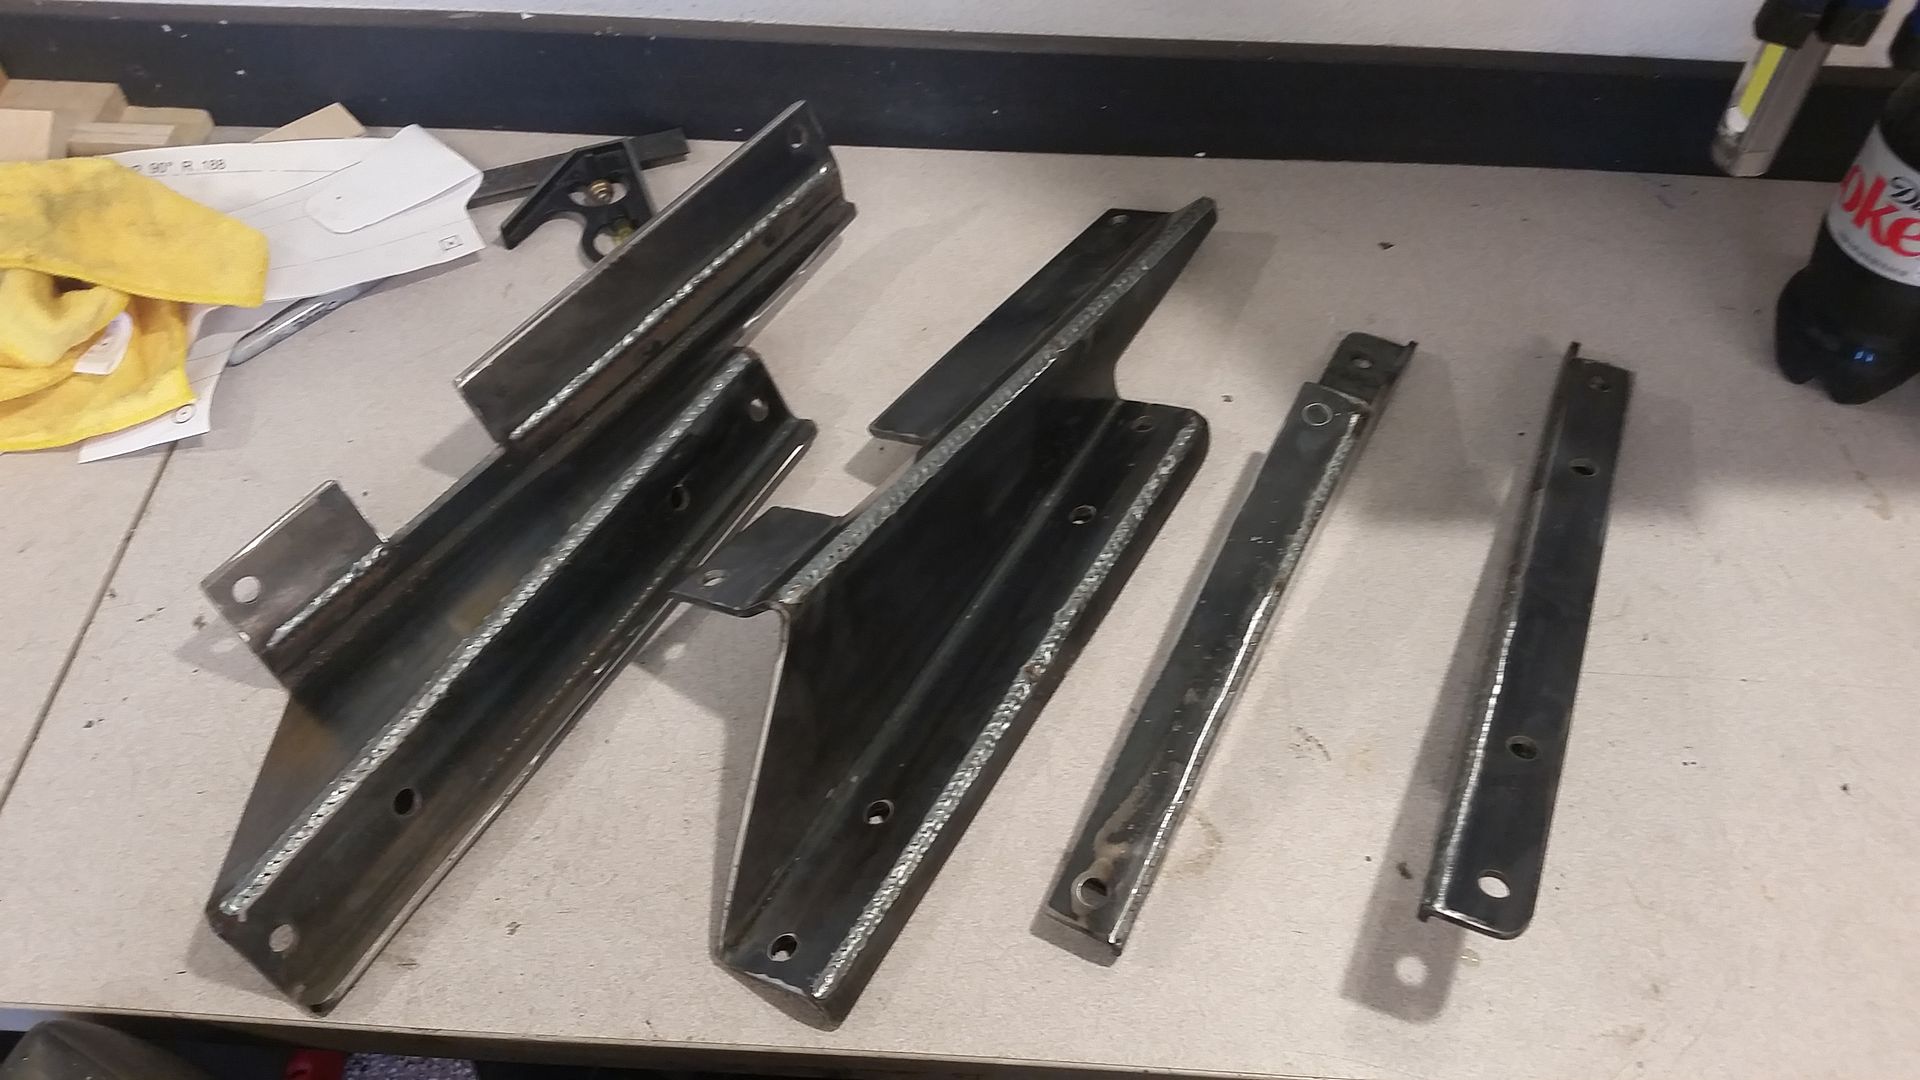
I am super happy with how they came out, they were a lot of work and I am very, very glad to have found the drawings.
My neighbor also found a weak link in my brake heim joint (These were not final tight yet) but I was not happy with this setup so I rebuilt it with WAAAAY more better stuff.
3/8-24 stud cut down and lick tighted into a female heim joint then into the coupler with a jam nut on both sides and burried together. There is no chance of a failure now.
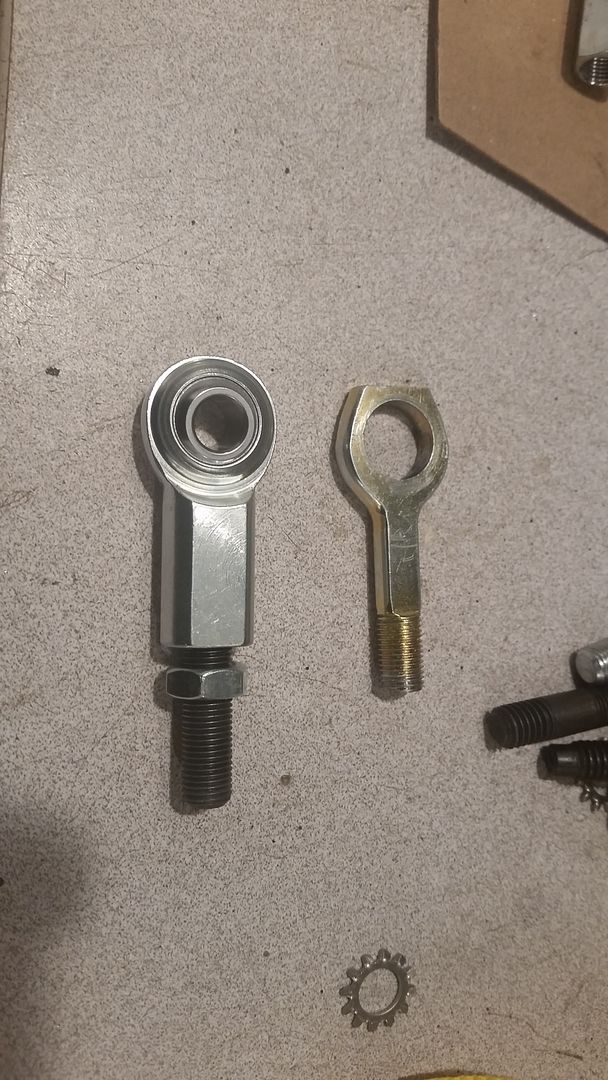
Much better now.
Also got my cupholders.
Well, today was interesting. Hands down the longest I have ever worked on a set of seat mounts in my life.
Not too sure everyone knows that they once made factory bucket seat mounts for these trucks but they were very, very rare and even more rare some 50 years later. I stumbled across someone that had taken the time to draw up the seat mounts in CAD and share them on one of the ford forums. I downloaded them at work and had one of our CAD guys print them out in actual size so I could use them as a template. (Thanks Eddie) Its one of the benefits of working in the HVAC Field =)
And here we go.
Started out with some 3/16" hot rolled plate. I sincerely believe these could be made with 1/8" and be plenty sturdy.

Laid out the template on the plate....I should mention here that I made a couple adjustments. As I am not running a fuel tank and am not necessarily a small person, in height and diameter I extended the brackets to the rear of the truck by about 3" and marked another set of holes in the brackets.

Got to work with the plasma, grinder and a flap disc and the drill press. I did a pilot hole, around 3/8 then the final 1/2" hole x 24 holes
Cut out and marked for holes. I also use a punch to mark the center of the holes before drilling.

All drilled up and ready to mark them up and bend them the poor mans way

So.....I have no brake so I have to get a little more creative and its a lot more work this way but I get to the end and its a very strong good looking part. OEM, not exactly.
I marked out the lines to bend on.

Then I use the plasma to cut the lines. I leave about 3/8" of uncut material at the end and about every three or four inches I skip a 1/4" section to keep the piece together allowing me to bend it but keep the part in one piece.

This is how I do my bends. This is a digital angle guage from Harbor Freight. It allows me to get dead on angles on my bends. I think this one was 26 degrees. I bent it to 26.2 degrees and can duplicate that over and over this way.

I wont bore you with the other bends.....and I did not take any photos of them either.
Here are the 4 brackets bent up and ready to weld. I know bending is the preferred way but this is doable at home and should be no issue with strength for seat brackets.

I went to work with the welder, turned the heat up a little bit and had 2 good setbacks. I forgot I had put Stainless wire, so I had to swap back to normal wire, then grabbed the hood and found it with dead batteries. So a quick trip for a rockstar, and some batteries for the hood. New lenses and batteries are good for the vision.
Now onto the weld.
You can see that there is some compound angles going on here.


And there we have it, bucket seat brackets for your bumpside in about a half a day's work.

I am super happy with how they came out, they were a lot of work and I am very, very glad to have found the drawings.
My neighbor also found a weak link in my brake heim joint (These were not final tight yet) but I was not happy with this setup so I rebuilt it with WAAAAY more better stuff.
3/8-24 stud cut down and lick tighted into a female heim joint then into the coupler with a jam nut on both sides and burried together. There is no chance of a failure now.

Much better now.
Also got my cupholders.
-
michael9218
- New Member

- Posts: 35
- Joined: Tue Sep 29, 2015 8:07 pm
- Location: Woodstock, Ga
Re: Hackster's F100 #2 CV Swap 6 speed manual and Coyote
Nice work! Very creative on the brackets!
Care to share the CAD file?
Are these brackets for vintage Ford seats only? You have Mustang buckets IIRC.
Also, watched Performance TV episode covering PRI. A couple interesting products for fabricators:
High quality heim joints: rodendsupply.com
Wheel fitment jig (a little pricey, but cool): thewheelfit.com
-
Monkey-1
- New Member

- Posts: 52
- Joined: Mon Jan 06, 2014 10:29 pm
Re: Hackster's F100 #2 CV Swap 6 speed manual and Coyote
I just knew you had a metal brake after seeing the other pieces you made. I never thought of using my plasma like that, I normally just 'score' the bend lines with an angle grinder with a cutting blade. This will have to do until I can afford a Baileigh magnetic brake.
-Monkey-1
1985 F-150 Build Thread (CV Swap, 4.6, Frame-Off) https://www.ford-trucks.com/forums/1519 ... 4-6-a.html
1977 F-100 Flareside Build Thread (CV Swap, 4.6, Frame-Off) https://www.ford-trucks.com/forums/1545 ... hread.html
Studmonkeyracing.com
studmonkey@bellsouth.net
1985 F-150 Build Thread (CV Swap, 4.6, Frame-Off) https://www.ford-trucks.com/forums/1519 ... 4-6-a.html
1977 F-100 Flareside Build Thread (CV Swap, 4.6, Frame-Off) https://www.ford-trucks.com/forums/1545 ... hread.html
Studmonkeyracing.com
studmonkey@bellsouth.net