everything.Truck is shaping up and your makin me wish we didn't just get a foot of snow
1969 F250 4x4 Highboy 7/9 rubicon
Moderator: FORDification
-
67mann

- 100% FORDified!

- Posts: 1704
- Joined: Thu Feb 07, 2008 7:19 am
- Location: NY..Mt.Morris 3rdgen. homestead
re: a 14 yr olds 69 F100 Ranger project- BIG UPDATE: 3/9
everything.Truck is shaping up and your makin me wish we didn't just get a foot of snow
I've had enough and I'm not alone
http://s267.photobucket.com/albums/ii304/67mann/
http://s267.photobucket.com/albums/ii304/67mann/
-
1971fordsdad
- New Member

- Posts: 75
- Joined: Thu Nov 08, 2007 4:31 pm
- Location: California, Folsom
re: a 14 yr olds 69 F100 Ranger project- BIG UPDATE: 3/9
I am not afraid to rebuild the bottom end. It's just that the last time I rebuilt a motor for the heck of it, the bottom end (bearings, rings etc) all still looked new and I felt like i wasted my time and money. I would definitely like other opinions on this. Should I rebuild it just based on age? I planned on popping a few mains and checking out the bearings, same things with the rods. If they have no unusual wear on them, i will probably put it back together and find something else to spend Ryan's money on. Unless enough people here feel that we should rebuild it anyways.
-
1971ford

- 100% FORDified!
- Posts: 5565
- Joined: Wed Jul 04, 2007 1:05 pm
- Location: Placerville CA
-
AlleyCat

- Blue Oval Guru

- Posts: 1283
- Joined: Sat May 12, 2007 8:28 pm
- Location: Pennsylvania, Pittsburgh
re: a 14 yr olds 69 F100 Ranger project- BIG UPDATE: 3/9
Just my  but I think with the amount of work that Ryan is putting into this truck it would be a good idea to rebuild the lower end.I've seen comparable gas engines that were barely broken in at 63k and others that were worn out at the same mileage.A lot of it has to do with what it was used for, how it was used and the maintence it recieved.Short trips allow a lot of sludge and contaminants to build up in the oil.One of the worst is sulphuric acid which eats the dickens out of babbit.Babbit is the top layer of metal on insert bearings.Bearings are also known to spall or flake with age.
You might pull it down to find a good cleaning along with rings and bearings is all that's needed.You might also pull it down and find something like a cracked ring land or pitted cam lobe.
Again just my 
You might pull it down to find a good cleaning along with rings and bearings is all that's needed.You might also pull it down and find something like a cracked ring land or pitted cam lobe.
Again just my
Clay
72 F100 4x2 Custom,289, C4 " Slow Ride "
70 F250 4x2 Ranger XLT , 360, C6 "B52 - IV"
96 F150 4x2 XL, 300, E4OD, daily driver
" Professional Wrecker Operators - We Pull for America "
72 F100 4x2 Custom,289, C4 " Slow Ride "
70 F250 4x2 Ranger XLT , 360, C6 "B52 - IV"
96 F150 4x2 XL, 300, E4OD, daily driver
" Professional Wrecker Operators - We Pull for America "
-
1971ford
- 100% FORDified!
- Posts: 5565
- Joined: Wed Jul 04, 2007 1:05 pm
- Location: Placerville CA
thanks alleycat, good points 
well check it out and discuss it.
UPDATE :
:
not much, but heres what i did:
-removed the rear window
-removed the driveshaft
-removed the spare tire
-marked holes and dash
-removed more small things off of firewall
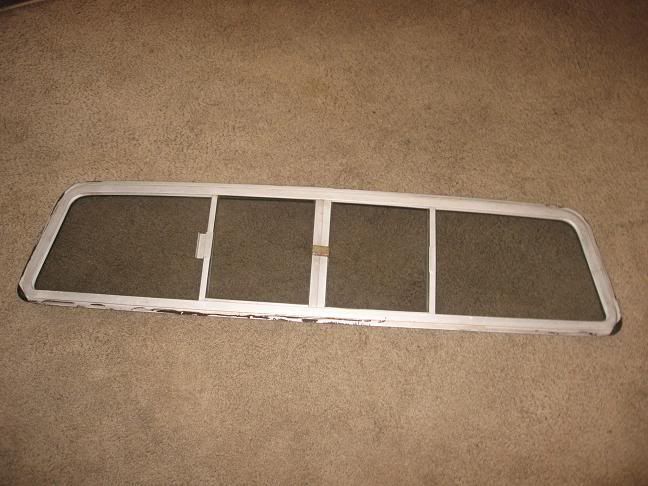
-got a rear slider from joshpow
PICTURES!!!!!!!!!!!!!!
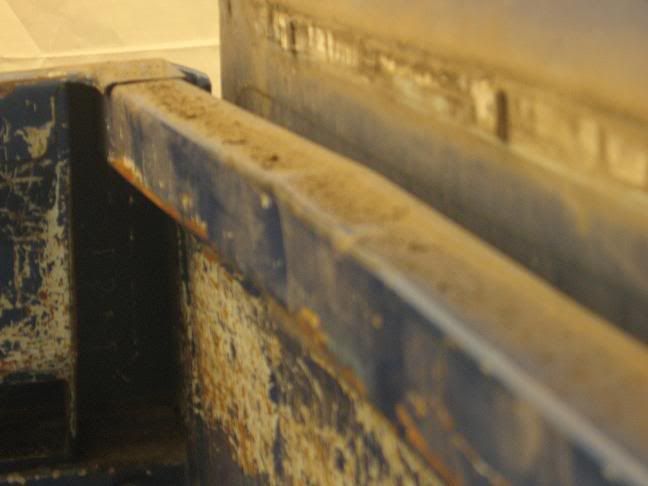
i am so glad there is no rust in this part of the world! just to show... (that is dried mud, not even rust
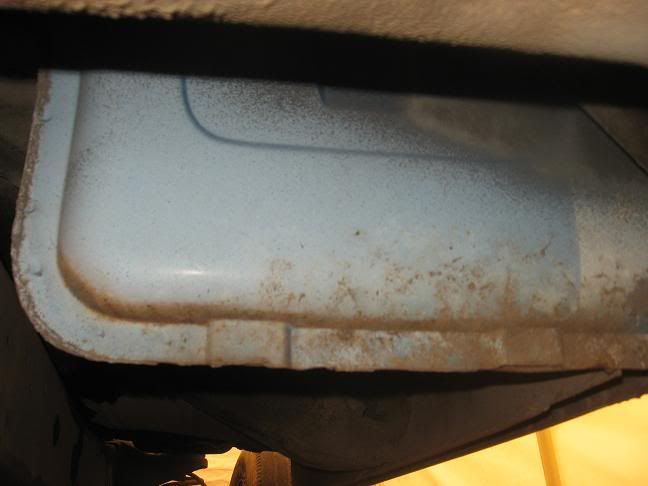
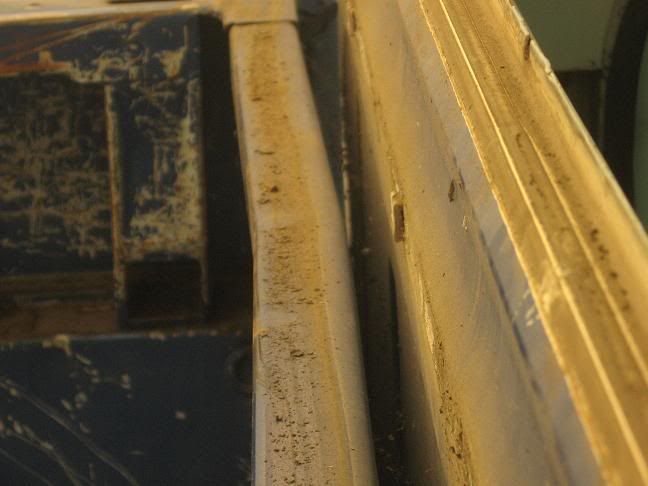
undercoating that ill be grinding off and applying POR-15 eventually
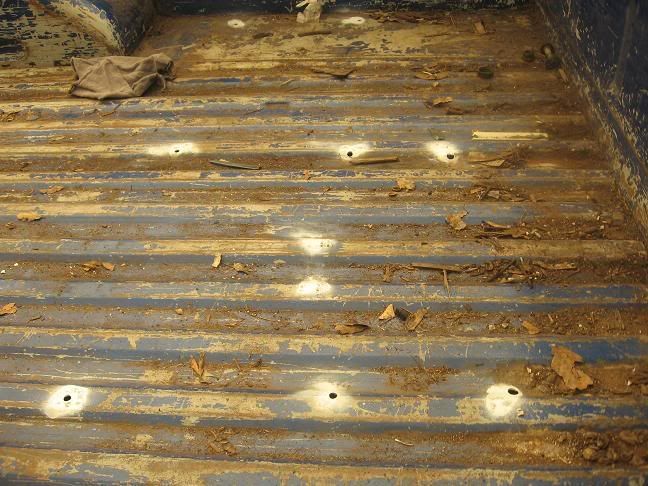
holes that will be weled up (No rust holes, just holes that the bucket seats were mounted to for going down to the beach )
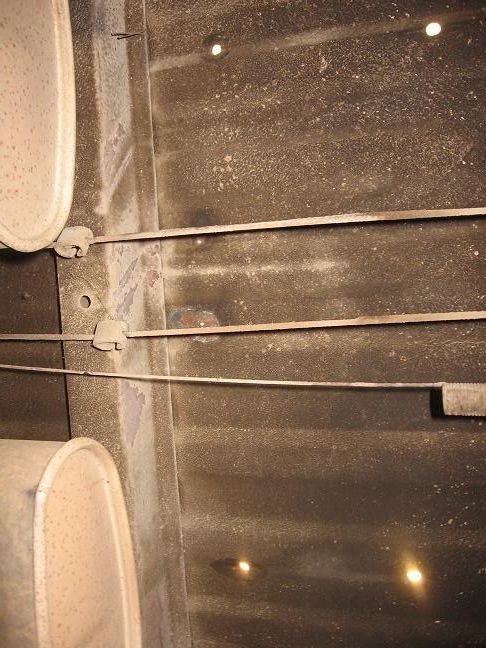
might as well take random pics while im down there:
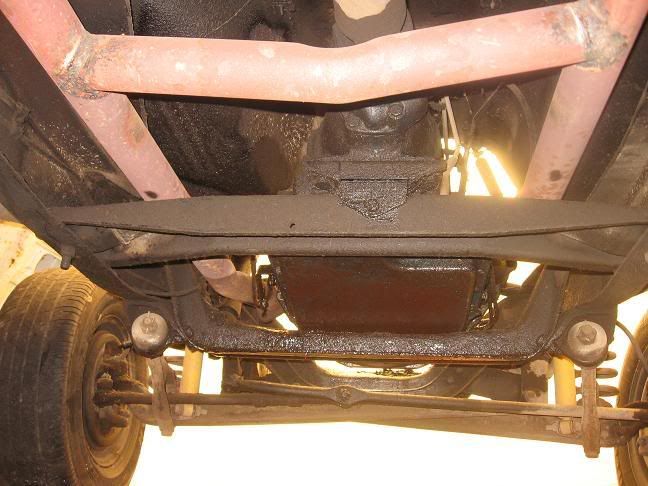
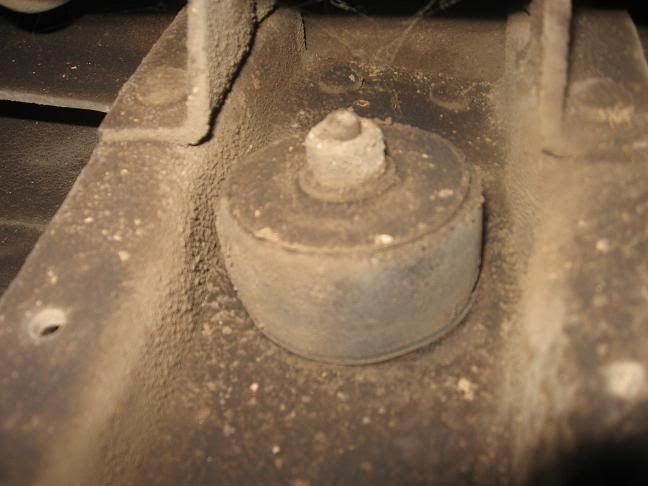
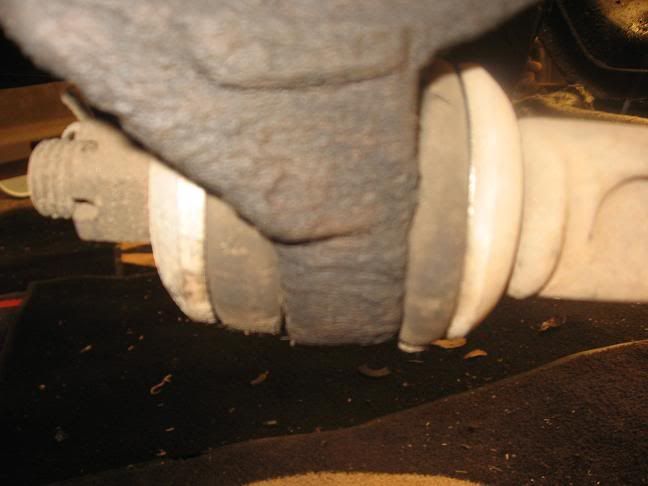
cab bushing, looks pretty good. allthough ill probably replace.
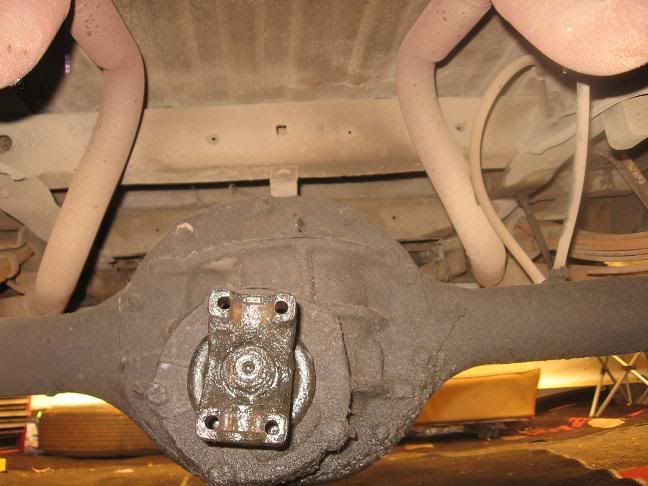
driveshaft pulled.
random picture

marked and ready:
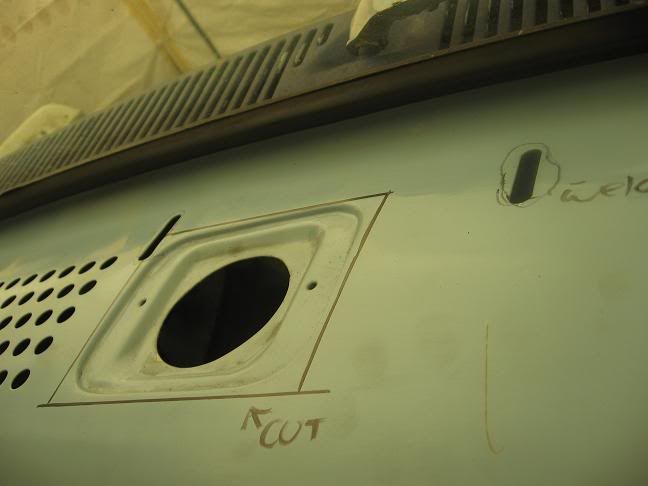
heres whats going to happen, the defroster holes will be cut out, a piece of sheet metal welded in (on each side), dash pad holes welded up, new holes cut in.
dont know how im going to tackle this one
i think ill paint the I-beams orange, to match the orange paint that will be on the truck. what do you think? someone did this and i thought it would look sweet on a orange/white truck. if you know where it is, put a link to it in this thread please )

these will be replaced:
these should be gone eventually with discs in its place:
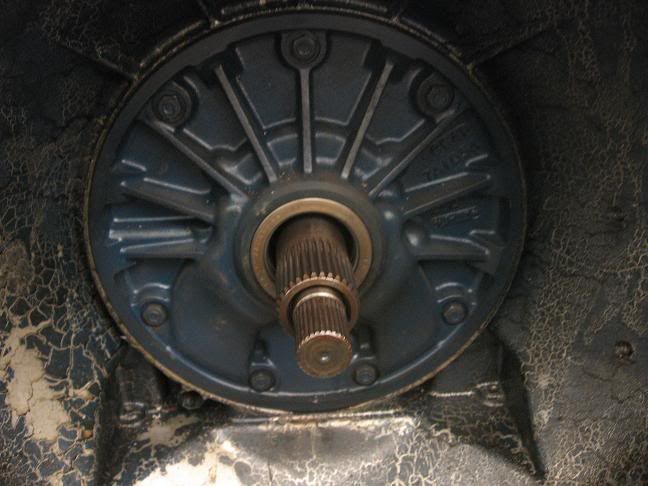
tranny
i got a rear slider window from joshpow. im goint to make it like new.
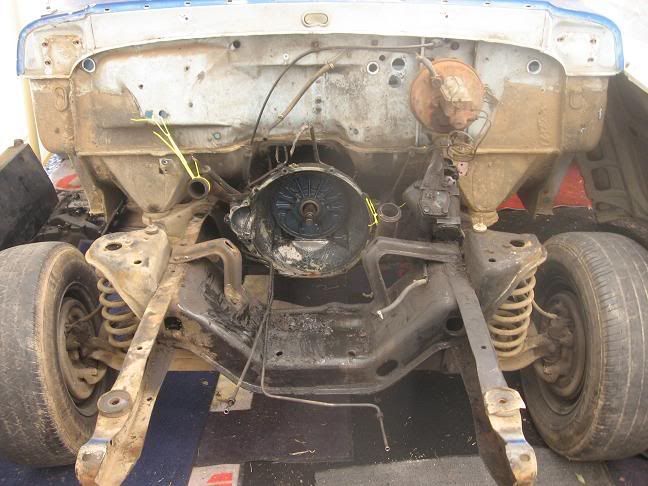
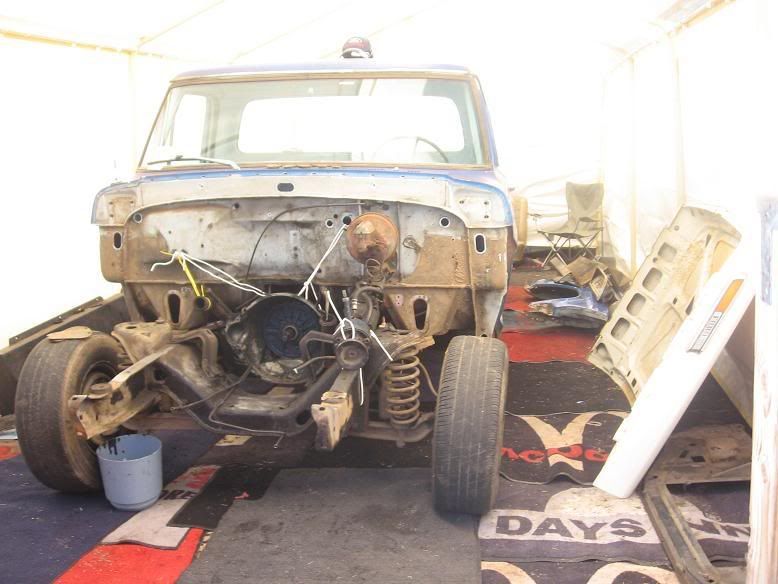
how the front looks now:
i have this week OFF FROM SCHOOL!
that means, alot of work on the bump if i can find something to do that is.
my plans are to start grinding paint off, but i want to wait until i have epoxy primer. so maybe next weekend i can get some.
i dont know what ill do this week though. i dont think there is anything i can do.
well check it out and discuss it.
UPDATE
not much, but heres what i did:
-removed the rear window
-removed the driveshaft
-removed the spare tire
-marked holes and dash
-removed more small things off of firewall
-got a rear slider from joshpow
PICTURES!!!!!!!!!!!!!!
i am so glad there is no rust in this part of the world! just to show... (that is dried mud, not even rust
undercoating that ill be grinding off and applying POR-15 eventually
holes that will be weled up (No rust holes, just holes that the bucket seats were mounted to for going down to the beach
might as well take random pics while im down there:
cab bushing, looks pretty good. allthough ill probably replace.
driveshaft pulled.
random picture
marked and ready:
heres whats going to happen, the defroster holes will be cut out, a piece of sheet metal welded in (on each side), dash pad holes welded up, new holes cut in.
dont know how im going to tackle this one
i think ill paint the I-beams orange, to match the orange paint that will be on the truck. what do you think? someone did this and i thought it would look sweet on a orange/white truck. if you know where it is, put a link to it in this thread please
these will be replaced:
these should be gone eventually with discs in its place:
tranny
i got a rear slider window from joshpow. im goint to make it like new.
how the front looks now:
i have this week OFF FROM SCHOOL!
that means, alot of work on the bump
my plans are to start grinding paint off, but i want to wait until i have epoxy primer. so maybe next weekend i can get some.
i dont know what ill do this week though. i dont think there is anything i can do.
-Ryan
-
1971ford
- 100% FORDified!
- Posts: 5565
- Joined: Wed Jul 04, 2007 1:05 pm
- Location: Placerville CA
and here is the plan:
-strip/por-15 front of frame tomorrow
-tow truck to welding shop, have welding/cutting done, put on lift, remove bed, put bed back on after frame is fixed
-take bed off, set down on grass once back from scheetz
-pull truck into garage to the very end with rearend closest to road
-put bed sideways upside down behind truck, both in shelter garage
-grind down/por-15 underside of bed
-grind/ por-15 under-bed frame section
-take bed out, back truck out
-take cab off, set on grass for now
-put bed back on and bolt down
-roll truck back in
-set cab behind truck on its back
-strip/por-15 bottom
-strip/por-15 under-cab frame section
-strip/primer/paint front of bed and back of cab
-then the wild world of body work and paint!
the problem is, were going to have to make another trip down there long in the future if i go this week like i want too, because ill have to go back to have the rearend of the frame welded on.
but i dont have a rearend (last 6 in. of both frame rails)
i need to get them
-Ryan
-
69bumptruck

- Preferred User

- Posts: 269
- Joined: Tue Jan 30, 2007 10:02 pm
- Location: Moore, Oklahoma
- Contact:
re: a 14 yr olds 69 F100 Ranger project-UPDATE: 3/16
Nice work! Looks like you got a pretty clean truck to start with. Keep the updates comin'!
-
1971ford
- 100% FORDified!
- Posts: 5565
- Joined: Wed Jul 04, 2007 1:05 pm
- Location: Placerville CA
UPDATE:
yeah another one allready
ill probably be updating every day until monday since i have this week off.
-i took all grommets and inspection plates off firewall
-cleaned the garage
-sprayed PB blaster on tons of bolts that i will be taking off soon.
-started grinding on front of frame
-found out that my rear frame is actually not torched off! and its perfectly fine with just some welds of the cheby rear bumper! that got me really excited and made my day
-spent alot of time investigating my defroster plans
-got the truck 100% ready to be towed
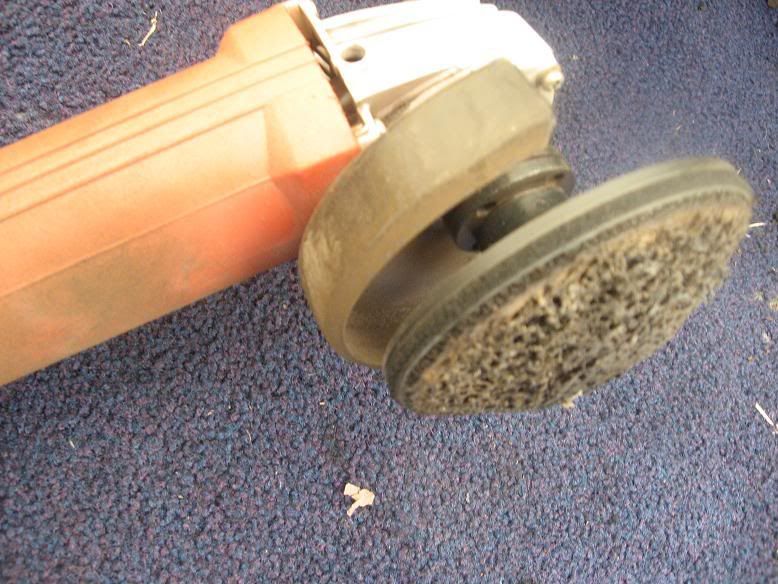
this is a old $10 grinder with a worn out 3m paint stripper pad.
i just couldnt wait anylonger to start sripping
im going to be buying a nice dewalt grinder and pads this weekend.
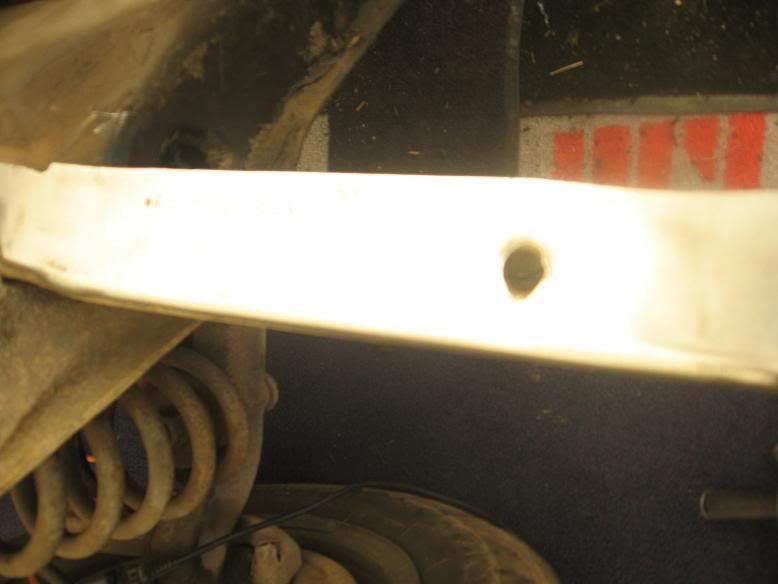
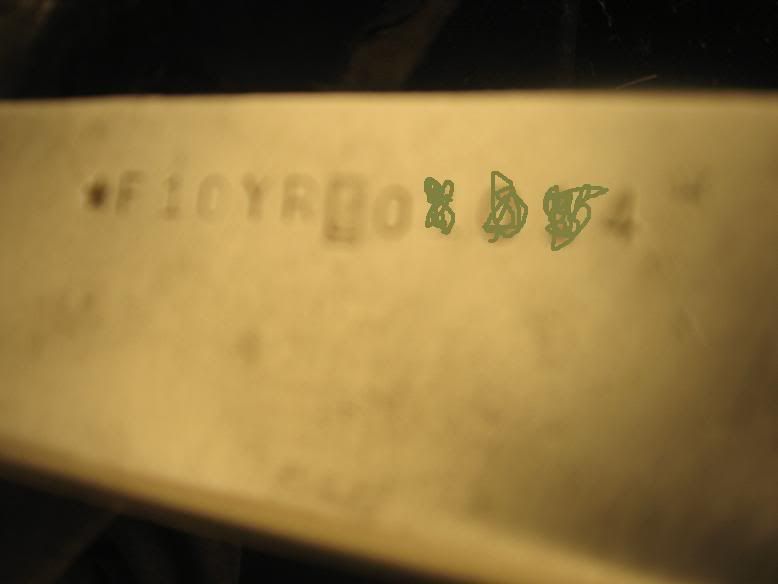
after 30 sec. or so. i found out there is a vin number here
this is annoying me. i cant get this stuff out until i get that special tool, which i keep putting off buying. maybe tonight ill buy it
this is how rust free the cab mounts are. i took off lots of grommets today.
how it sits now:
the PO of this truck (hal) also my "boss" since i work for him now, is going to come with his truck tomorrow or the next day, and were going to tow it (with towstraps) down to the welding shop.
then were going to take the bed offf (probably put it on the lift, that'll be exciting!, then were going to take care of the rear bumper (cut it off), and get all that needs to be welded/cut done with.
Will me and my truck turn into a wrecked fireball, or will we get to and back from the welding shop fine?
STAY TUNED!!!!!!! to find the answer
yeah another one allready
ill probably be updating every day until monday since i have this week off.
-i took all grommets and inspection plates off firewall
-cleaned the garage
-sprayed PB blaster on tons of bolts that i will be taking off soon.
-started grinding on front of frame
-found out that my rear frame is actually not torched off! and its perfectly fine with just some welds of the cheby rear bumper! that got me really excited and made my day
-spent alot of time investigating my defroster plans
-got the truck 100% ready to be towed
this is a old $10 grinder with a worn out 3m paint stripper pad.
i just couldnt wait anylonger to start sripping
im going to be buying a nice dewalt grinder and pads this weekend.
after 30 sec. or so. i found out there is a vin number here
this is annoying me. i cant get this stuff out until i get that special tool, which i keep putting off buying. maybe tonight ill buy it
this is how rust free the cab mounts are. i took off lots of grommets today.
how it sits now:
the PO of this truck (hal) also my "boss" since i work for him now, is going to come with his truck tomorrow or the next day, and were going to tow it (with towstraps) down to the welding shop.
then were going to take the bed offf (probably put it on the lift, that'll be exciting!, then were going to take care of the rear bumper (cut it off), and get all that needs to be welded/cut done with.
Will me and my truck turn into a wrecked fireball, or will we get to and back from the welding shop fine?
STAY TUNED!!!!!!! to find the answer
-Ryan
-
Joshpow

- 100% FORDified!
- Posts: 1790
- Joined: Fri Jan 21, 2005 10:43 am
- Location: Virginia
- Contact:
re: a 14 yr olds 69 F100 Ranger project-UPDATE: 3/16
Good Luck man. Hang in there. It will turn out perfectly fine as long as you don't get in a rush. Glad to see your progress.
Josh
72 F-100 Ranger XLT SWB
71 F-100 Custom SWB
67 F-350 Dually Dump
02 F-250 Stroke
http://www.cardomain.com/ride/2972100
72 F-100 Ranger XLT SWB
71 F-100 Custom SWB
67 F-350 Dually Dump
02 F-250 Stroke
http://www.cardomain.com/ride/2972100
-
1971ford
- 100% FORDified!
- Posts: 5565
- Joined: Wed Jul 04, 2007 1:05 pm
- Location: Placerville CA
-
aramil

- Preferred User
- Posts: 284
- Joined: Fri May 18, 2007 1:45 pm
- Location: Iowa, Pacific Junction
- Contact:
why banging? banging leaves dents...
72, f-100 ranger xlt, 360-c6, 2wd 84k miles.
77, ford f-150 custom 4x4, 400m-c6 SOLD
"the existence of flamethrowers is proof that someone, somewhere, sid to himself, "i want to set those people over there on fire, but i dont feel like walking over there to do it"
77, ford f-150 custom 4x4, 400m-c6 SOLD
"the existence of flamethrowers is proof that someone, somewhere, sid to himself, "i want to set those people over there on fire, but i dont feel like walking over there to do it"
-
1971ford
- 100% FORDified!
- Posts: 5565
- Joined: Wed Jul 04, 2007 1:05 pm
- Location: Placerville CA
GIAGNORMOUS UPDATE:
well heres what Troy(mostly Troy) and I did if i can remember it all:
-got the truck ready for towing
-towed the truck down (its amazing how many stares you get, its like i was in a lamborghini)
-got many dents out with a bunch of hammers and hours.
-got the bed bolts out (wow, how fun)
-got the bed off with the forklift
-welded up the bed holes
-weded up the radio mount holes
-torched the cargo box screws out
-removed the cargo box
-cut the brackets off
-welded the torched holes up
-cut the hook off
-sanded the scrape down
-removed more wiring, and underbed wiring
-cut the bumper off
-put the bed back on
-towed it home
-spen 1 hour making this post
-is that enough for you?
after we got the bed off with the forklift (we put on the huge forks, and slid the forks right under the bed. easy as that.)

show me ONE spot of rust

its bumpside city over here, we have the bump trailer:

we have my bump, we have boss's 70-

and we have his other 70

so here is the bed:

here are the forks:

then i did LOTS of BANGING! i got many many dents out of this heavily worked bed. this fenderwell used to be crumpled, now look at it
the yellow line is to give you an idea of the crumplage
all we have to do to transport the bed is slide the forklift's fork into the big forks,

no, the bed is not falling, this is the weirdest illusion ever

sanded the scrape (didnt get to fooling with it today)

a visual of scrape to no-scrape

darn cargo box screws wouldnt budge, now they came out with no trouble

random picture:

Troy doing work on the brackets:

brackets? what brackets

no more torched holes

no more hook
all 10 or so holes in the bed welded up and sanded. look at that!

now i can finally take EVERYTHING off steering, braking, all of it

as it sits now: i think ill make this one my default, its so beautyfull

there will be another update on sunday, since this weekend i plan on removing the bed, pushing the truck in to the end, laying the bed down behind the truck upside down so i can strip the bottom and i will POR-15 the under-bed chassis, and the front end and under the bed.
and i want to remove all braking/steering equipment.
what do you think of Troys work? looks VERY good to me!
well heres what Troy(mostly Troy) and I did if i can remember it all:
-got the truck ready for towing
-towed the truck down (its amazing how many stares you get, its like i was in a lamborghini)
-got many dents out with a bunch of hammers and hours.
-got the bed bolts out (wow, how fun)
-got the bed off with the forklift
-welded up the bed holes
-weded up the radio mount holes
-torched the cargo box screws out
-removed the cargo box
-cut the brackets off
-welded the torched holes up
-cut the hook off
-sanded the scrape down
-removed more wiring, and underbed wiring
-cut the bumper off
-put the bed back on
-towed it home
-spen 1 hour making this post
-is that enough for you?
after we got the bed off with the forklift (we put on the huge forks, and slid the forks right under the bed. easy as that.)
show me ONE spot of rust
its bumpside city over here, we have the bump trailer:
we have my bump, we have boss's 70-
and we have his other 70
so here is the bed:
here are the forks:
then i did LOTS of BANGING! i got many many dents out of this heavily worked bed. this fenderwell used to be crumpled, now look at it
the yellow line is to give you an idea of the crumplage
all we have to do to transport the bed is slide the forklift's fork into the big forks,
no, the bed is not falling, this is the weirdest illusion ever
sanded the scrape (didnt get to fooling with it today)
a visual of scrape to no-scrape
darn cargo box screws wouldnt budge, now they came out with no trouble
random picture:
Troy doing work on the brackets:
brackets? what brackets
no more torched holes
no more hook
all 10 or so holes in the bed welded up and sanded. look at that!
now i can finally take EVERYTHING off
as it sits now: i think ill make this one my default, its so beautyfull
there will be another update on sunday, since this weekend i plan on removing the bed, pushing the truck in to the end, laying the bed down behind the truck upside down so i can strip the bottom and i will POR-15 the under-bed chassis, and the front end and under the bed.
and i want to remove all braking/steering equipment.
what do you think of Troys work? looks VERY good to me!
Last edited by 1971ford on Sat Jul 11, 2009 12:46 am, edited 1 time in total.
-Ryan
-
RedneckTexan

- Blue Oval Guru
- Posts: 1102
- Joined: Tue Apr 03, 2007 6:58 pm
- Location: The backwoods of TEJAS!