Hackster's F100 #2 CV Swap 6 speed manual and Coyote
Moderator: FORDification
-
yarko
- New Member

- Posts: 65
- Joined: Wed Jun 03, 2015 11:06 am
Re: Hackster's F100 #2 CV Swap 6 speed manual and Coyote
Woohoo! Exciting times! I've loved reading your thread. Amazing work!
-
hackster
- Preferred User

- Posts: 317
- Joined: Fri Oct 18, 2013 11:21 am
Re: Hackster's F100 #2 CV Swap 6 speed manual and Coyote
Thanks Yarko, Been an exciting kind of weekendyarko wrote:Woohoo! Exciting times! I've loved reading your thread. Amazing work!
After several hours of cleaning in the shop from the previous days work I had a pretty good day in the garage yesterday, Cut short for our annual holiday party but that was a good night too.
I picked up my new dipstick yesterday and Ironed out a few more details, got the fuel pressure guage installed, hooked up the vacuum reference for the fuel presssure regulator to intake vacuum and got the other ports capped off.
Hooked up power for the very first time and nothing let the smoke out, it was extremely non eventful to be honest.
So with that it was time to see what blows up when I turned the key on........nothing blew up
Still no smoke or fire and everything so far is actually working.
Pour some fuel in the old turd and see where it leaked out. just a couple gallons. Nothing so far, turned on the key a few times and got the fuel system primed. crawled back under the truck and was not able to find any leaks, nothing left to do but hit the key.
My wife just walked around the corner from getting her nails done and was like, you have not started it? No just getting ready to turn the key.
https://youtu.be/jeEpcDkV3eY
<iframe width="420" height="315" src="https://www.youtube.com/embed/jeEpcDkV3eY" frameborder="0" allowfullscreen></iframe>
Literally first turn of the key it fired right up!!
I was damn surprised and just sat down and stared at it for a little bit.
Got to work on chopping up the factory airbox to try and make an intake that will work for me. I am pretty sure its not going to be the final version of the intake but it might get me up and running.
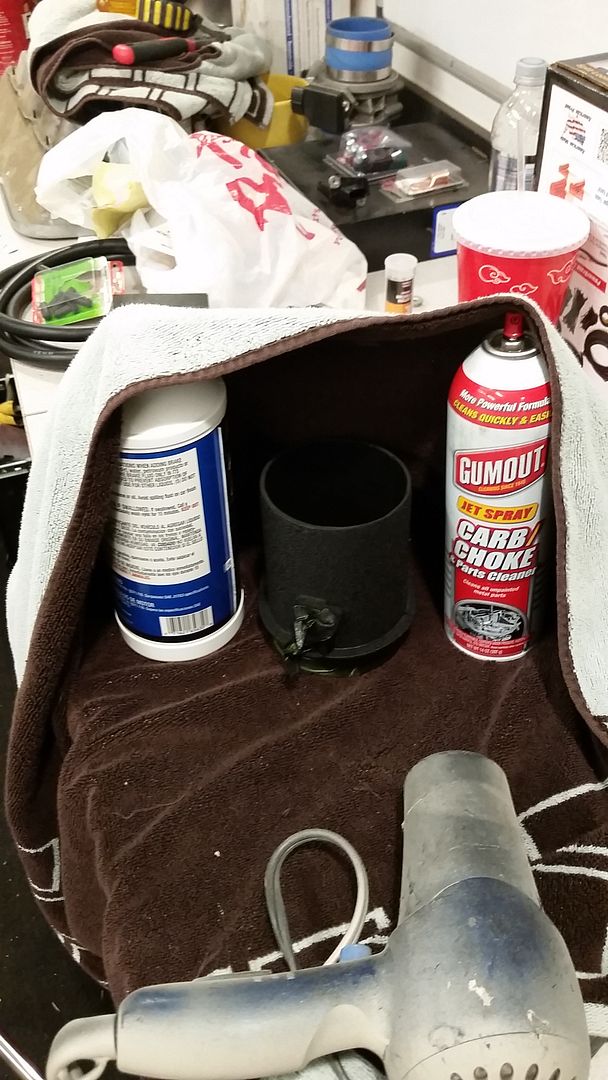
My paint drying booth. You would not really believe me but this works really well.
Here is the final result. This was the molded inlet to the factory airbox. It took a lot of cutting, grinding and sanding but I think it turned out pretty OEM looking and has the mass air meter in the correct location.
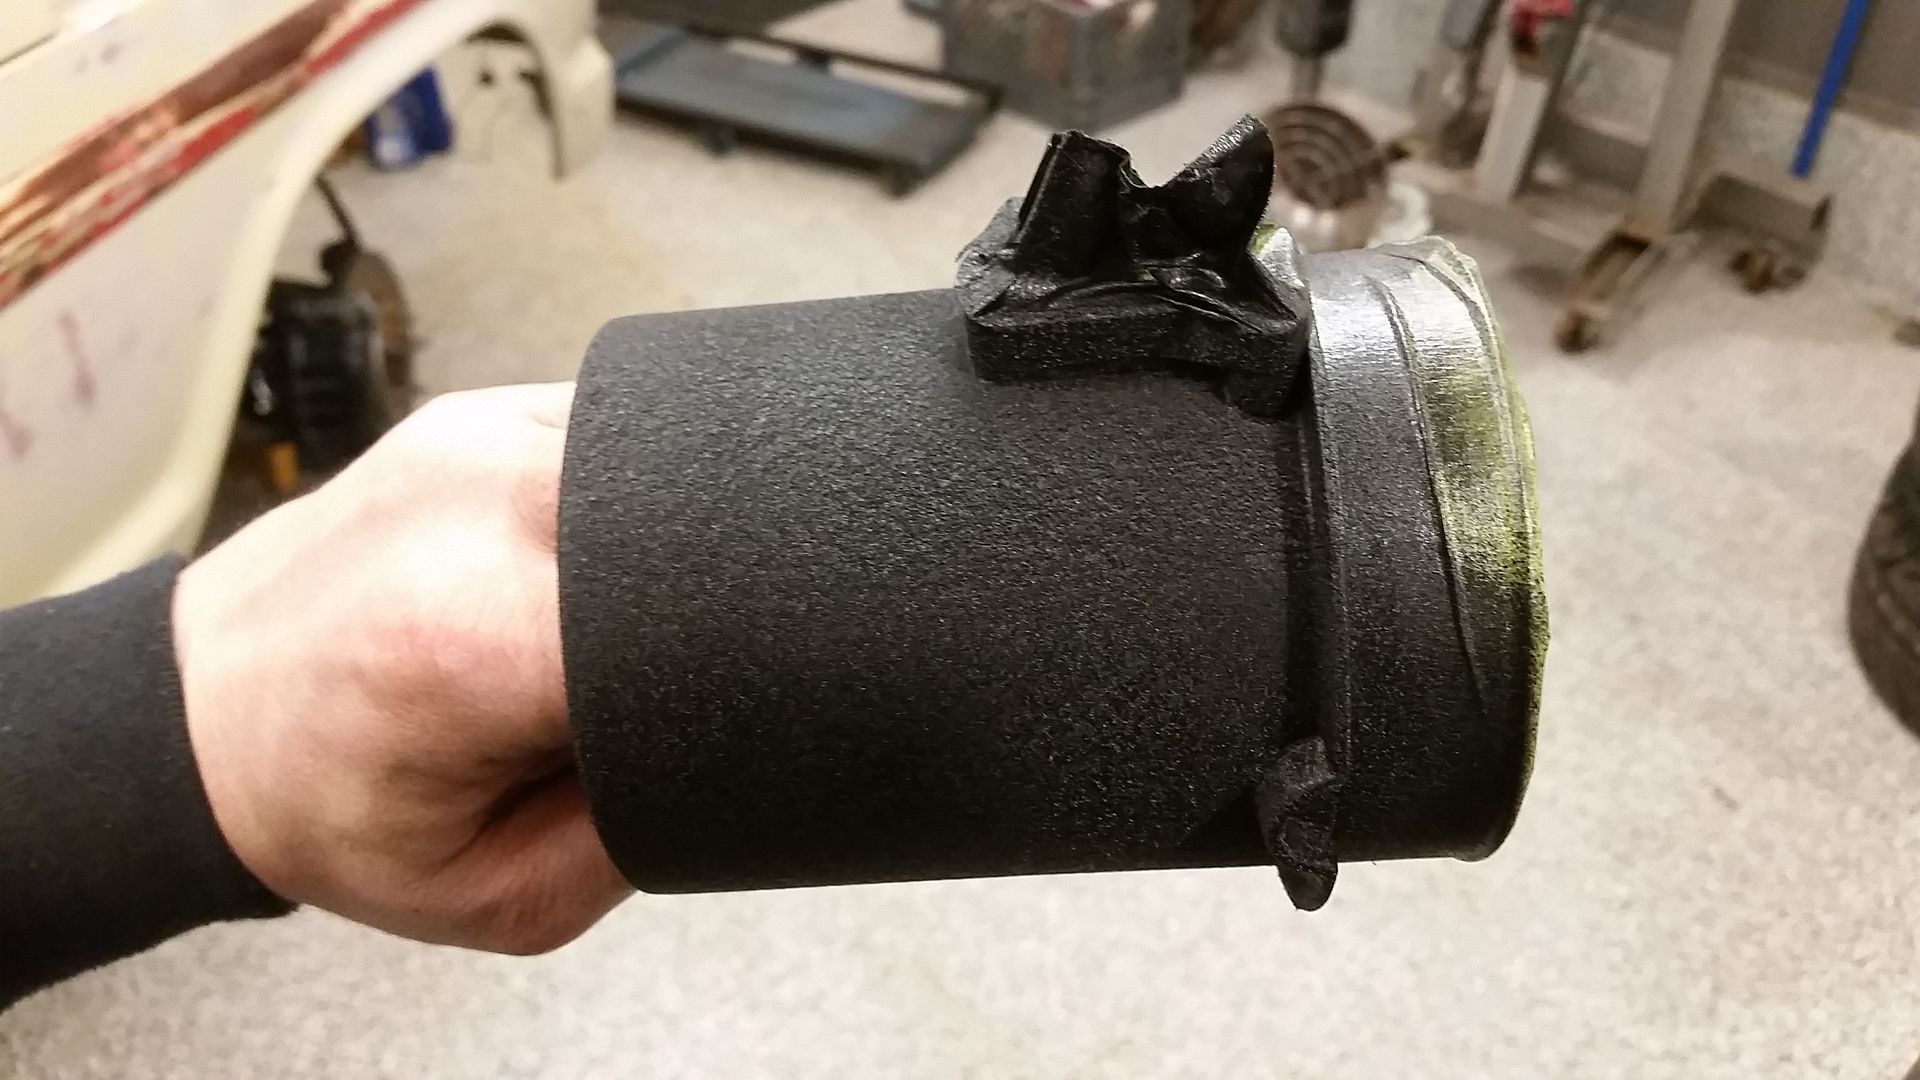
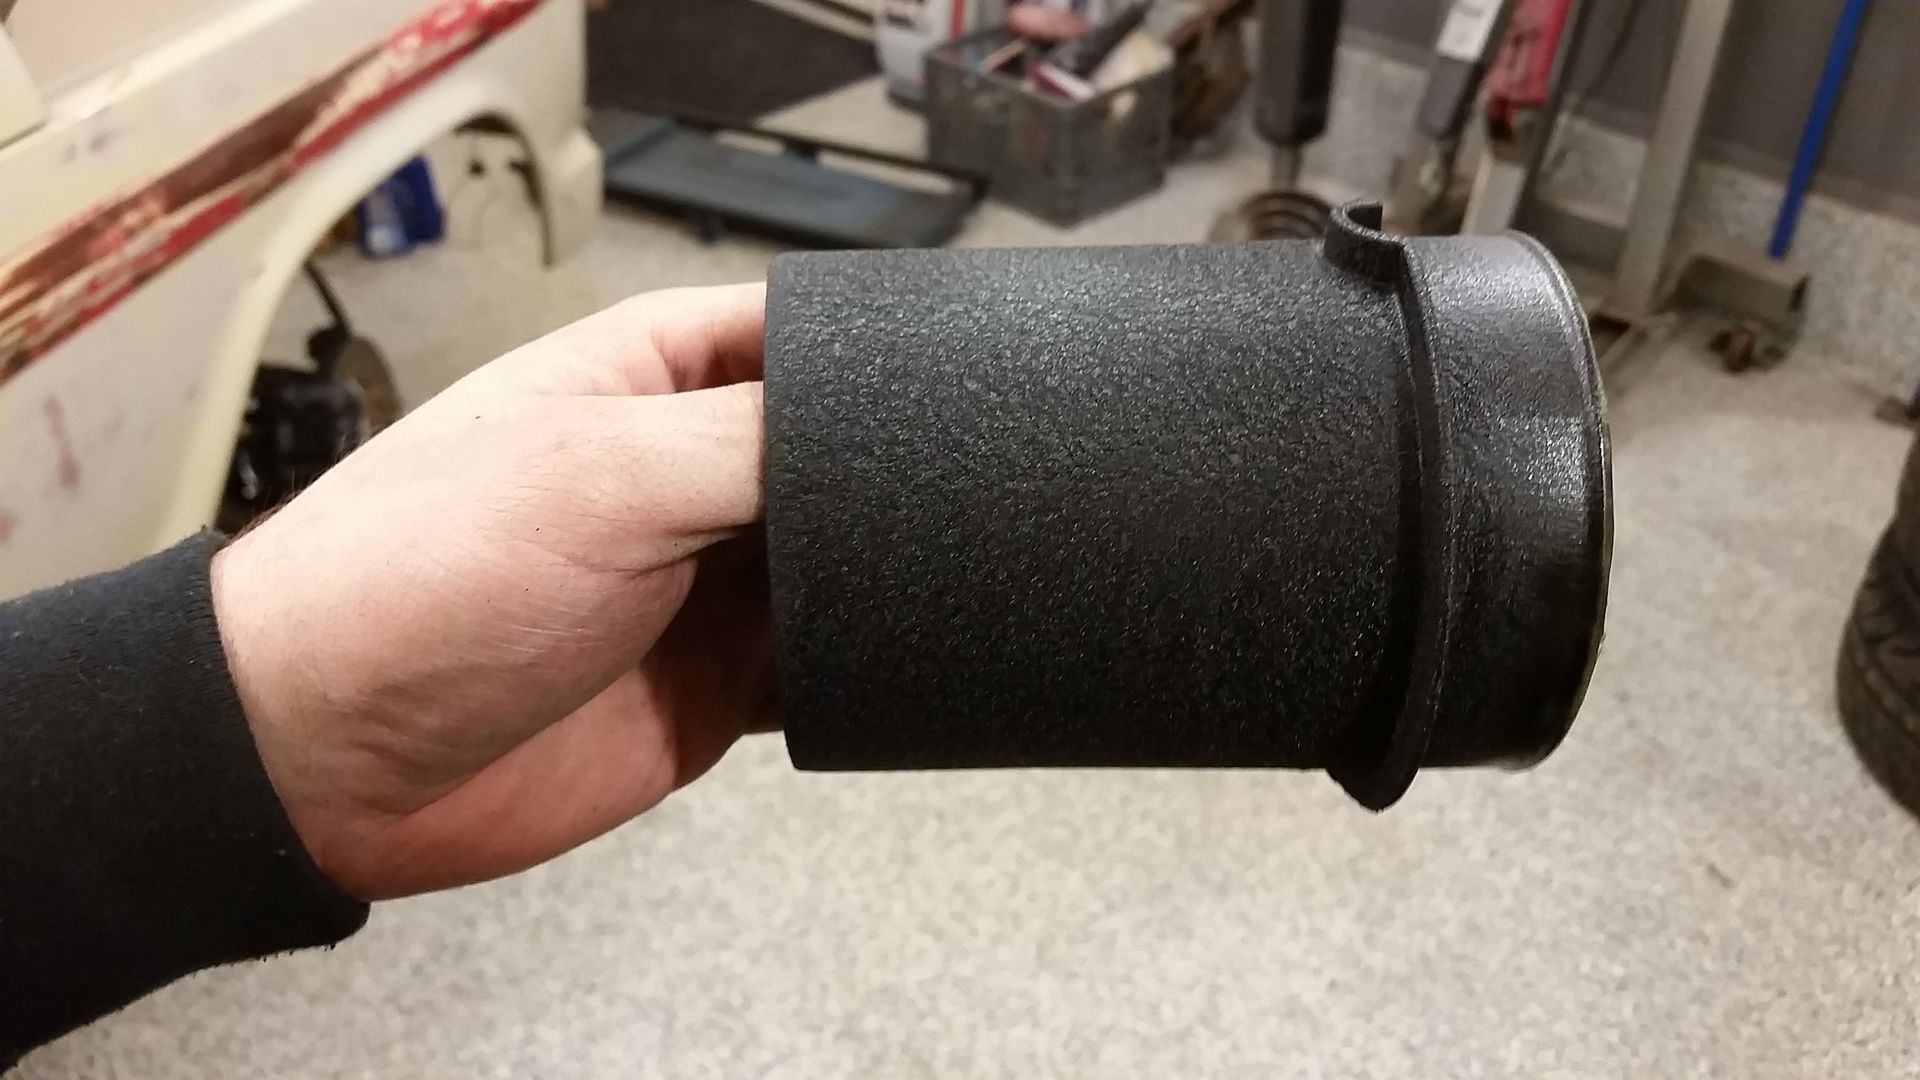
I finished it with some wrinkle black, thus the heat box to get stuff to dry out and get the wrinkle.
Also cut off the inlet tube to the cab....yes this is one of those cars that they pipe the intake noise into the cabin.
I made a cover plate out of the airbox cover I chopped up and plastic welded it to the intake tube.
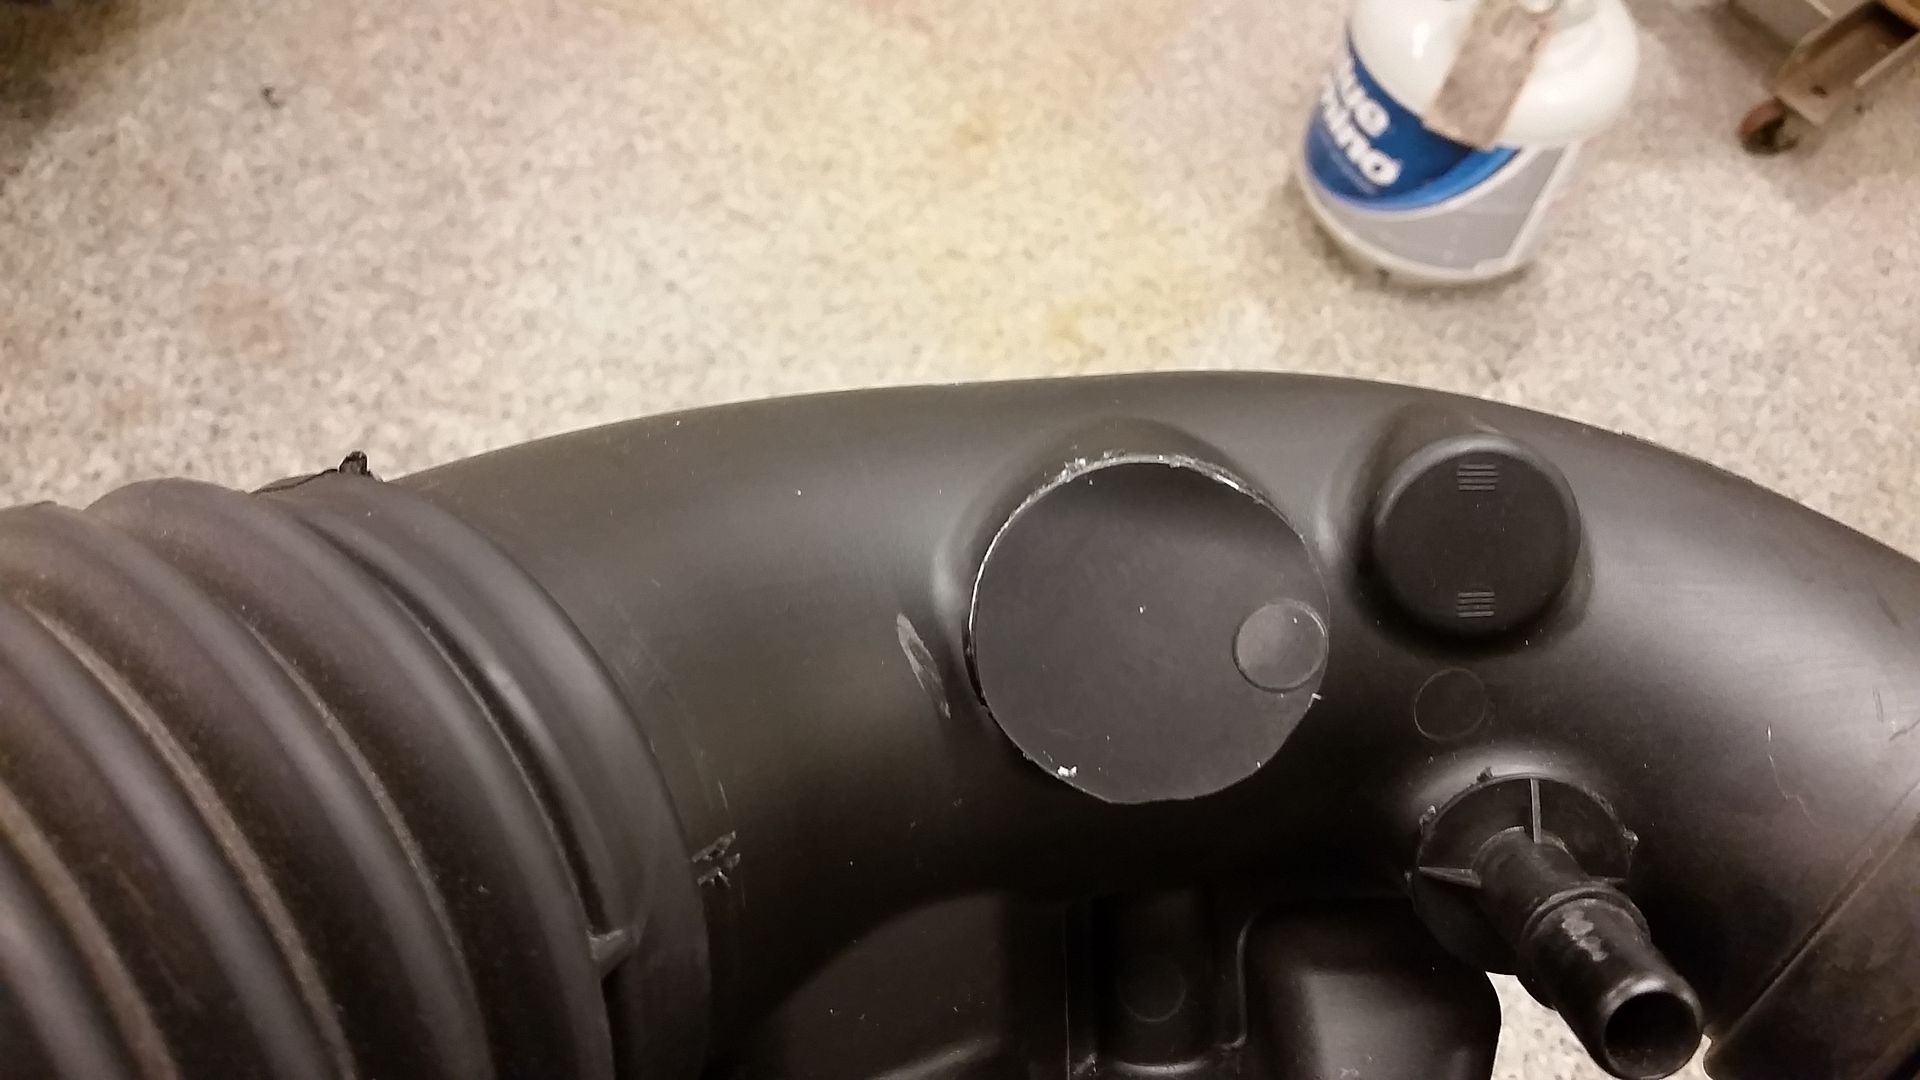
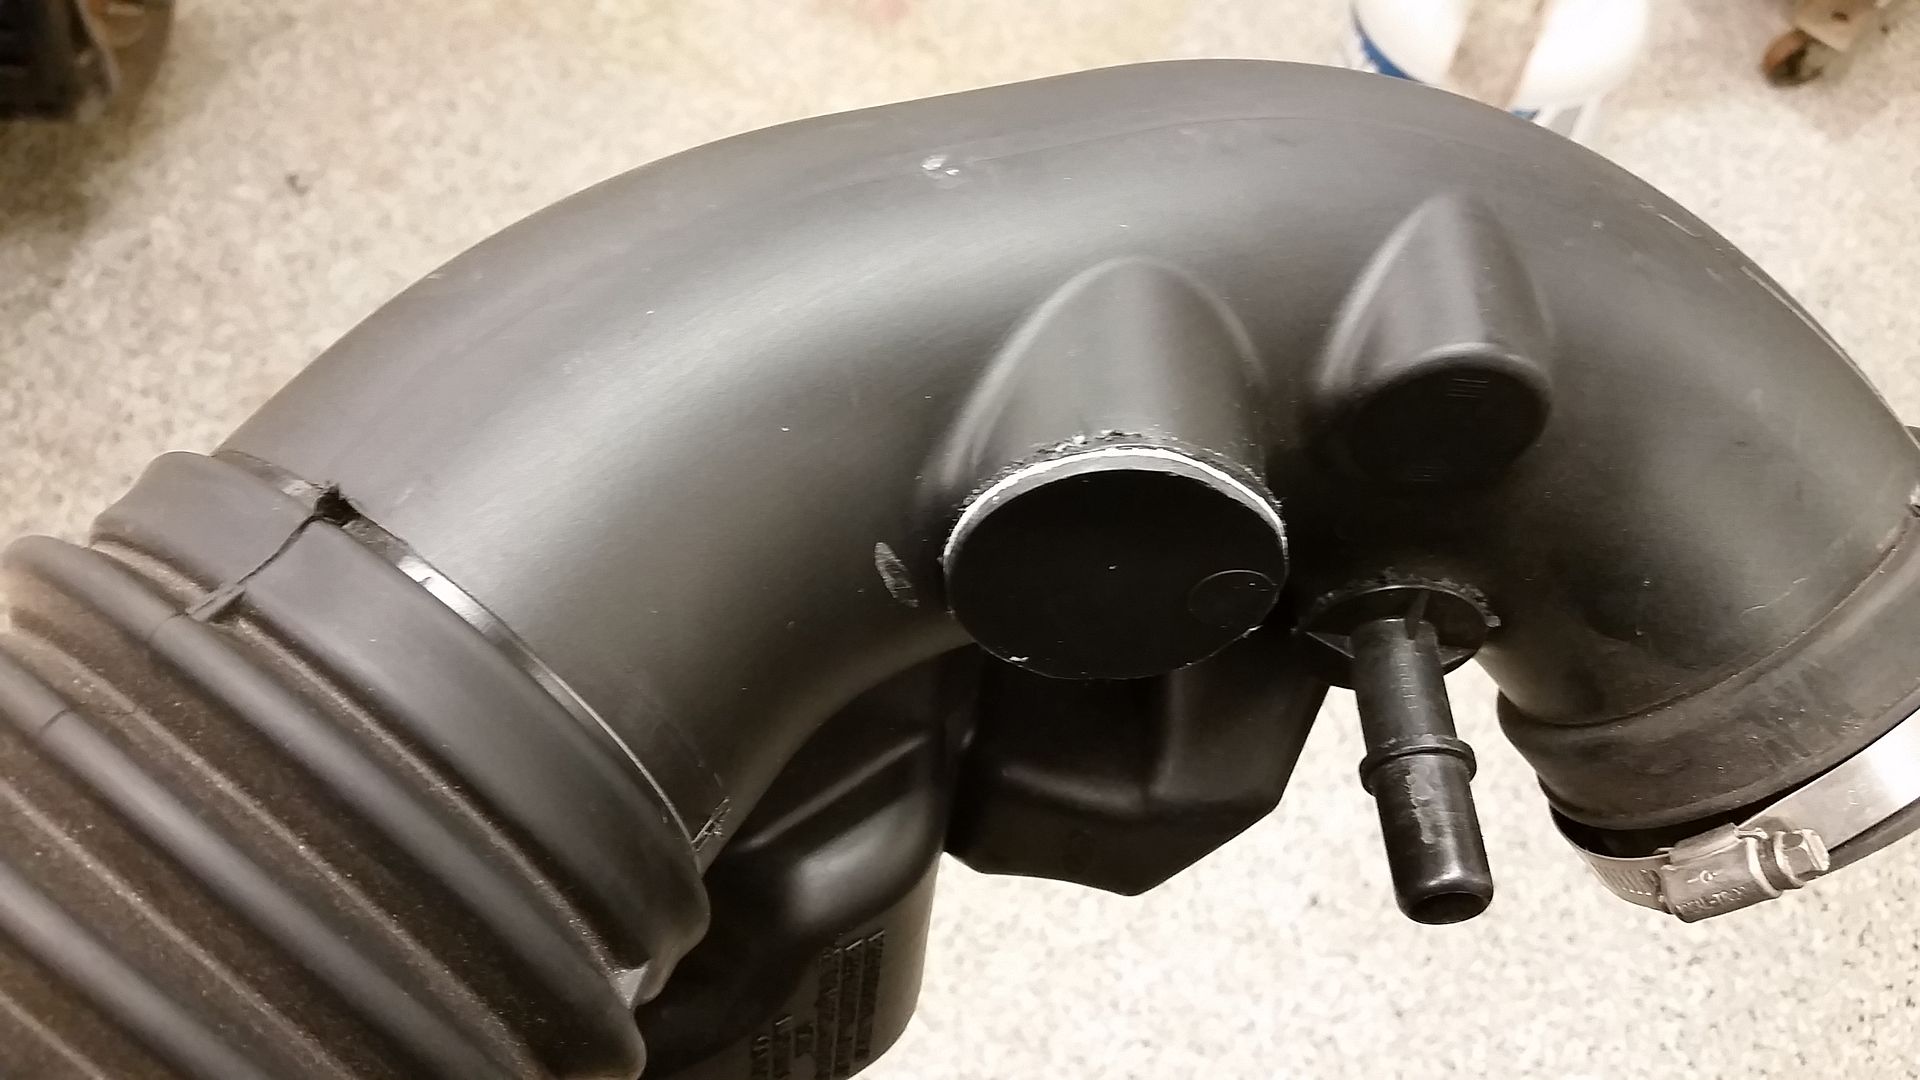
About where I ended up last night. Filter is ordered and should be able to get that buttoned up today.
-
michael9218
- New Member

- Posts: 35
- Joined: Tue Sep 29, 2015 8:07 pm
- Location: Woodstock, Ga
Re: Hackster's F100 #2 CV Swap 6 speed manual and Coyote
That's awesome! Sounds good too. Congrats!
-
hackster
- Preferred User

- Posts: 317
- Joined: Fri Oct 18, 2013 11:21 am
Re: Hackster's F100 #2 CV Swap 6 speed manual and Coyote
Thank you, its loud with the open headersmichael9218 wrote:That's awesome! Sounds good too. Congrats!
Damn good weekend, if I can say so.
Picked up the filter and it is perfect, just what I wanted. It is nice and clean and fits well in the engine bay, away from the radiator and near the front corner away from as much heat as it could be and protected from any water as well.
Got to building a mount for the air filter, might have gone a bit overboard for just a filter bracket but its cool.
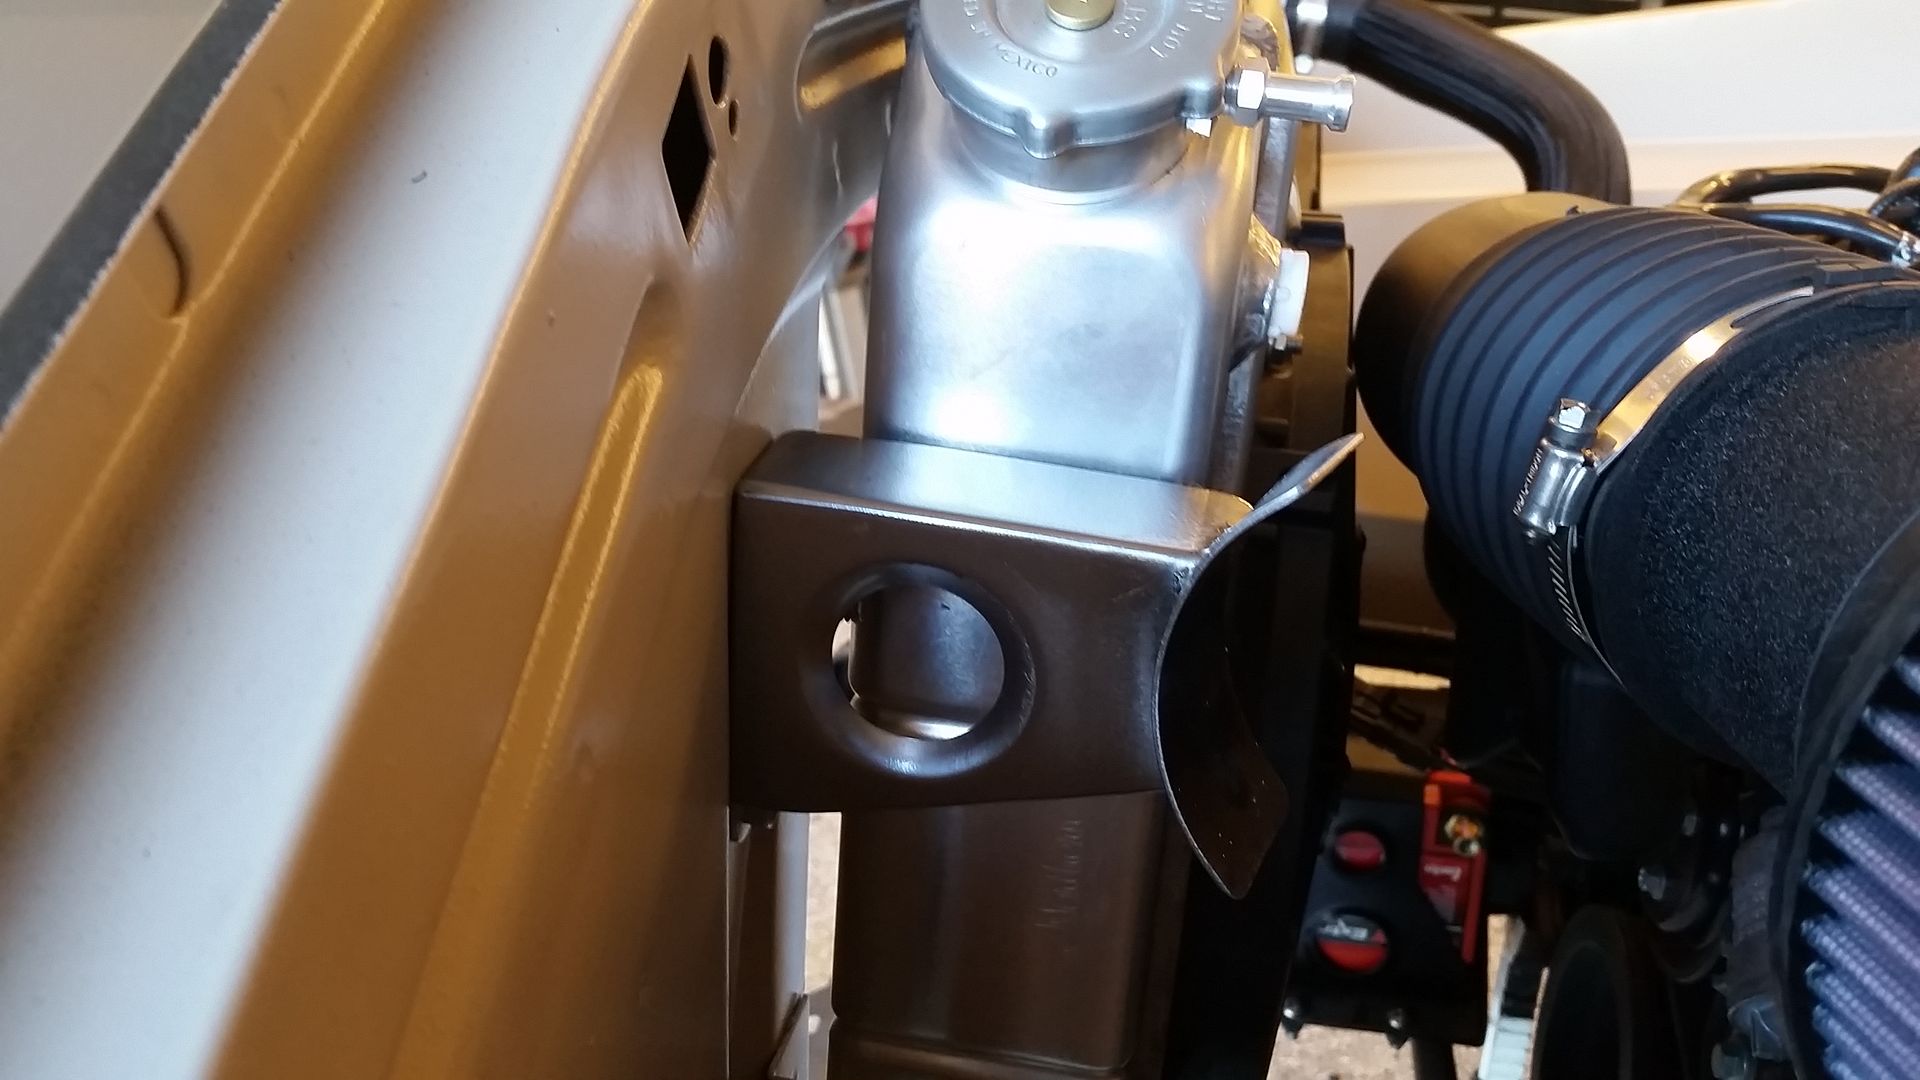
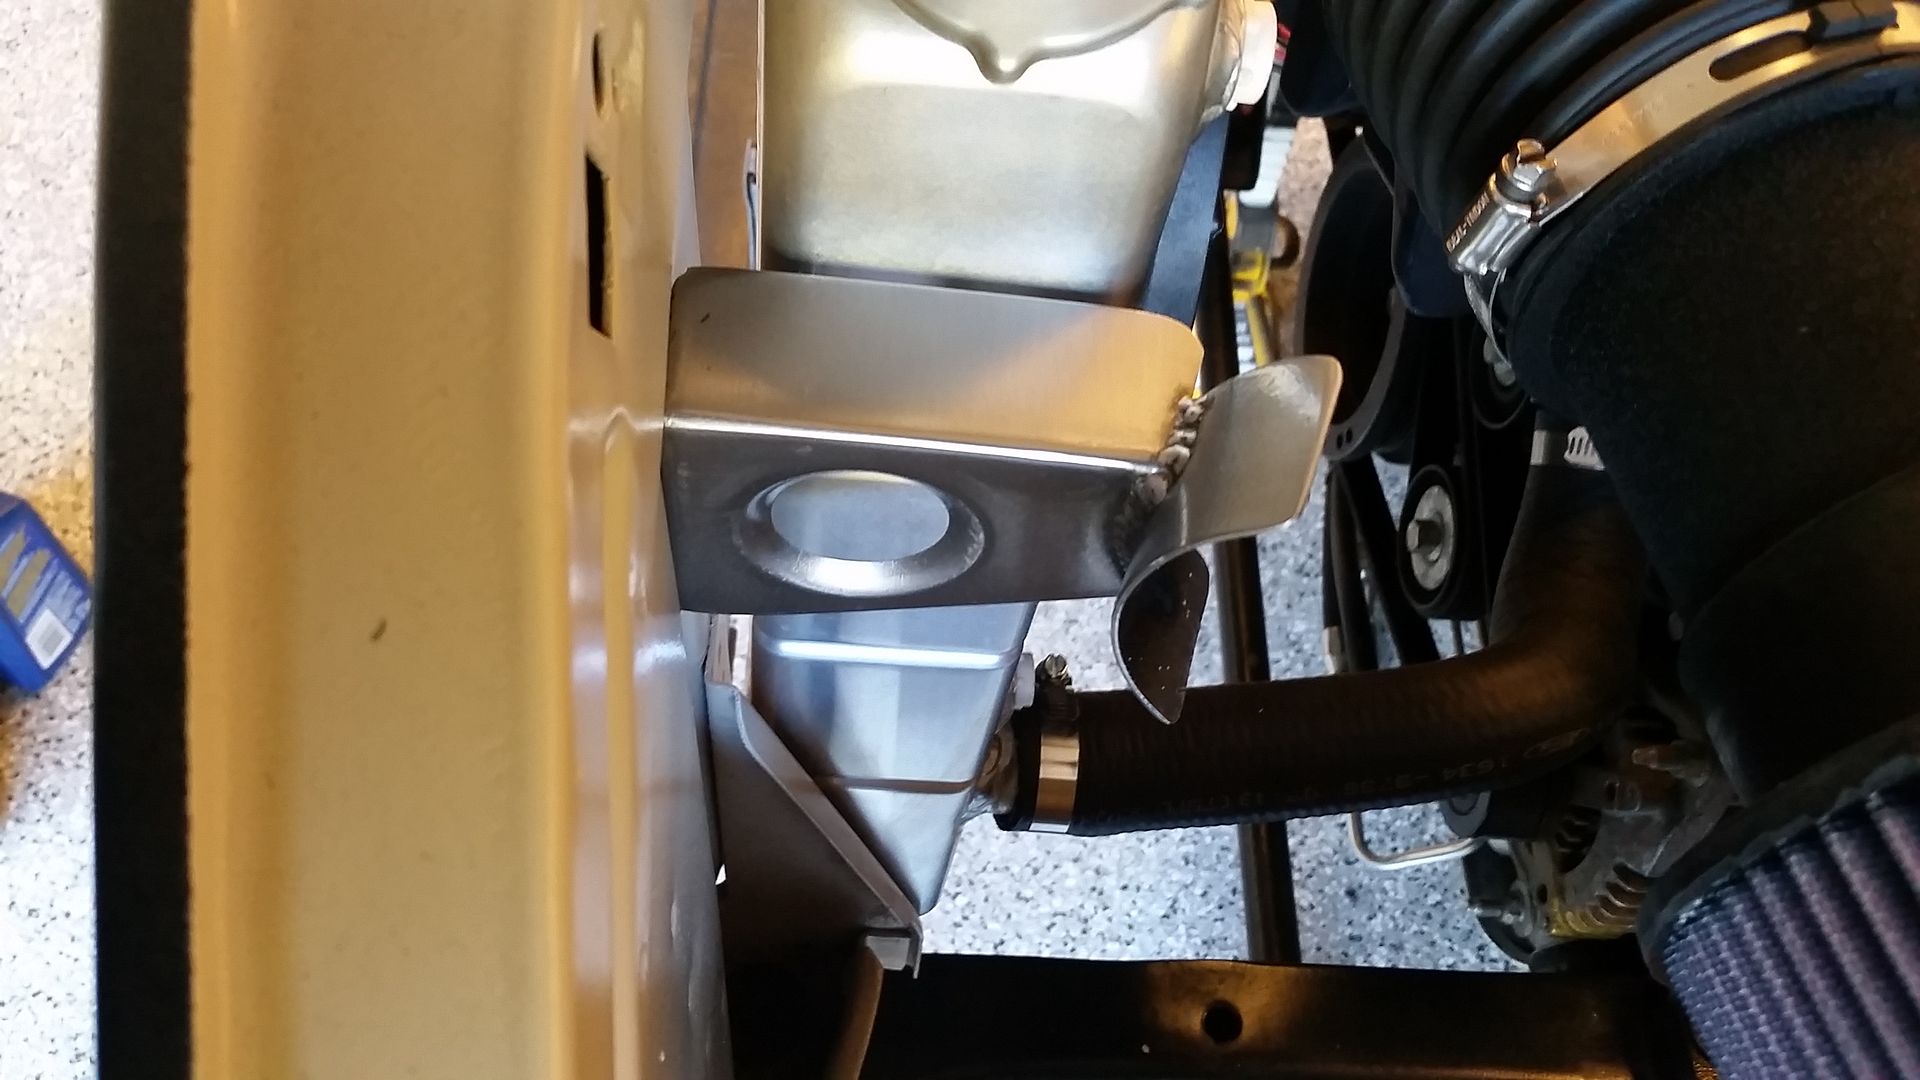
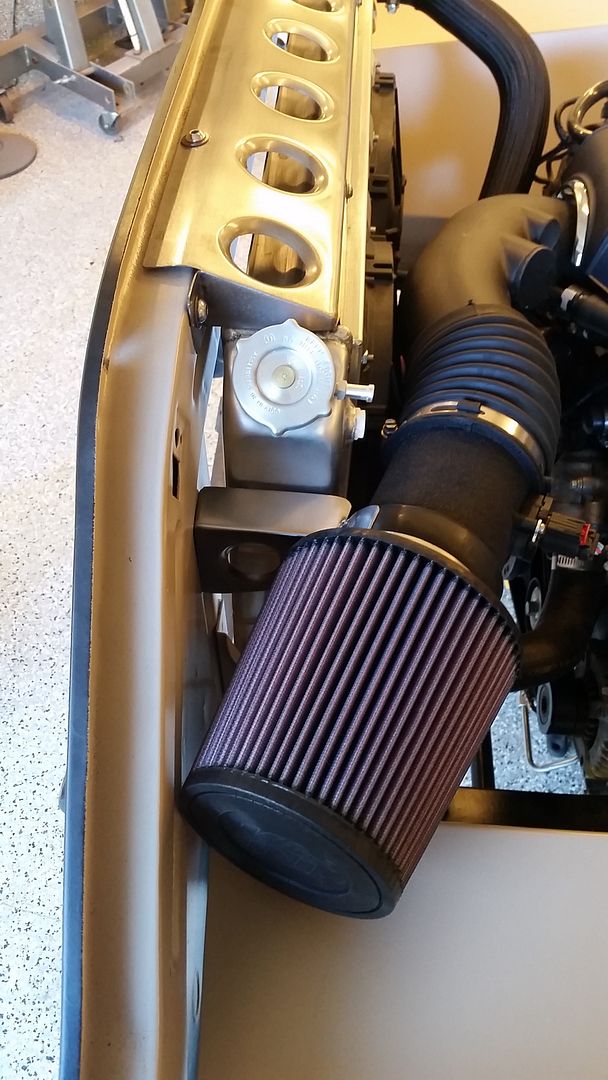
I think the intake turned out well for modifying the stock crap. Once I can get the truck on the road and find someone that can tune it, I will likely do a JLT intake on it but this should work for now.
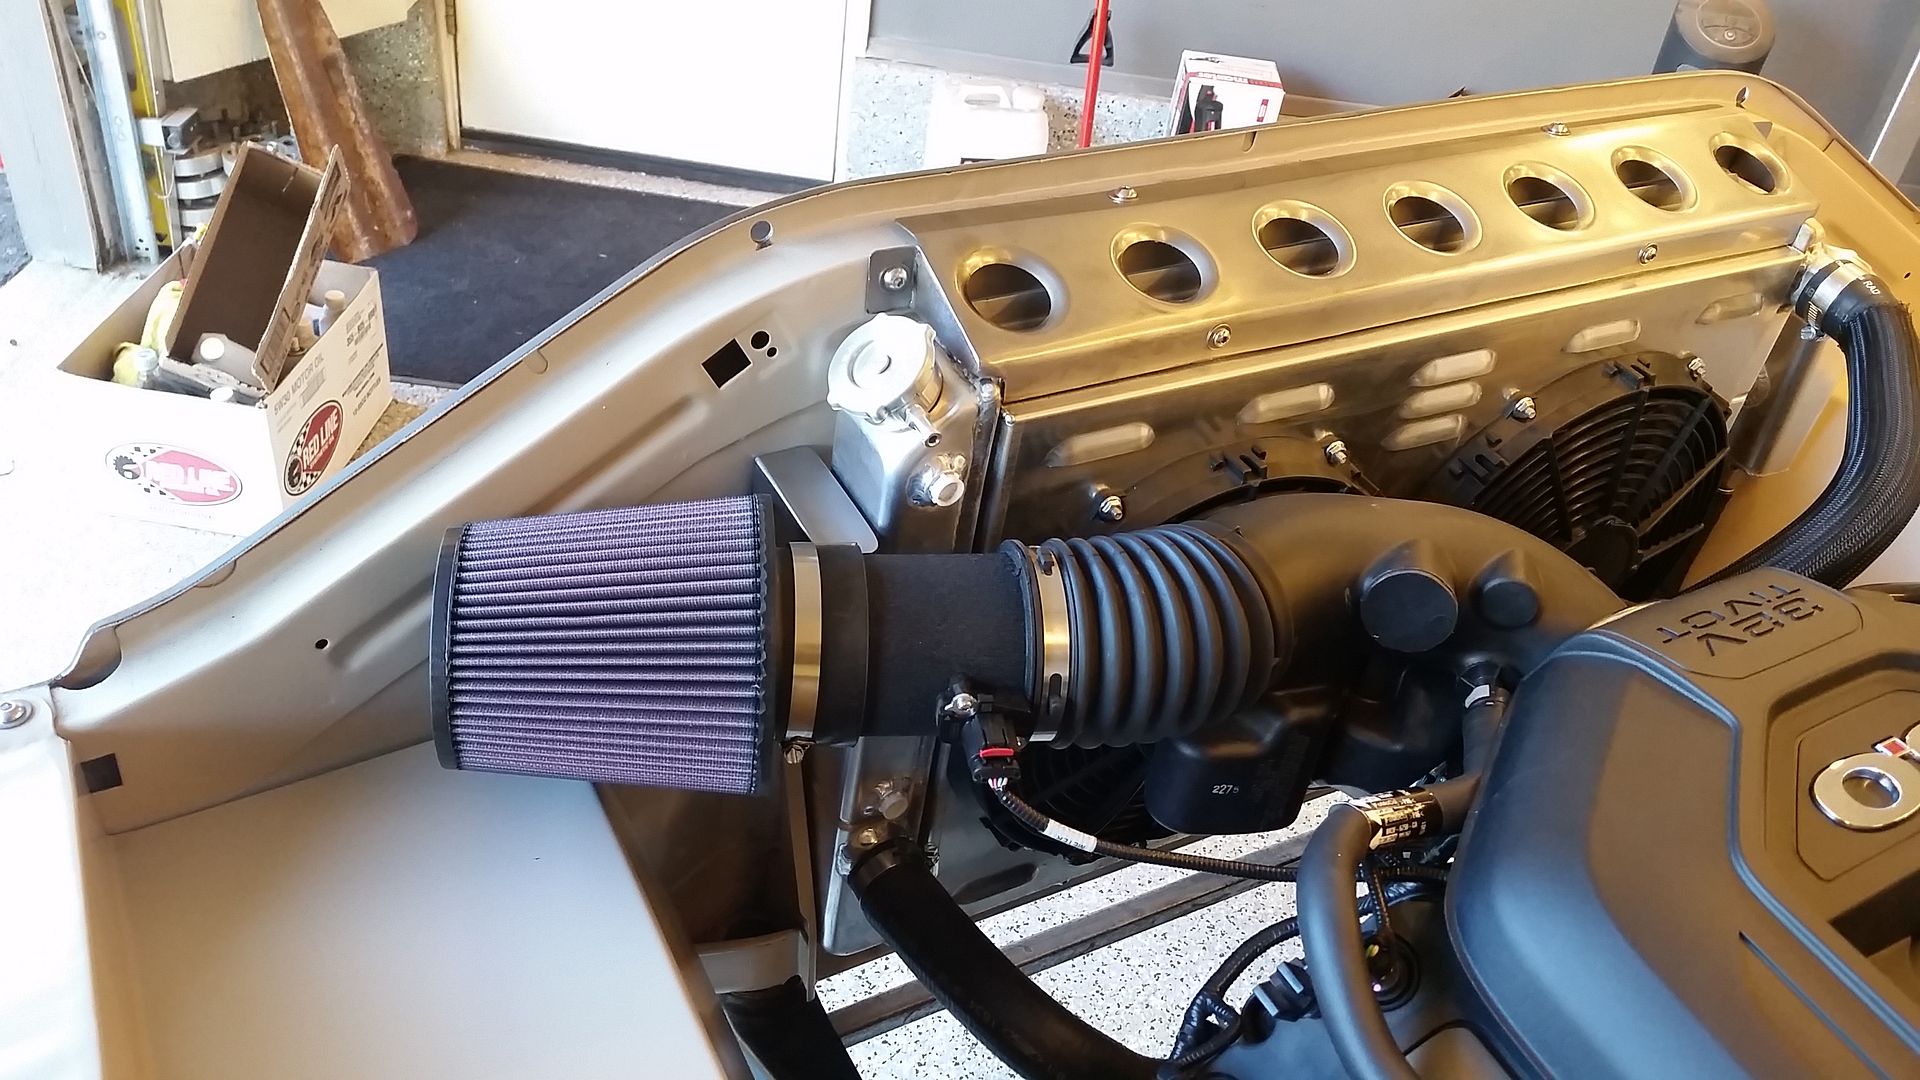
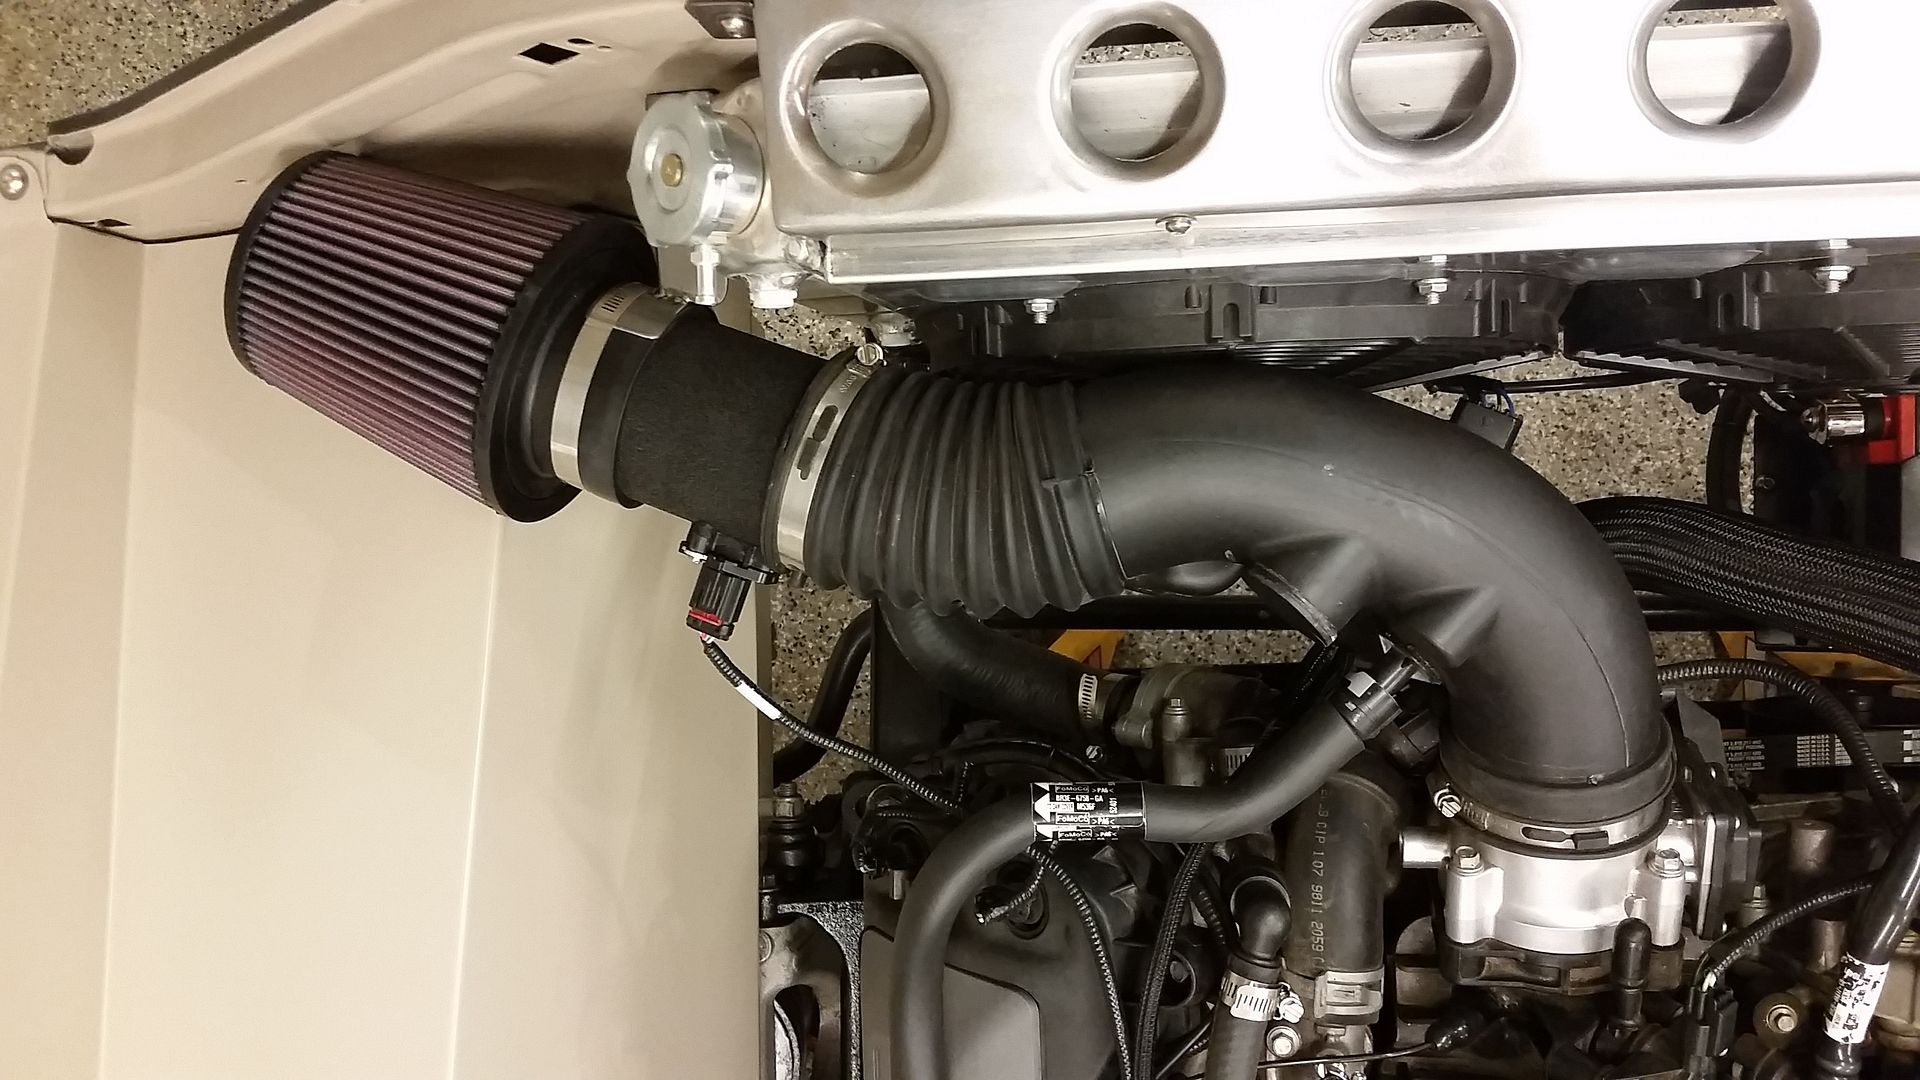
And that is the end of photo taking for the day.
I did a bit of other stuff though. I was having issues with the clutch master cylinder, I could not get it to bleed very well so I tackled that first. Got the wife to help me a little bit more. I tapped on the hose and got it as flat as I could and uphill the entire length of the line. See there is no provisions for bleeding this thing, its just through slowly pressing the pedal and releasing to get all the air out. We got that sorted out and the air bled out of it but I could still not get the clutch to release, I felt like it was just not pushing the pedal far enough or not getting all the travel out of the master.
So i started measuring and looking at the pedal. Turns out my hunch was right. Where I built the double shear on the pedal apparently It hits the heim joint and I could only use the top hole. So out with the air saw, the cutoff wheel, some files and a die grinder and an hour or so later I was able to get the full travel on the master cylinder and got it pretty well adjusted.
One more try, the wife pushed down the pedal in gear and hot damn I could spin the driveline!!!! This was a pretty big relief that the stuff I had was indeed going to work and play well together.
So, I moved onto the gauges to see if I could get all that crap to work together. Read the manual and went through all of their setup and got everything to work with the exception of the oil pressure. Pretty sure that the coyote does not use or is not setup to use the input from the oil pressure sender. I swapped in the sender from the Dakota Digital into the block and hot damn we have a full set of working guages on the truck.
I also cleaned up all the wiring under the engine cover and got the insulation on the fuel rails and got the factory heater hose guides on. Most of the work on the engine is complete. I need to build some exhaust and get the overflow for the radiator.
Garage is a mess, time for a few hours of clean up!!!!
Sean
-
ablokzyl
- New Member

- Posts: 17
- Joined: Wed Dec 02, 2015 3:18 pm
Re: Hackster's F100 #2 CV Swap 6 speed manual and Coyote
Great looking truck! I've been stalking this build for quite a while now, and I'm probably going to steal an idea (or two or three) for my 68. One thing to think about when using a K&N filter is that its an oil bath filter. I have seen several MAF equipped engines burn a piston from use of them. The oil from the filter collects on the sensing wires on the MAF and runs the engine very lean. Just a thought would be to switch to a dry style filter like an AFE.
-
ahawks9er
- New Member

- Posts: 8
- Joined: Wed Sep 30, 2015 5:20 pm
Re: Hackster's F100 #2 CV Swap 6 speed manual and Coyote
Your progress is exponential! The driveline looks factory and I don't think that filter bracket is overboard at all; I think it's a tasteful detail that suits the rest of your build. Awesome to hear it run and soon, it'll be tooling down the road.
-
hackster
- Preferred User

- Posts: 317
- Joined: Fri Oct 18, 2013 11:21 am
Re: Hackster's F100 #2 CV Swap 6 speed manual and Coyote
ablokzyl wrote:Great looking truck! I've been stalking this build for quite a while now, and I'm probably going to steal an idea (or two or three) for my 68. One thing to think about when using a K&N filter is that its an oil bath filter. I have seen several MAF equipped engines burn a piston from use of them. The oil from the filter collects on the sensing wires on the MAF and runs the engine very lean. Just a thought would be to switch to a dry style filter like an AFE.
Thanks man!! Steal all you want, its the internet, its kind of how that works
On the filter. I have read a bit about what you mentioned above. It sounds like this is really only a problem with filters that people over oil after they clean them. Have you personally seen these engines burned up?
It might be worth me looking into the AFE Filter though. Thanks for mentioning it.
Thanks man, I am beginning to enjoy all the little details in these builds more and more, it will probably start to slow the builds down though. Soon....like very soon it should be going down the road.ahawks9er wrote:Your progress is exponential! The driveline looks factory and I don't think that filter bracket is overboard at all; I think it's a tasteful detail that suits the rest of your build. Awesome to hear it run and soon, it'll be tooling down the road.
Very slow week for work on the truck as a matter of fact its been exhausting.
Picked up a bunch of stainless 3" tubing 3" stainless mandrel u bends, v bands and some 3" 2 bolt gaskets from columbia river mandrel earlier this week as I kind of need the exhaust done before I can continue on and get it on the ground.
Ordered a muffler but it did not fit so had to order another muffler, single in and out this time instead of dual in and single out.
Magnaflow 3" all stainless, I think its going to be really loud.
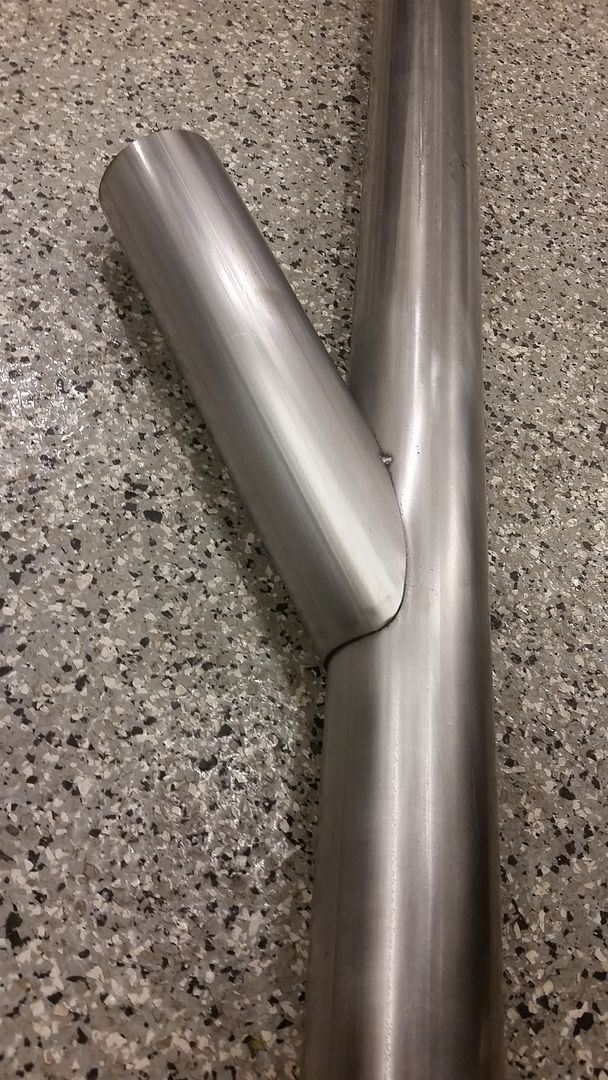
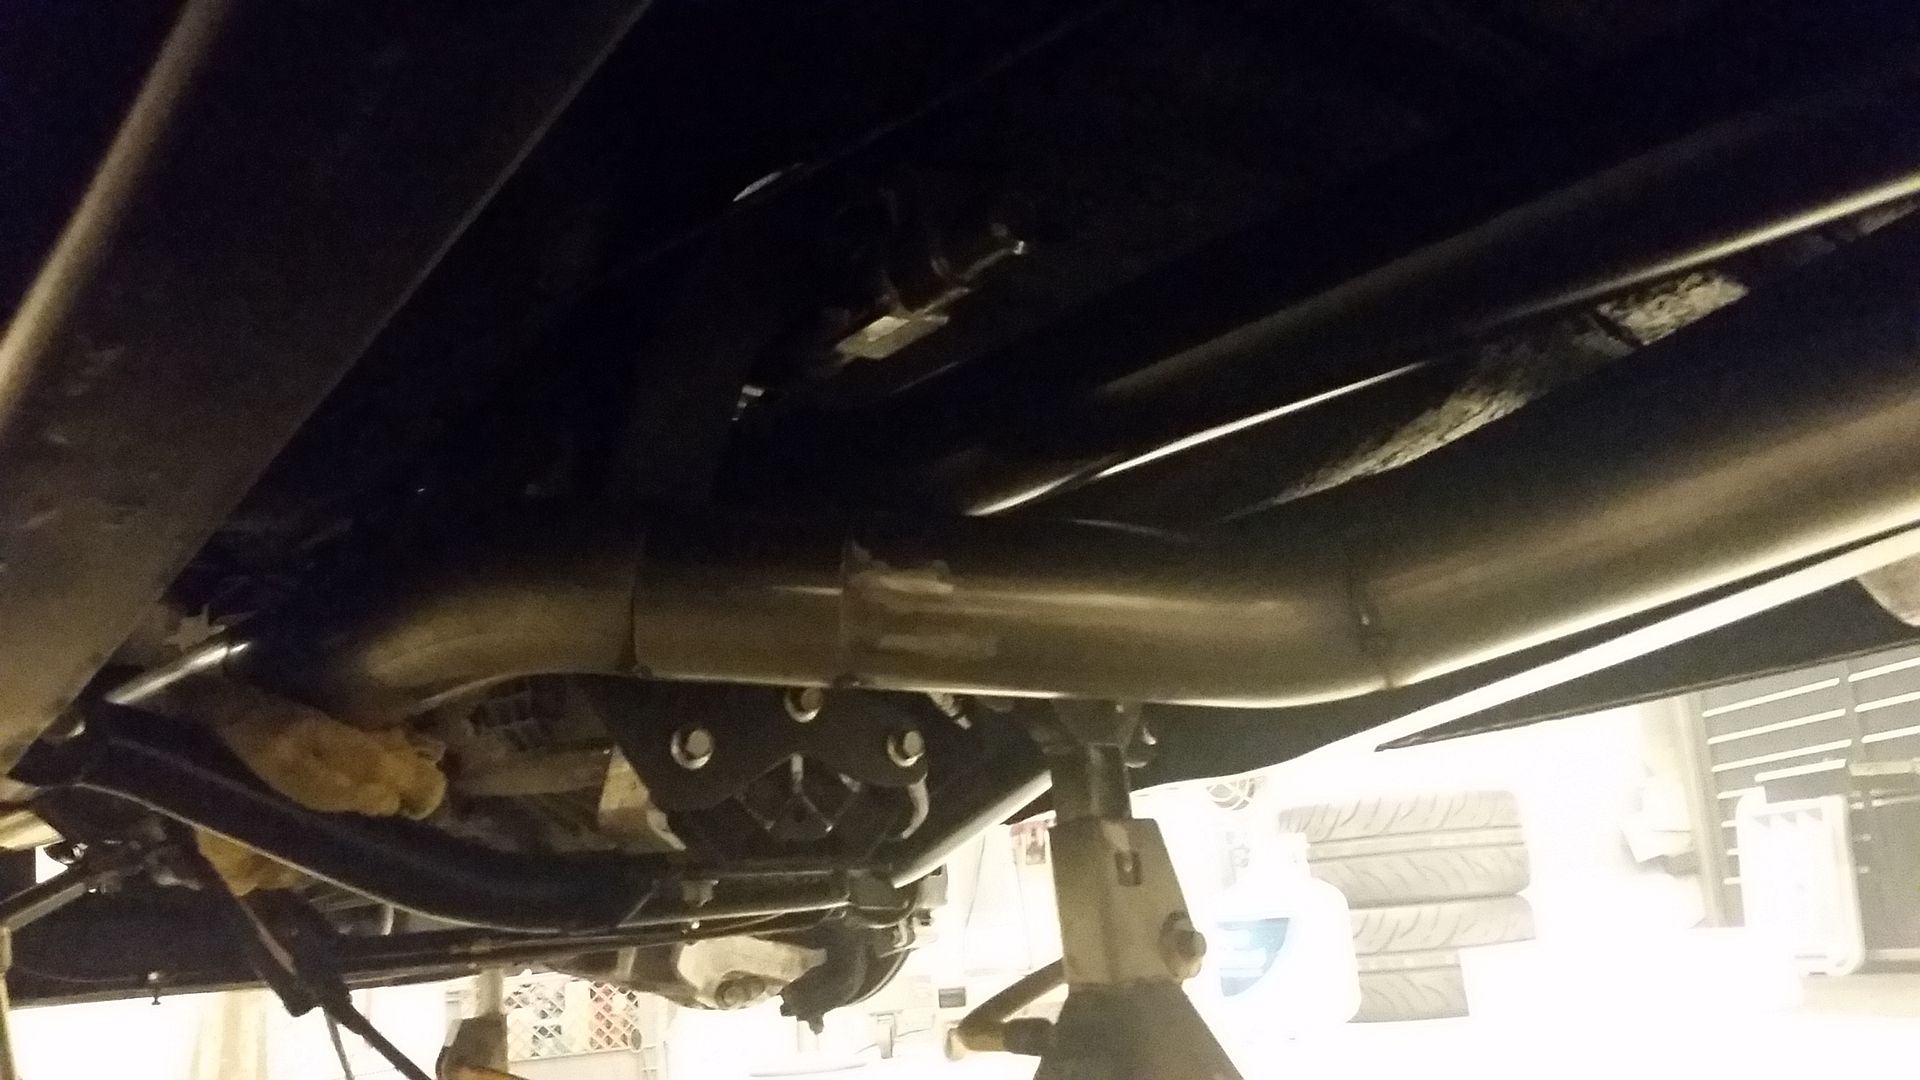
Managed to get the header flange over the crossmember and back to the V Bands done, then from the V bands around the transmission, built the y connector from scratch and got that all tied in together last night. Its hard building exhaust on the floor and trying to build it all neat and tight with very very small gaps.
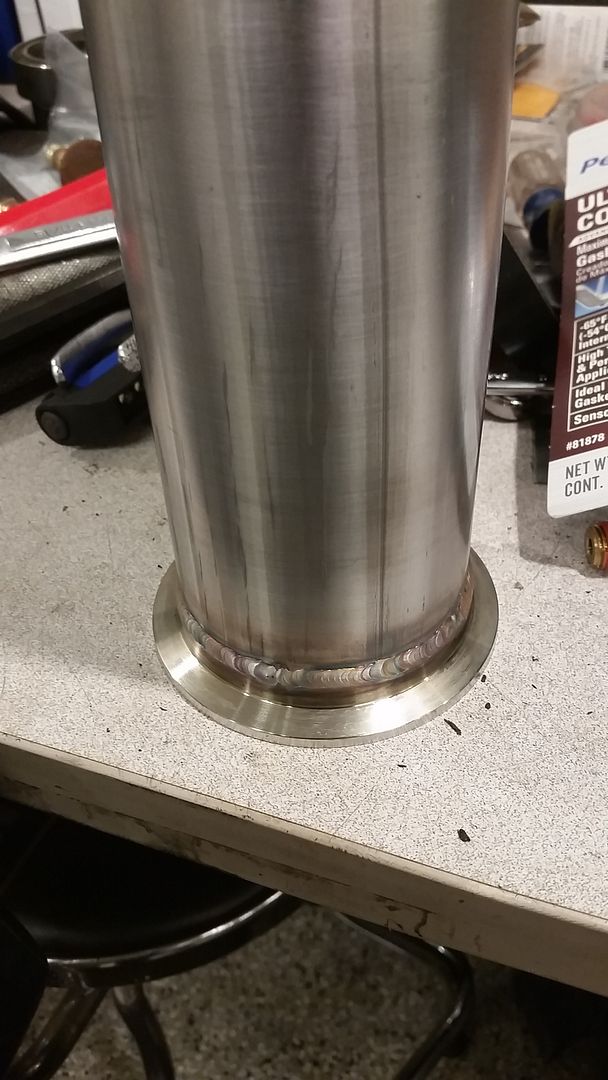
I spent a long time getting these just right.
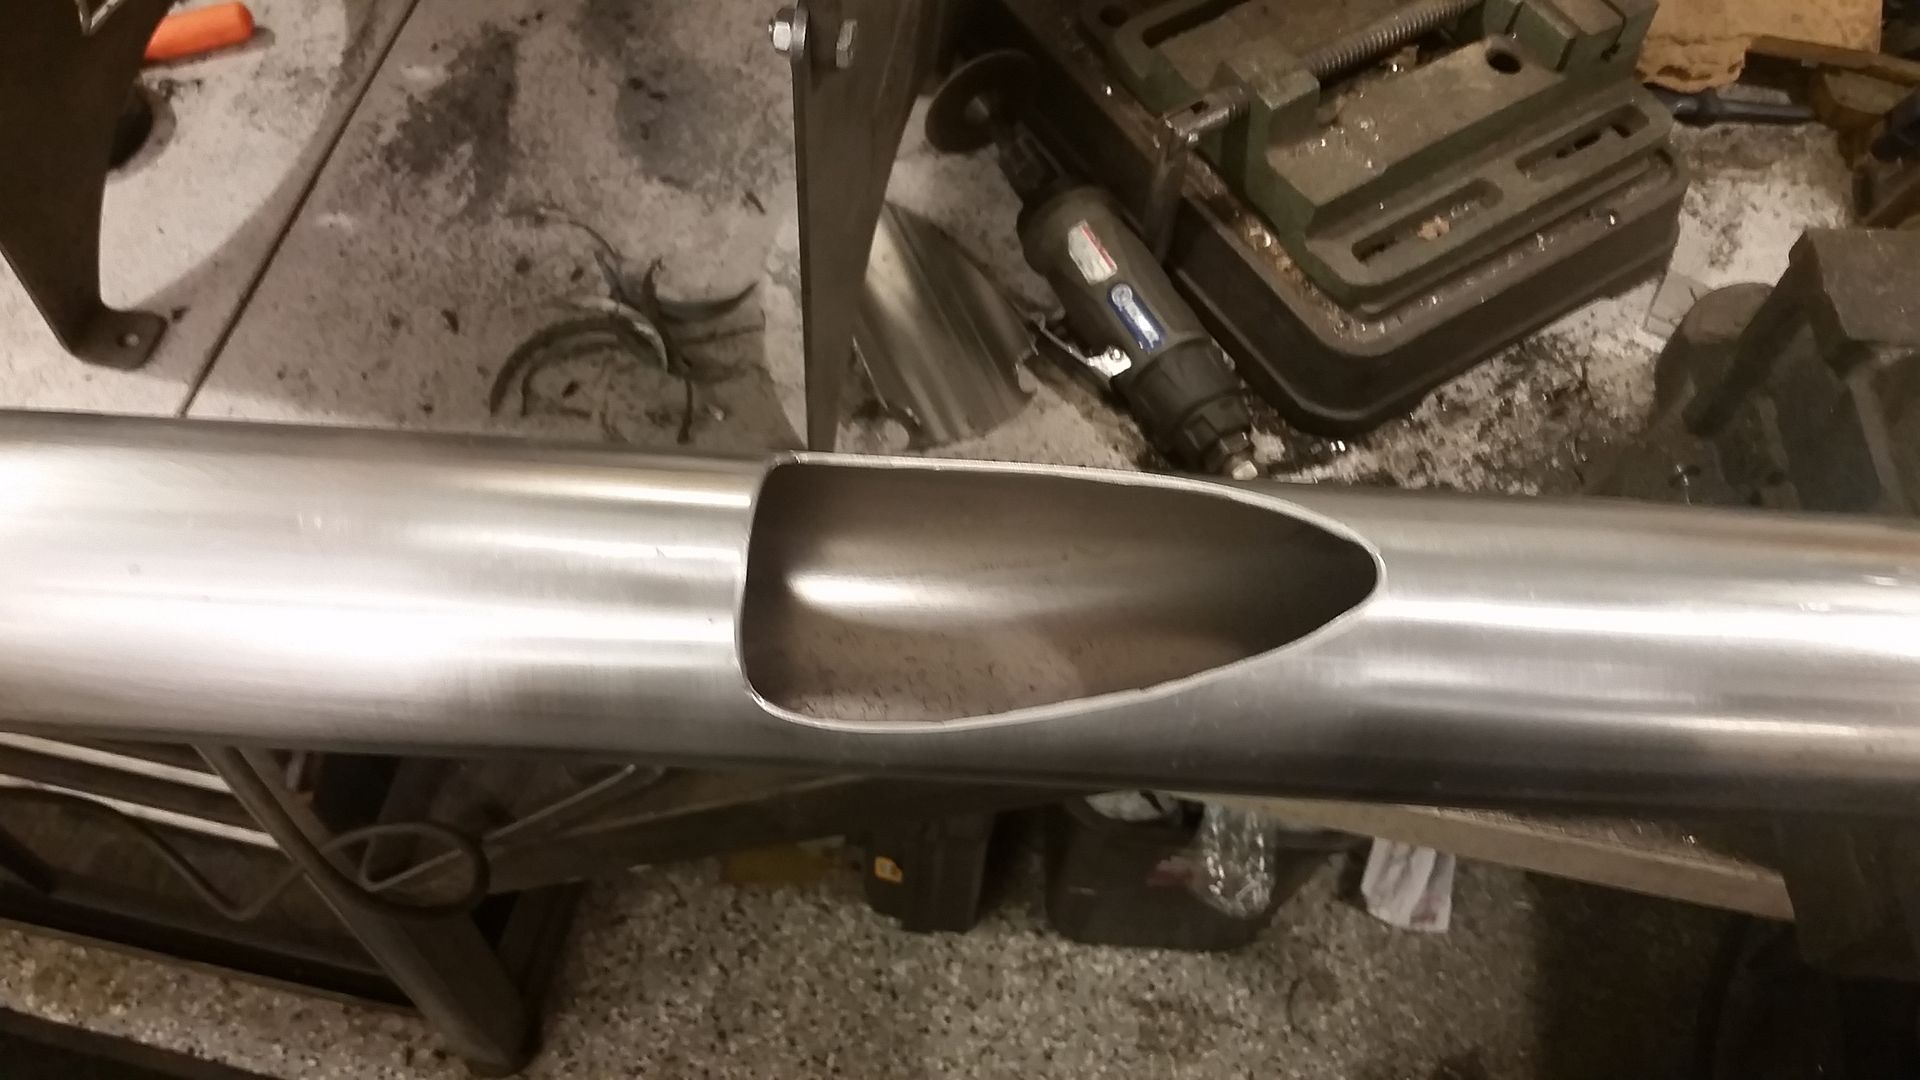
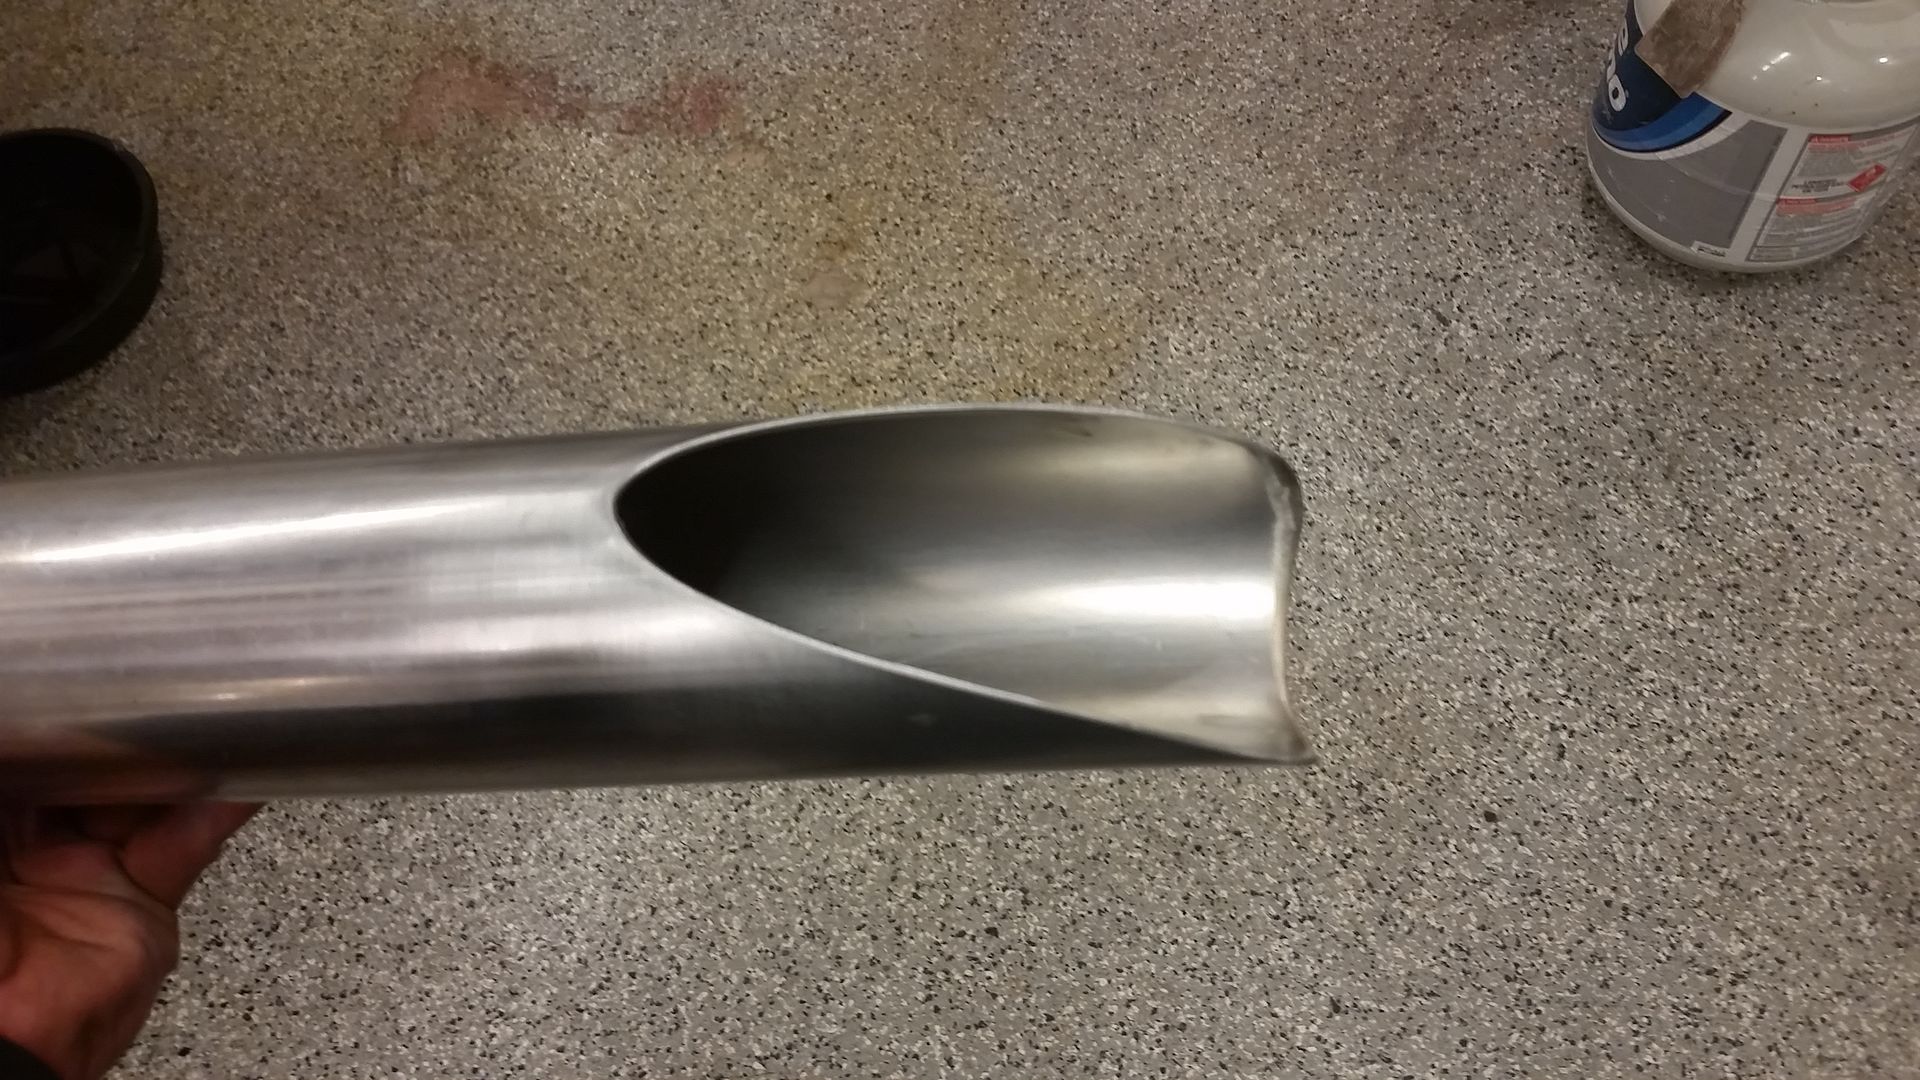
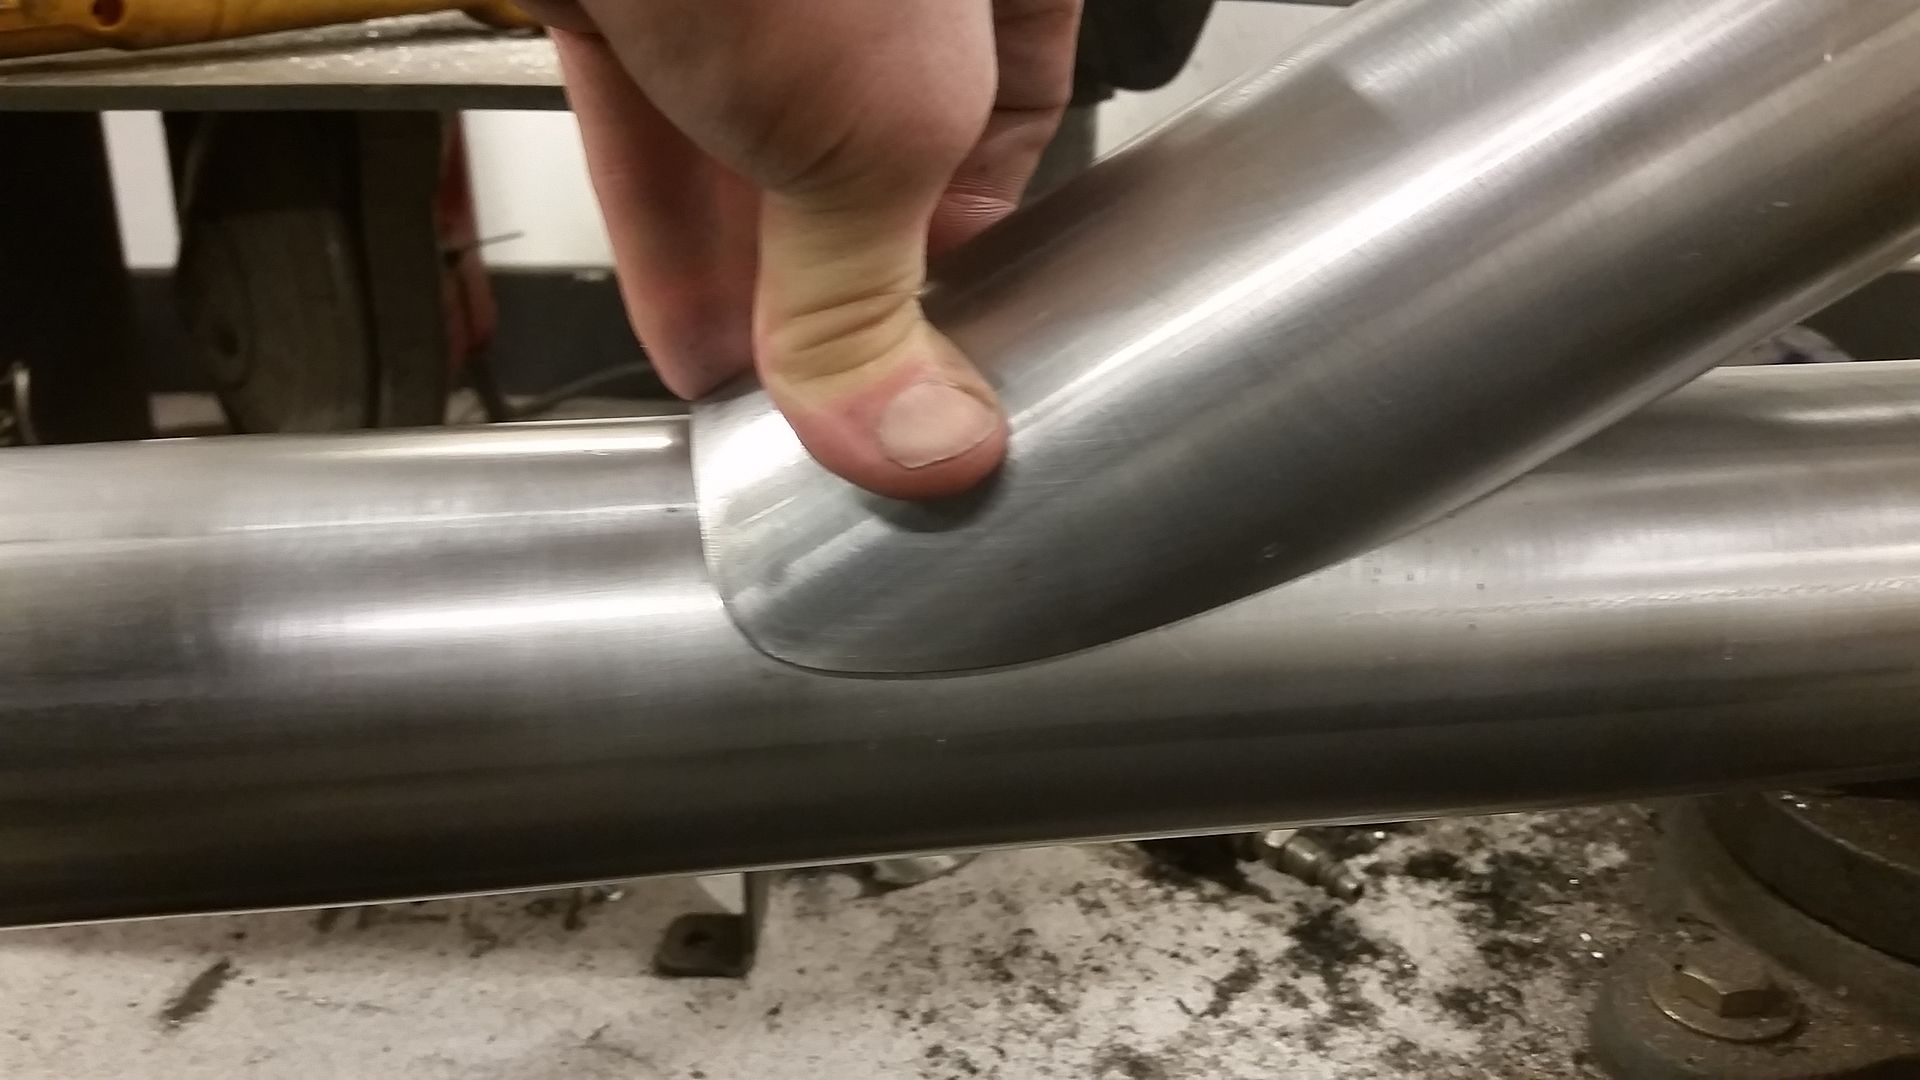
Fit up is about perfect, there is no gap all the way around it.
Here is what it looks like under the truck. Sorry for the crappy cluttered photo. I really hope to have the exhaust all mocked up tomorrow and pull it out. I need to figure out if I am going to try and take it to a friends house to tig weld or just use the stainless wire that I have in my machine and get it done. His welds are masterful to say the least.
Also need to get some 3/8" round stainless for the hangers.
Headed to pick the wife's new car up tonight so no shop time.....happy wife though =)
Sean
-
ablokzyl
- New Member

- Posts: 17
- Joined: Wed Dec 02, 2015 3:18 pm
Re: Hackster's F100 #2 CV Swap 6 speed manual and Coyote
Exhaust looks great! Yes I have personally seen these engines. I am a tech in a Ford dealership so I get to see all kinds of fun things like an oil soaked MAF causing engine problems. Most times the customer complaint is a check engine light.
-
crazyhorse
- 100% FORDified!

- Posts: 1514
- Joined: Sun Jan 27, 2008 9:24 pm
Re: Hackster's F100 #2 CV Swap 6 speed manual and Coyote
Mr Hackster, it is amazing to see all the nice pictures and read you posts.
I like all the great work you have done.
Thank you sir for all the rebuild posts/ pictures.
I like all the great work you have done.
Thank you sir for all the rebuild posts/ pictures.
-
hackster
- Preferred User

- Posts: 317
- Joined: Fri Oct 18, 2013 11:21 am
Re: Hackster's F100 #2 CV Swap 6 speed manual and Coyote
Well, that is a pretty reputable source then. Ill look into a new filter. Appreciate the input man.ablokzyl wrote:Exhaust looks great! Yes I have personally seen these engines. I am a tech in a Ford dealership so I get to see all kinds of fun things like an oil soaked MAF causing engine problems. Most times the customer complaint is a check engine light.
Thank you for following along.crazyhorse wrote:Mr Hackster, it is amazing to see all the nice pictures and read you posts.
I like all the great work you have done.
Thank you sir for all the rebuild posts/ pictures.
Managed to get a little bit of work done on the exhaust this morning. Finished the rear part and got the exit figured out. It took me a few times to get it but it turned out good. I am pretty happy with the final results.
Got the hangers all bolted in as well and welded up the hangers to the exhaust. It was ready at that point to come out and get welded. I asked my buddy if he would weld it up, it just looked too cool to not tig weld it.
I pulled out everything and gave it to Robbie to get welded up.
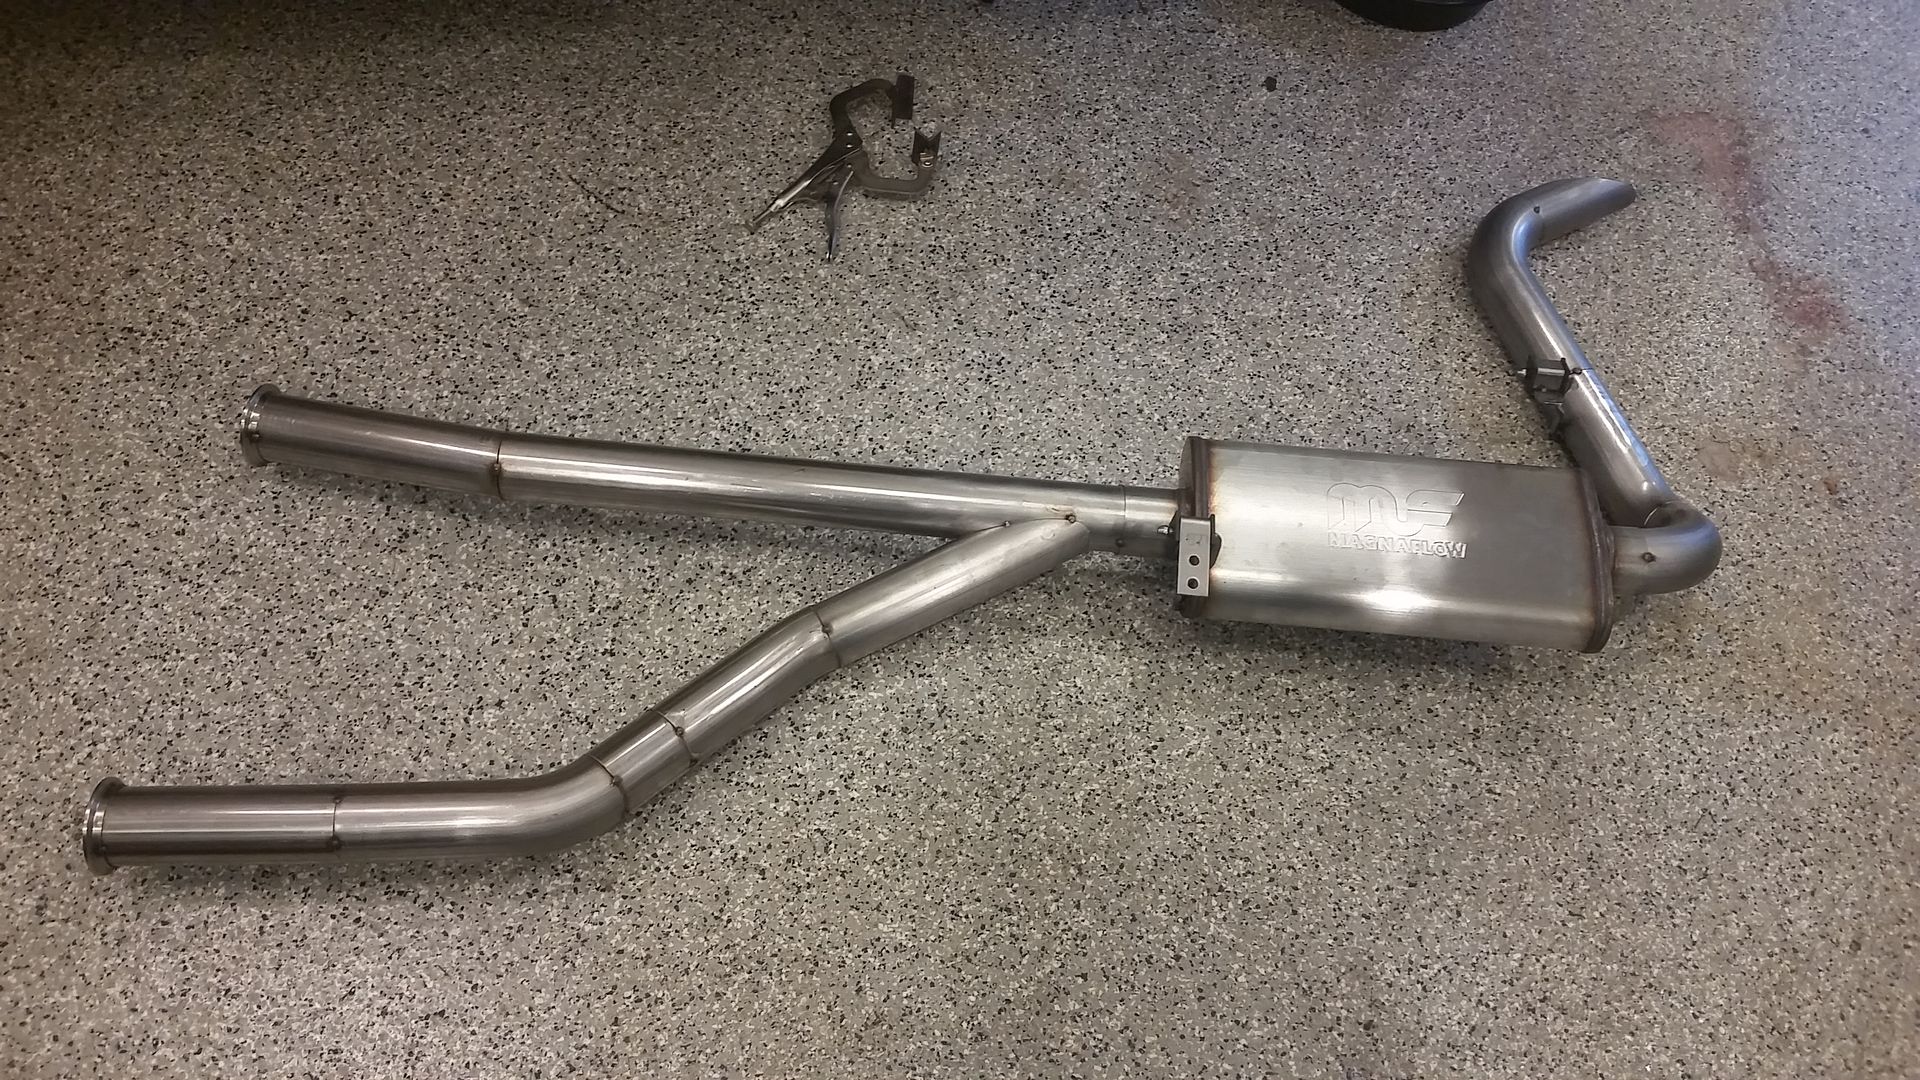
Only pic I snapped of it.
Sean
- poke em
- New Member

- Posts: 63
- Joined: Wed Nov 26, 2014 1:58 am
- Location: Hayden Idaho
Re: Hackster's F100 #2 CV Swap 6 speed manual and Coyote
I love this build. Waiting to hear this beast with the exhaust installed.
I put a Mark VIII I 4.6 in mine with a mac prochamber into a pair of dynomax turbos with turn downs in front of the rear axle. It's pretty quiet until I step on it. The only thing I don't like is the drone. I will likely redo them to exit in front of the rear wheels at some point.
I put a Mark VIII I 4.6 in mine with a mac prochamber into a pair of dynomax turbos with turn downs in front of the rear axle. It's pretty quiet until I step on it. The only thing I don't like is the drone. I will likely redo them to exit in front of the rear wheels at some point.
-
hackster
- Preferred User

- Posts: 317
- Joined: Fri Oct 18, 2013 11:21 am
Re: Hackster's F100 #2 CV Swap 6 speed manual and Coyote
I really like the Mac pro chamber's used to run them on my mustangs. Turn Downs under the truck would be pretty loud. Are you going to just put it under the bedside or cut a hole in the bed and run it out there? I like the side exit and I know it wont be too loud or droney if that is even a word. Its probably going to be waay too low but I really dont care =)poke em wrote:I love this build. Waiting to hear this beast with the exhaust installed.
I put a Mark VIII I 4.6 in mine with a mac prochamber into a pair of dynomax turbos with turn downs in front of the rear axle. It's pretty quiet until I step on it. The only thing I don't like is the drone. I will likely redo them to exit in front of the rear wheels at some point.
I picked up these lights a while back and was excited to get them in the truck. I have run them on several other cars and they are awesome. Replaceable H4 bulbs and excellent beam pattern.
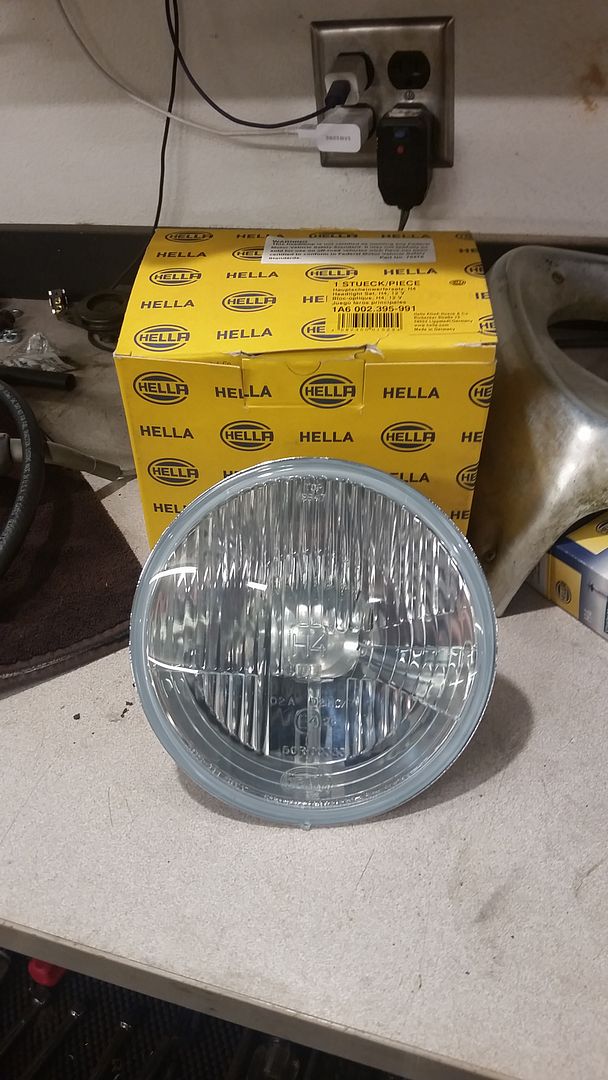
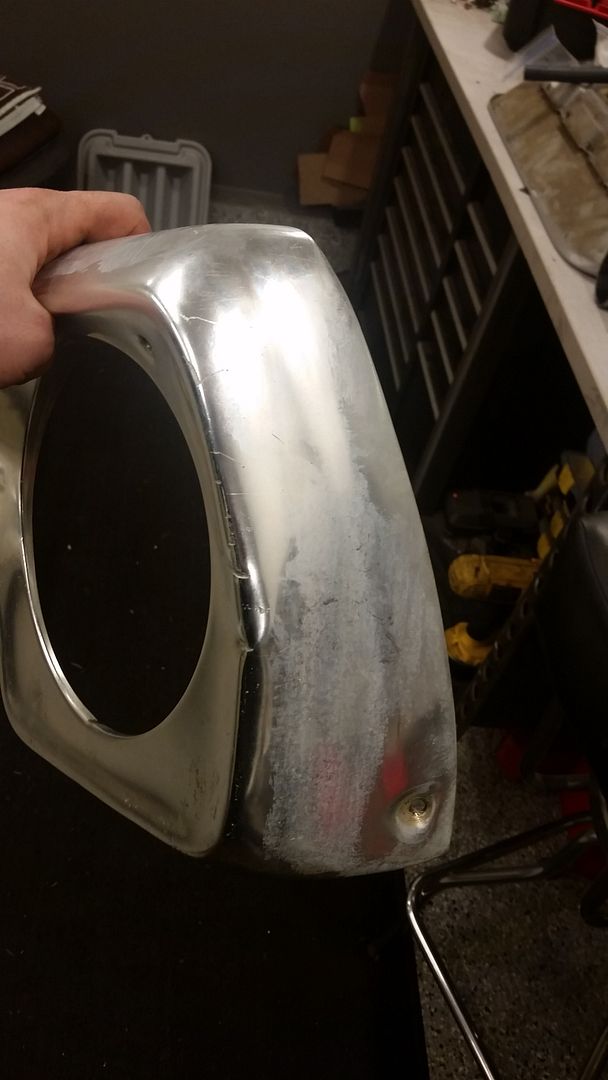
Spent a little bit of time cleaning up the bezels, they still look like ass, but less dirty and cloudy now.
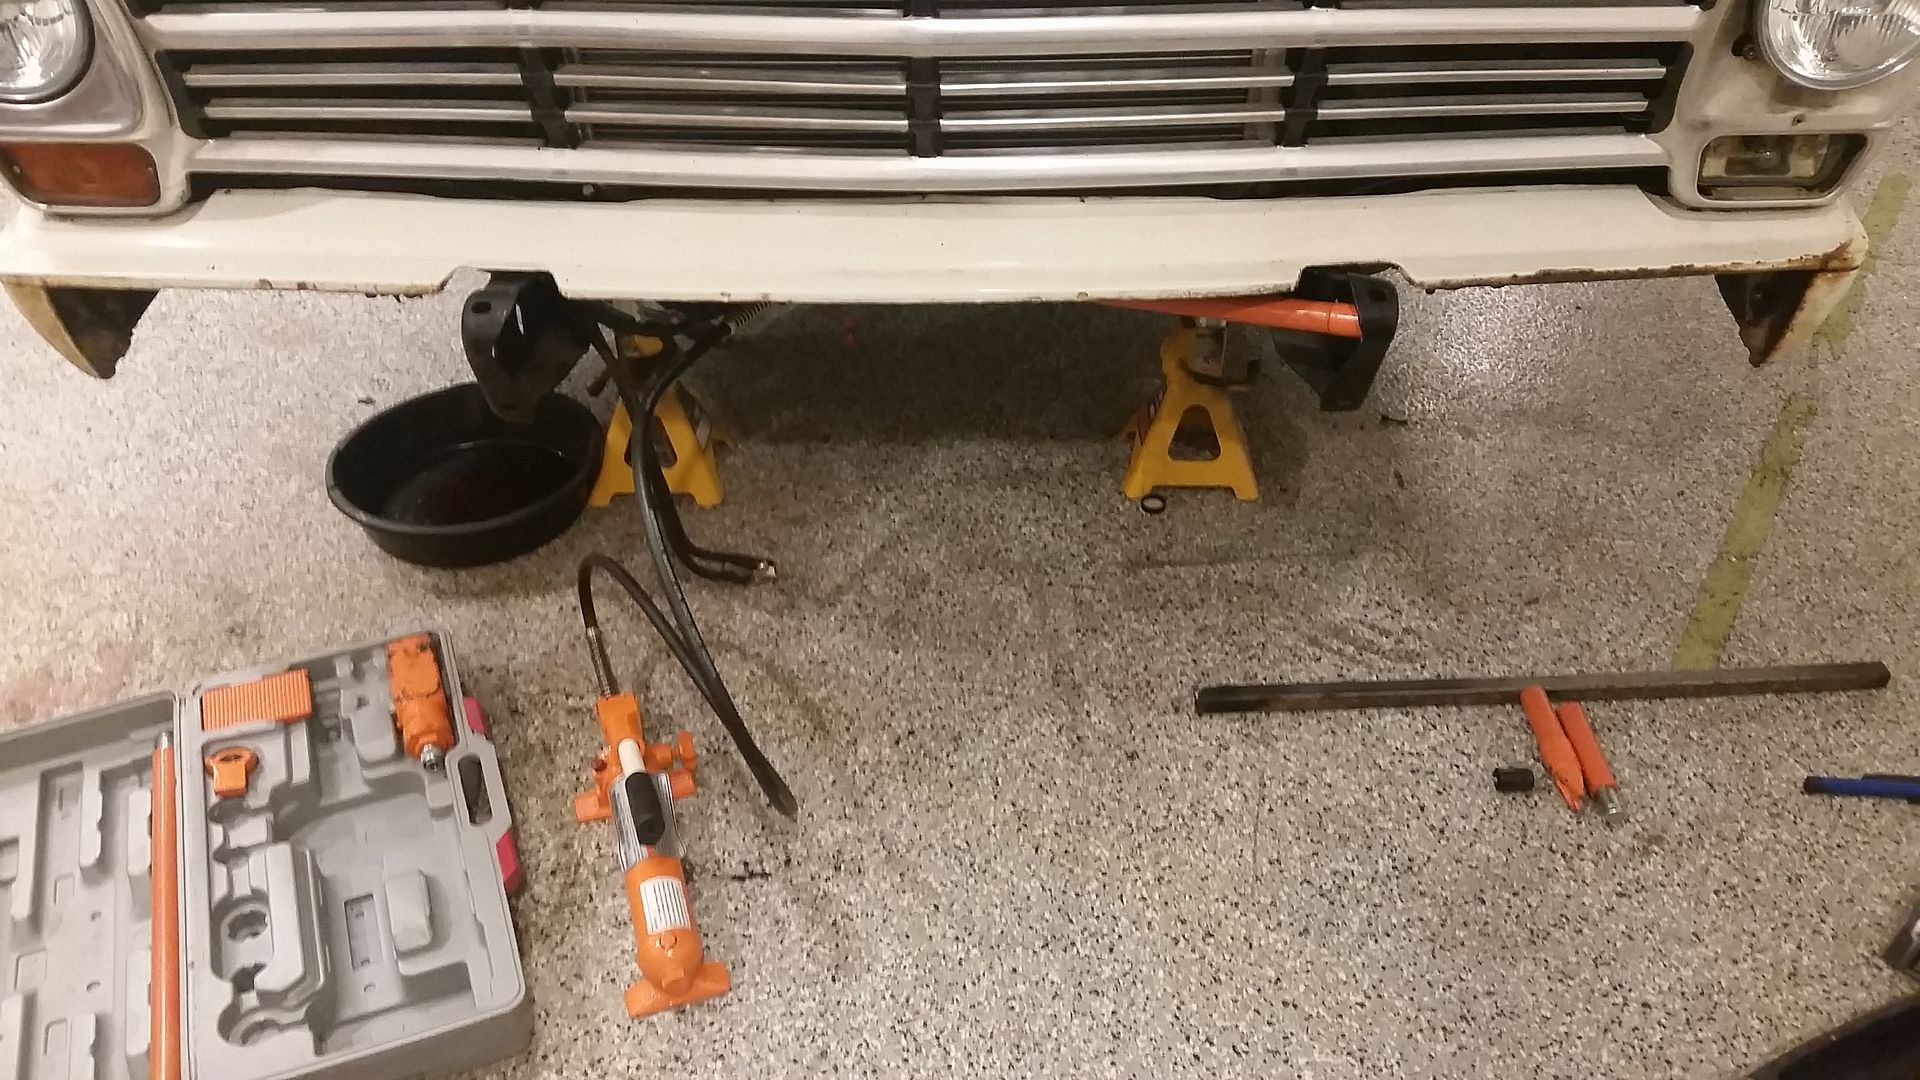
Went to put the bumper on and things up front might not be perfect. It took a little work with the porta power to push out the frame horn to get things to bolt together but I got it. I have a little more work to do to get things straight and square but pretty sure I can get it there.
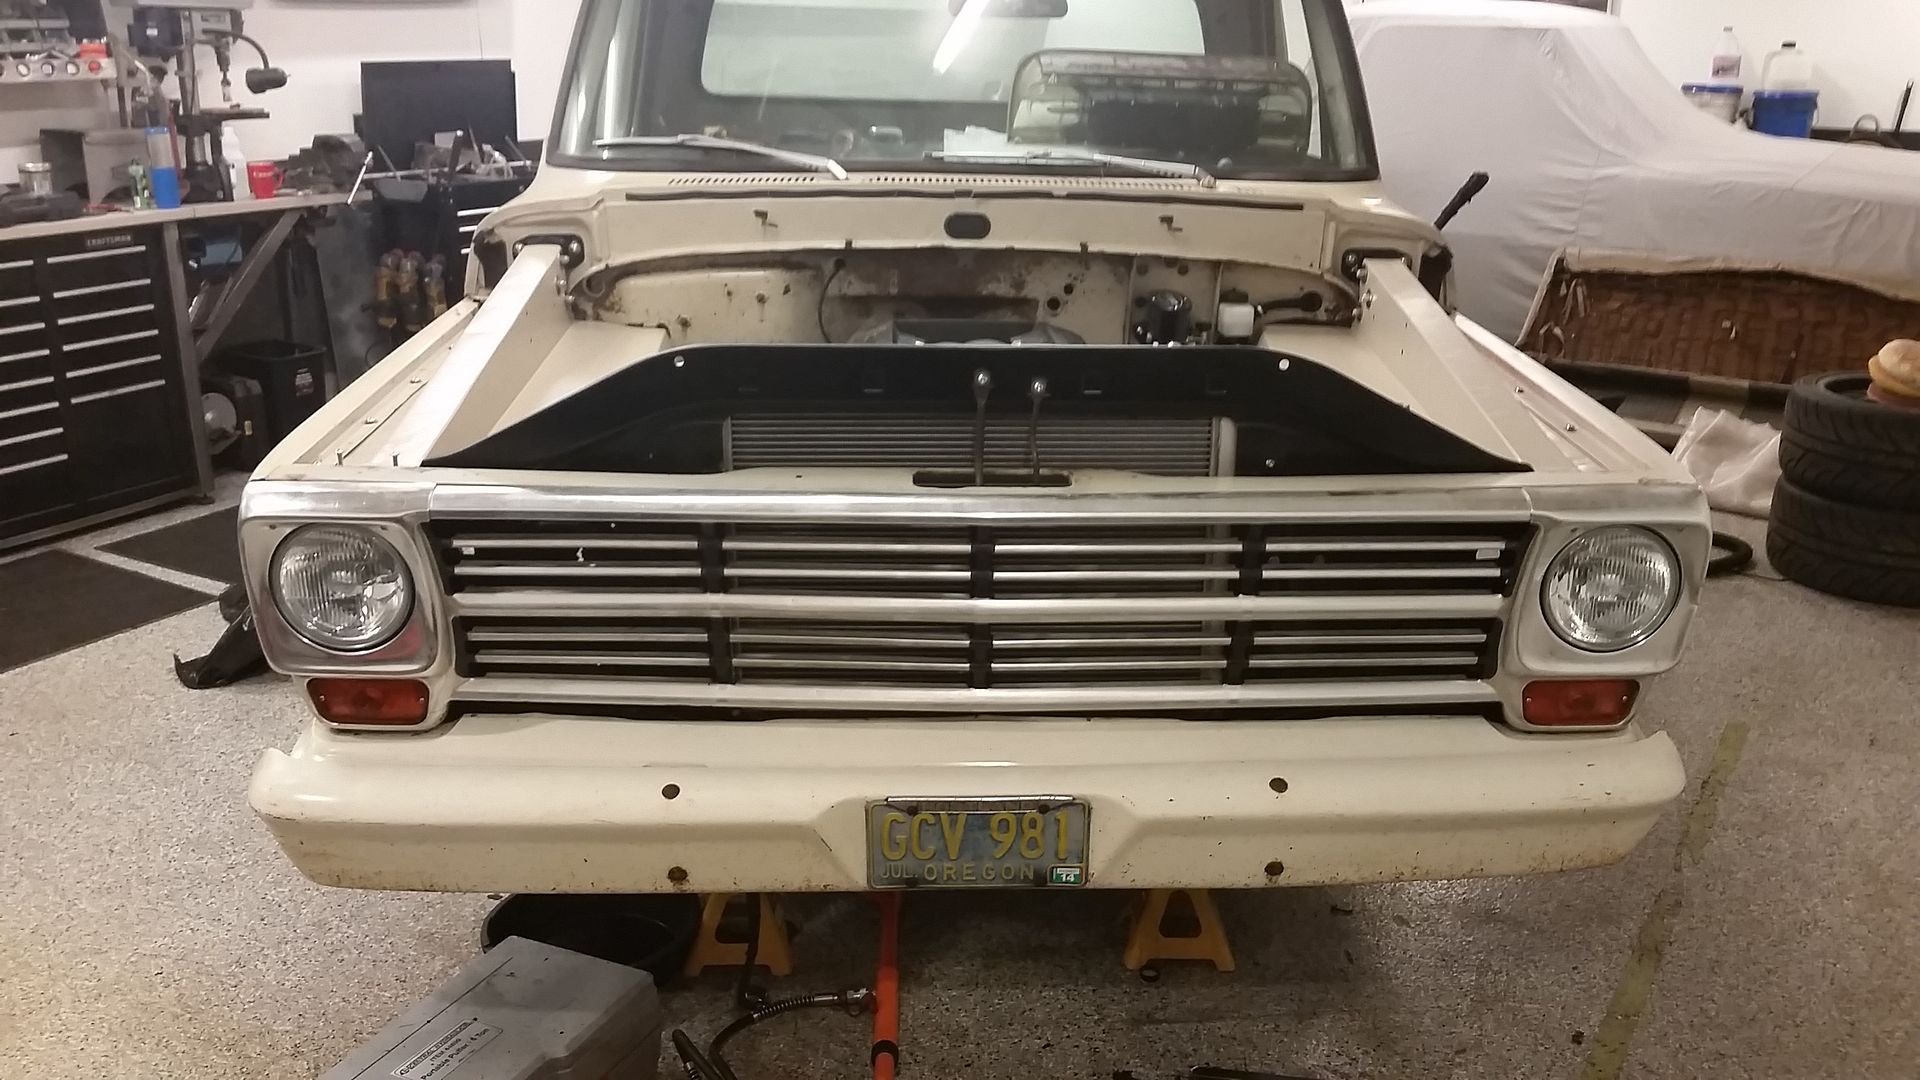
And hot damn look at that, I have a frontend of an actual truck, It actually looks pretty good. I feel like you can tell even from the outside that there is more than just an old farm truck here.
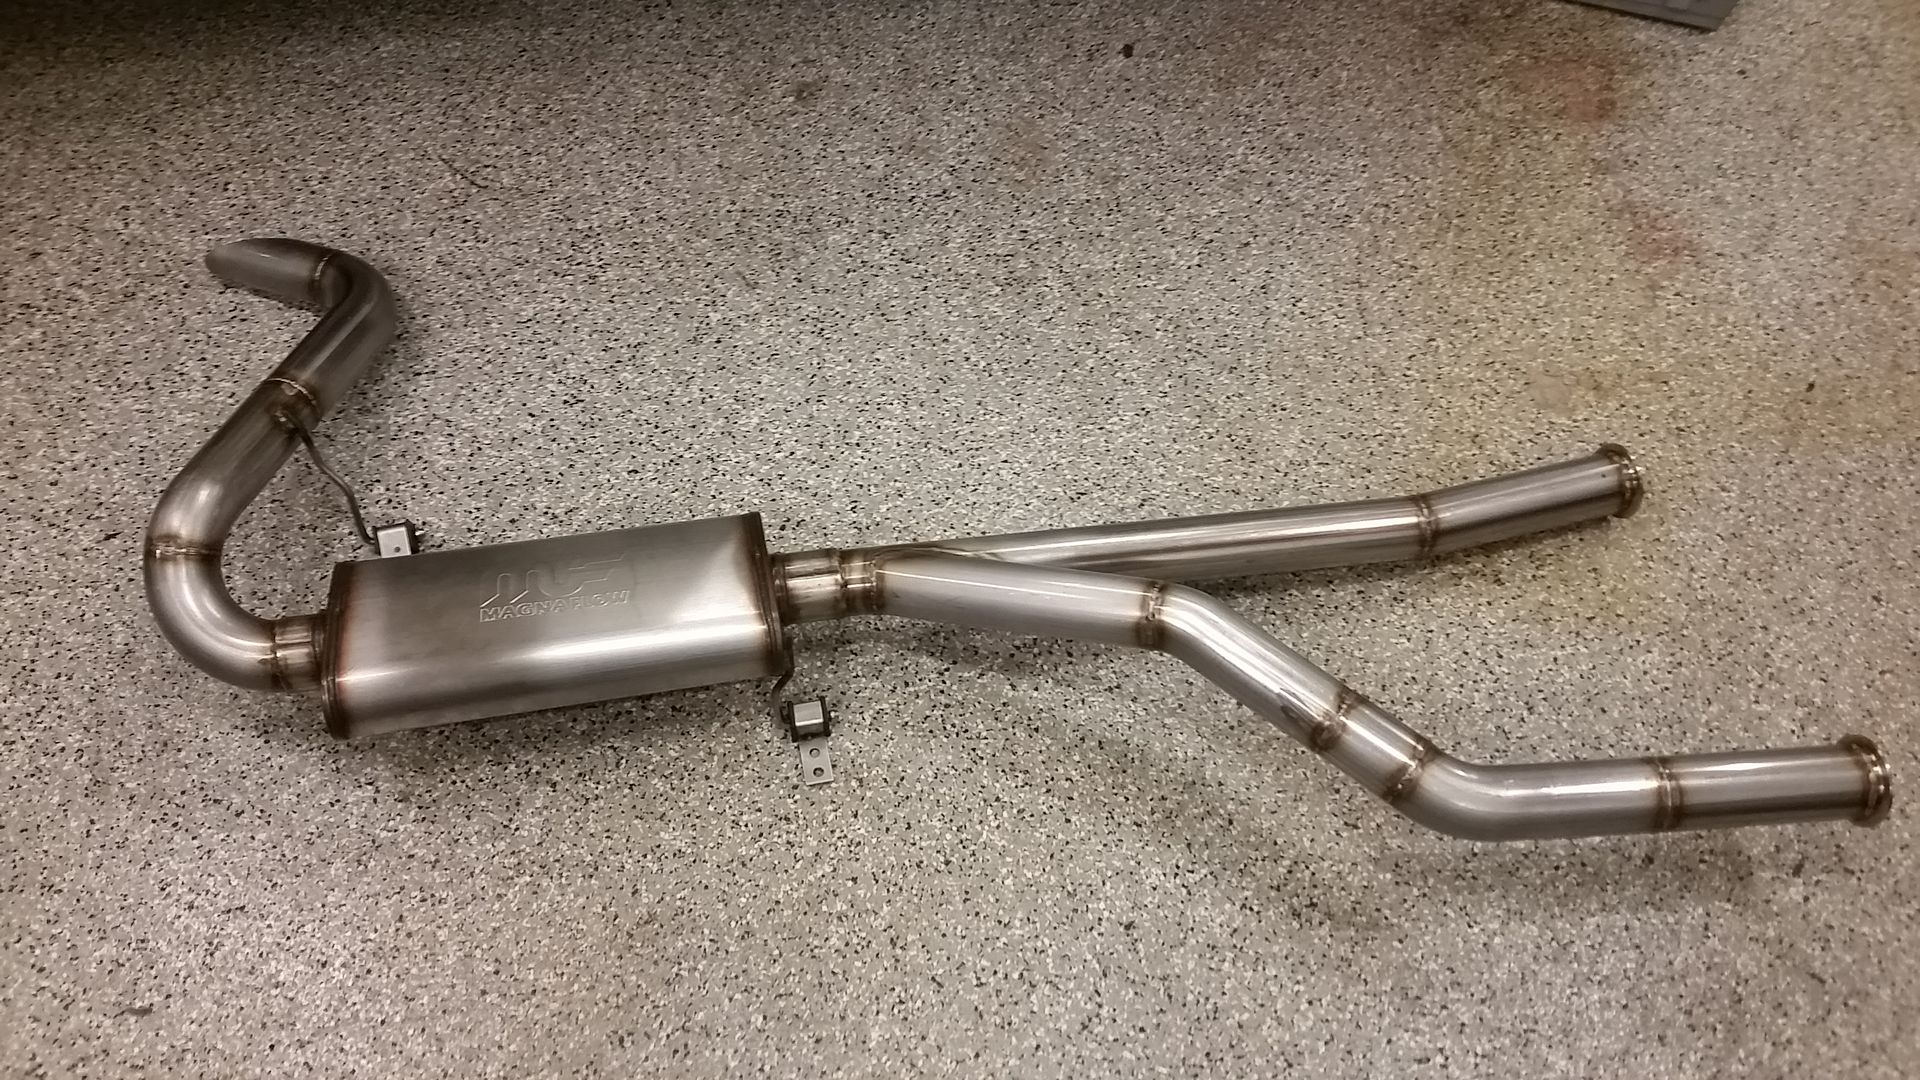
Made the trek out to the other side of town and picked up the exhaust from my buddy. He had a few issues with the 409, but ended up looking good. Its a much cleaner process than mig welding.....I need to get a tig and learn how to run it.
Exhaust all welded up and ready to go on..
All bolted in
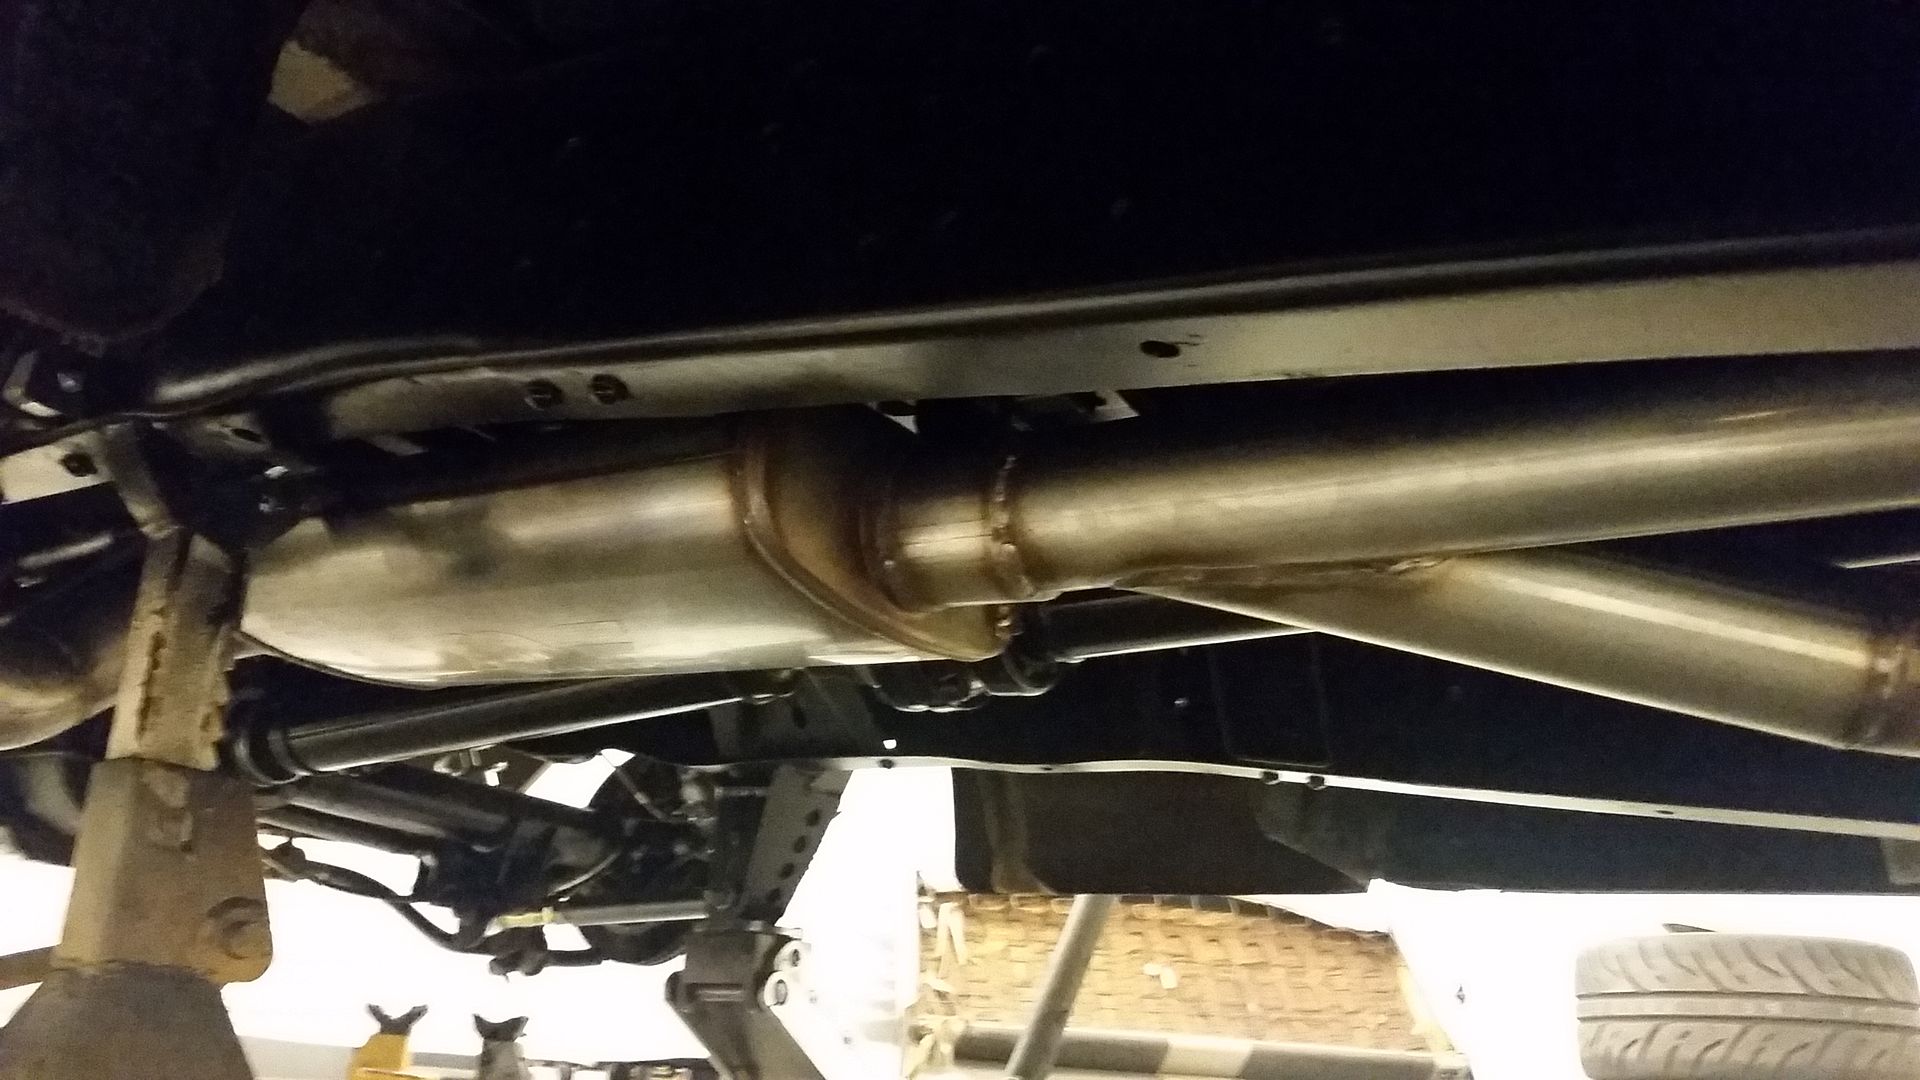
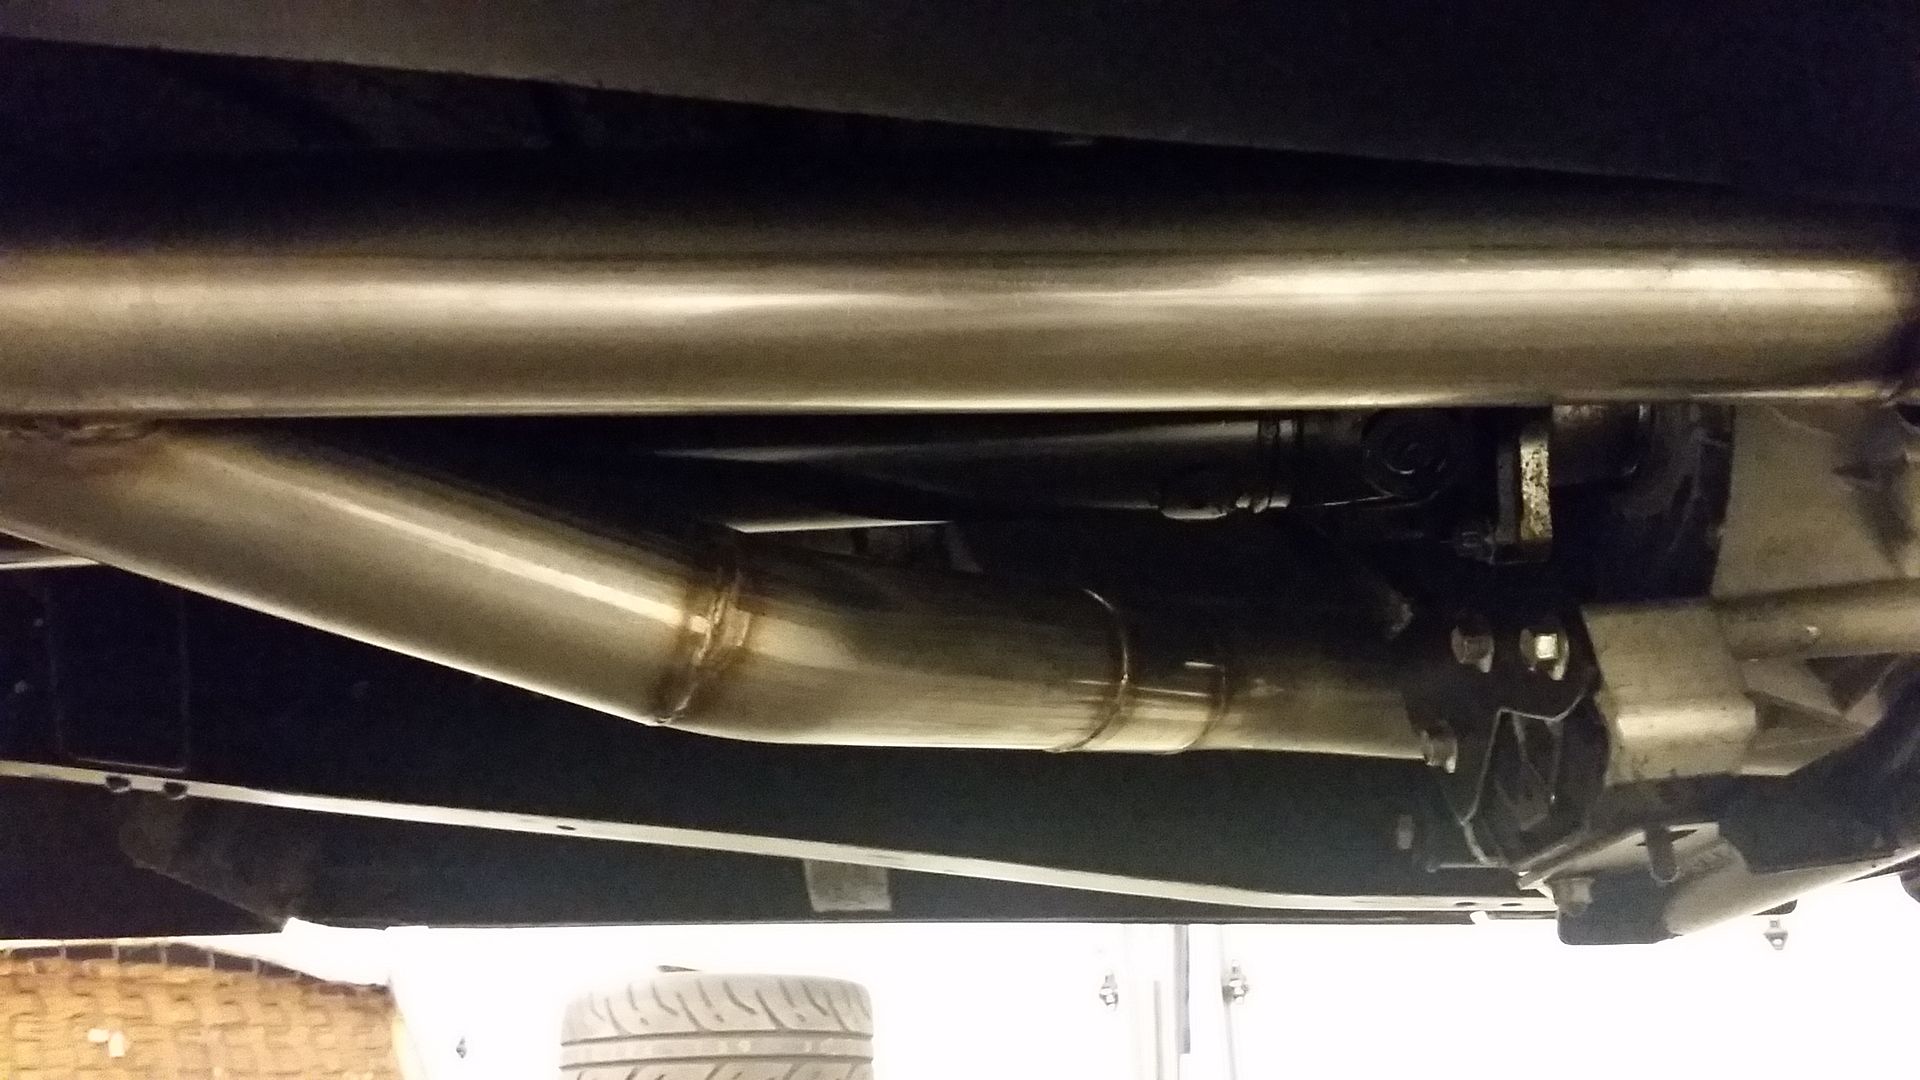
So.....Exhaust is done and all bolted on, v bands, gaskets at the collector flanges, done. Little bit of copper high temp on the v bands to make sure it doesnt leak after the welding
Here is where the side exit comes out, I think it looks pretty cool and flows with the wheelwell opening and the side of the truck
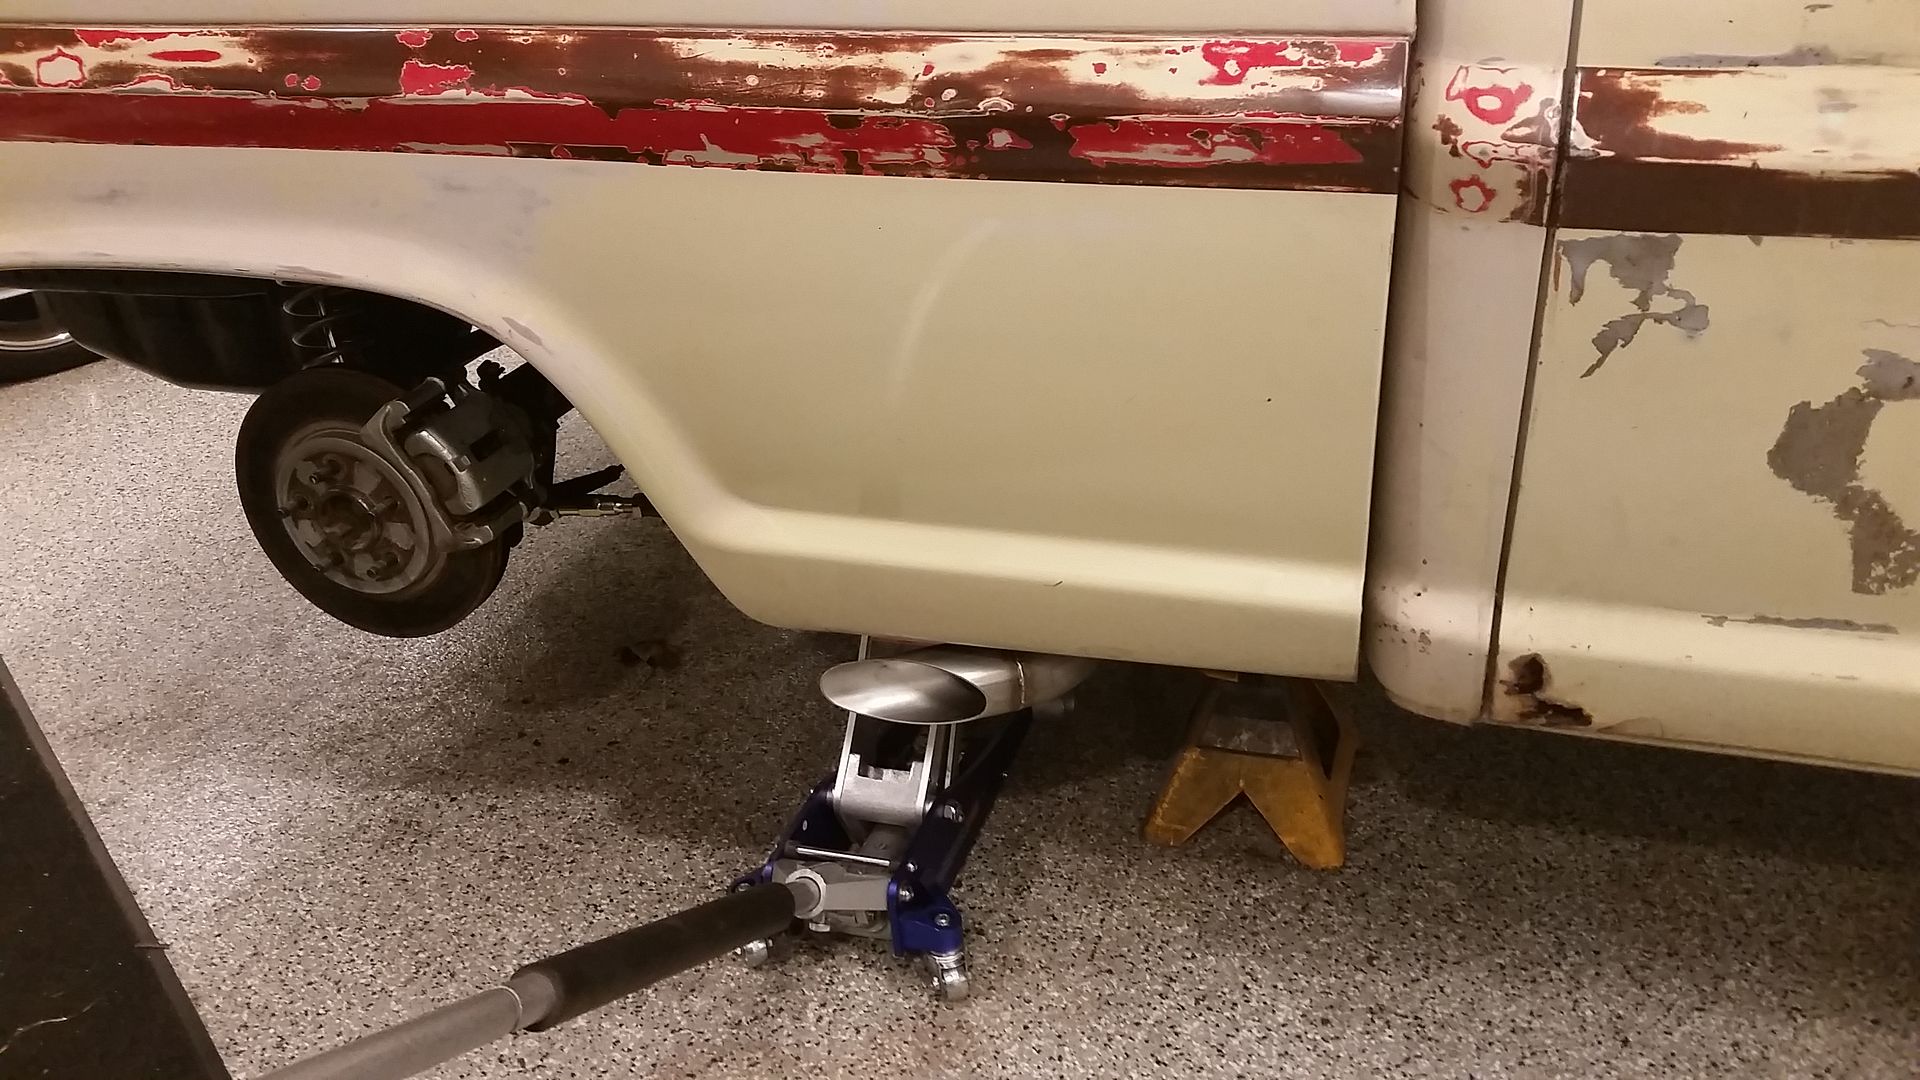
I had my wife put a couple of blocks of wood under the bed when I lifted up on it so I could make some clearance for the shock bolt so it was removable without pulling the bed. Also ran the fuel vent line with a -6 line up into the bedside behind the tailight and ran a small air filter on the line. No pics though.
Also cleaned up all the bed bolts and got those all installed and nuts on the bottom and tightened up.
Got the bolts under the truck and the rearend tightened up and went from rear to front with a pair of wrenches. Got all the loose stuff tightened up. Ran the drivers side wires in P clips for the front harness up and got things tidied up. Got the Wheels bolted back on and set it back on the ground. That felt damn good.
Fired it up and drove the bitch out the garage!!!!!! That is right, I drove it out of the garage, clutch feels excellent, brakes feel like ass but stop the truck, this is as far as I drove it, then pulled it back it. Sounds awesome.
<iframe width="560" height="315" src="https://www.youtube.com/embed/fMN1sVHpSN0" frameborder="0" allowfullscreen></iframe>
https://youtu.be/fMN1sVHpSN0
Pretty happy to see it looking whole and on the ground for the first time...
The very, very unsuspecting back end.
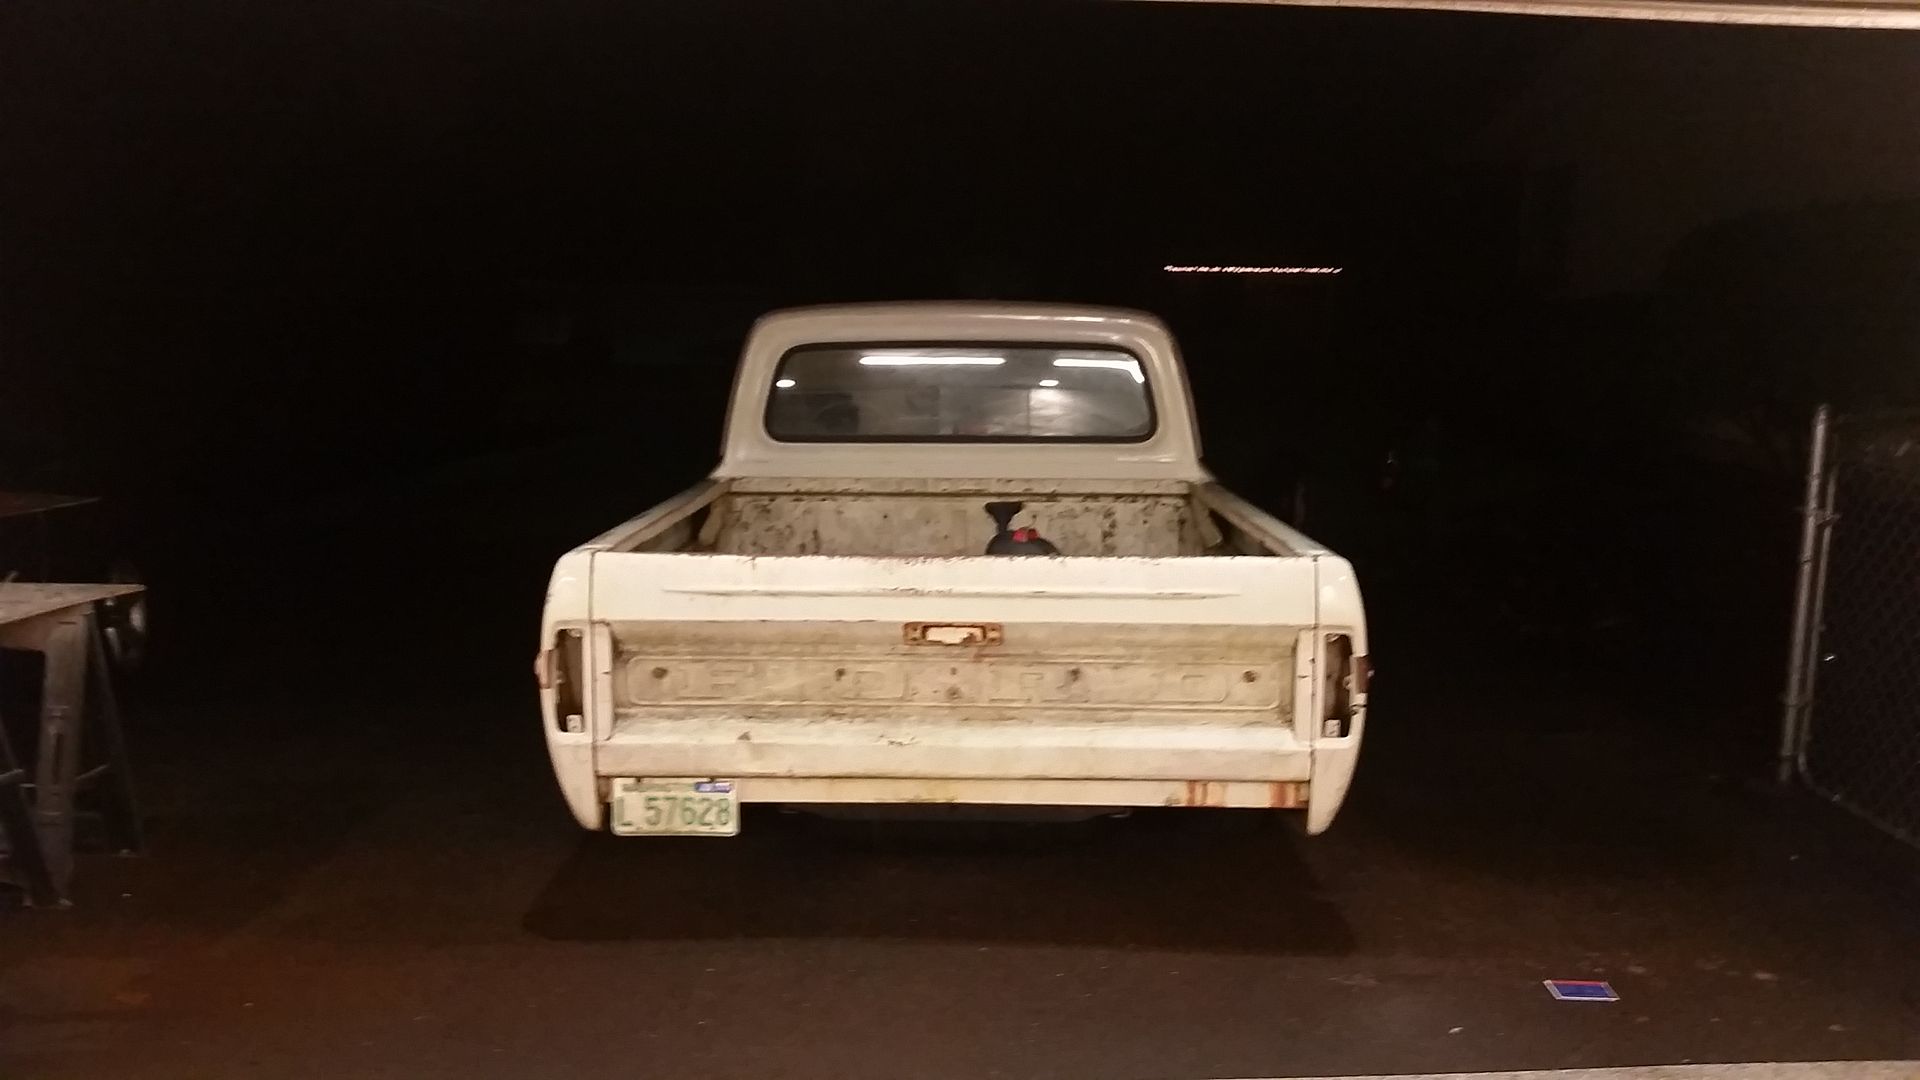
Sean
- poke em
- New Member

- Posts: 63
- Joined: Wed Nov 26, 2014 1:58 am
- Location: Hayden Idaho
Re: Hackster's F100 #2 CV Swap 6 speed manual and Coyote
Thanks for posting the video. Your exhaust sounds fantastic. I haven't thought it out fully, but at some point I will likely just dump them out the side at an angle similar to yours. It is very droney, louder in the cab than outside. I installed a little hush mat and that helped, but I don't think anything will get rid of it completely besides rerouting it. Thanks for the tip on the Hellas. When I wired up my front clip I used a relay for the headlights and that helped out alot, but not enough. II've been looking for a better headlight and this looks like a nice inexpensive setup.
On your frame horns, I had a similar issue. When I boxed the frame in I must have caused some warping and when I started assembling the front end I couldn't get the rad support to bolt up. I had to spread the frame and added a 1.5" square tube crossmember under the support to help keep things square. If i were to build this truck again I would be a little more careful welding up my boxing plates.
The truck looks and sounds great. I'm looking forward to seeing some video of you ripping up some autocross.
-
IN2FORD
- Preferred User

- Posts: 345
- Joined: Sun Apr 27, 2014 3:54 pm
- Location: Cookeville TN
Re: Hackster's F100 #2 CV Swap 6 speed manual and Coyote
Wow you got this thing running already!! You have built two trucks in the time it has taken me to tear one apart and begin to put it together. I need you in Tennessee for about one month on a hot rod vacation 
Barry
Barry
-
hackster
- Preferred User

- Posts: 317
- Joined: Fri Oct 18, 2013 11:21 am
Re: Hackster's F100 #2 CV Swap 6 speed manual and Coyote
I am motivated what can I say.....=)IN2FORD wrote:Wow you got this thing running already!! You have built two trucks in the time it has taken me to tear one apart and begin to put it together. I need you in Tennessee for about one month on a hot rod vacation
Barry
You let me know where I am staying and Ill be there.....well maybe not a month but I would love to see Tennessee someday.
The lights are awesome, and they are not super cheap though, but for what they are they are awesome and just look so much more modern and proper.poke em wrote:Thanks for posting the video. Your exhaust sounds fantastic. I haven't thought it out fully, but at some point I will likely just dump them out the side at an angle similar to yours. It is very droney, louder in the cab than outside. I installed a little hush mat and that helped, but I don't think anything will get rid of it completely besides rerouting it. Thanks for the tip on the Hellas. When I wired up my front clip I used a relay for the headlights and that helped out alot, but not enough. II've been looking for a better headlight and this looks like a nice inexpensive setup.
On your frame horns, I had a similar issue. When I boxed the frame in I must have caused some warping and when I started assembling the front end I couldn't get the rad support to bolt up. I had to spread the frame and added a 1.5" square tube crossmember under the support to help keep things square. If i were to build this truck again I would be a little more careful welding up my boxing plates.
The truck looks and sounds great. I'm looking forward to seeing some video of you ripping up some autocross.
I tacked the frontend together with a piece of tube before I cut the frontend apart, I know it did not more, more than likely the frame guy had it a little more off than he said he did. I think I am going to have him pull on it and get it straighter, I feel I paid good money for him to do his work, he should get it right.
Been an interesting couple of days. Spent last night cleaning up the total craphole of a garage it has been turned into the past few months. Also got the little beemer all cleaned up and put away in the garage.
Oh man did that feel good to get things all cleaned up and put away.
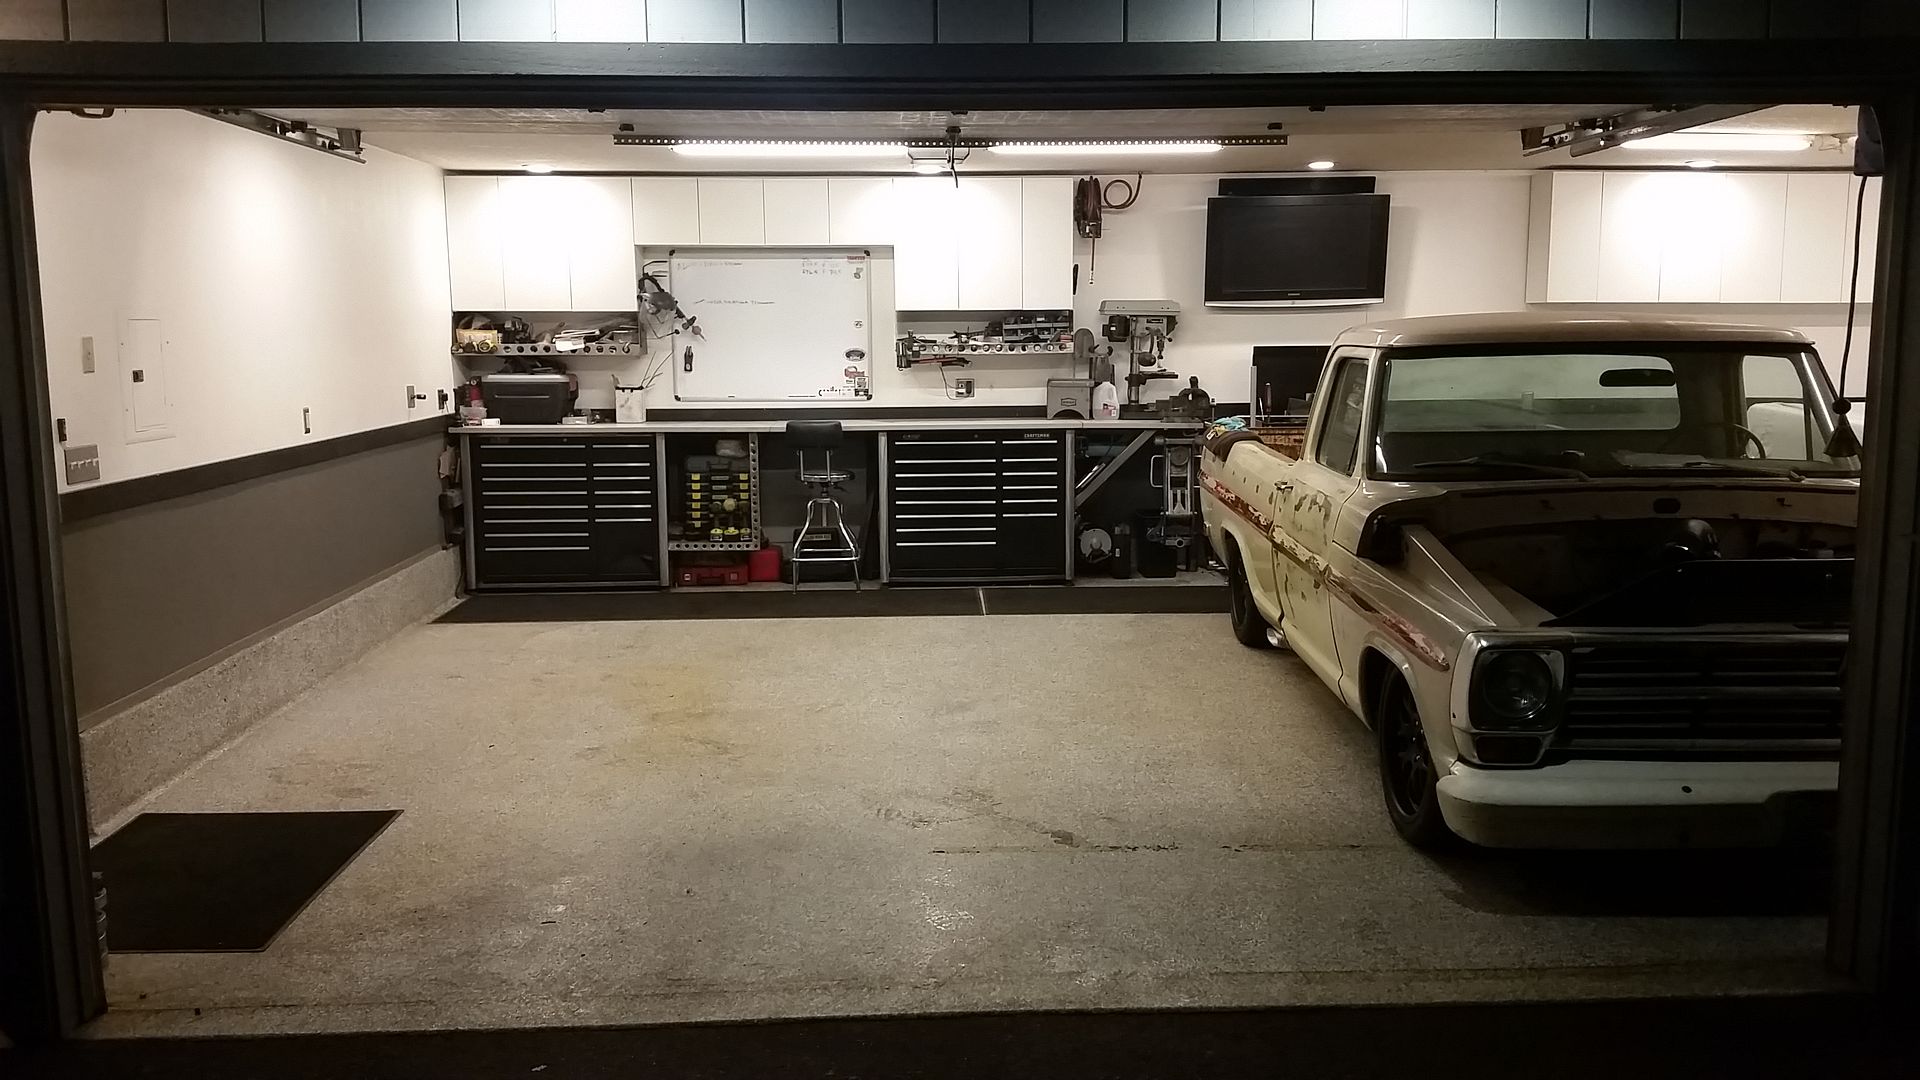
Last night I could not sleep, I mean slept maybe an hour or so, finally ended up just getting up and going to work. Worked from 2 am to 3 pm this afternoon and as of right now have basically been up for.....39 hours straight. Not feeling too great right now as can be imagined.
I put some coolant into the truck and found that the T connector from the thermostat housing out to the engine and back to the radiator was cracked.......and of course nobody has one in stock so I ordered it from back east, hope it shows up soon.....at least by the weekend.
Drug out some sand paper and got to work on the drivers side of the truck. I need to spend a little bit more time on the bottom of the doors but its getting better
Hit it with the buffer and the old **** shines up pretty damn good.
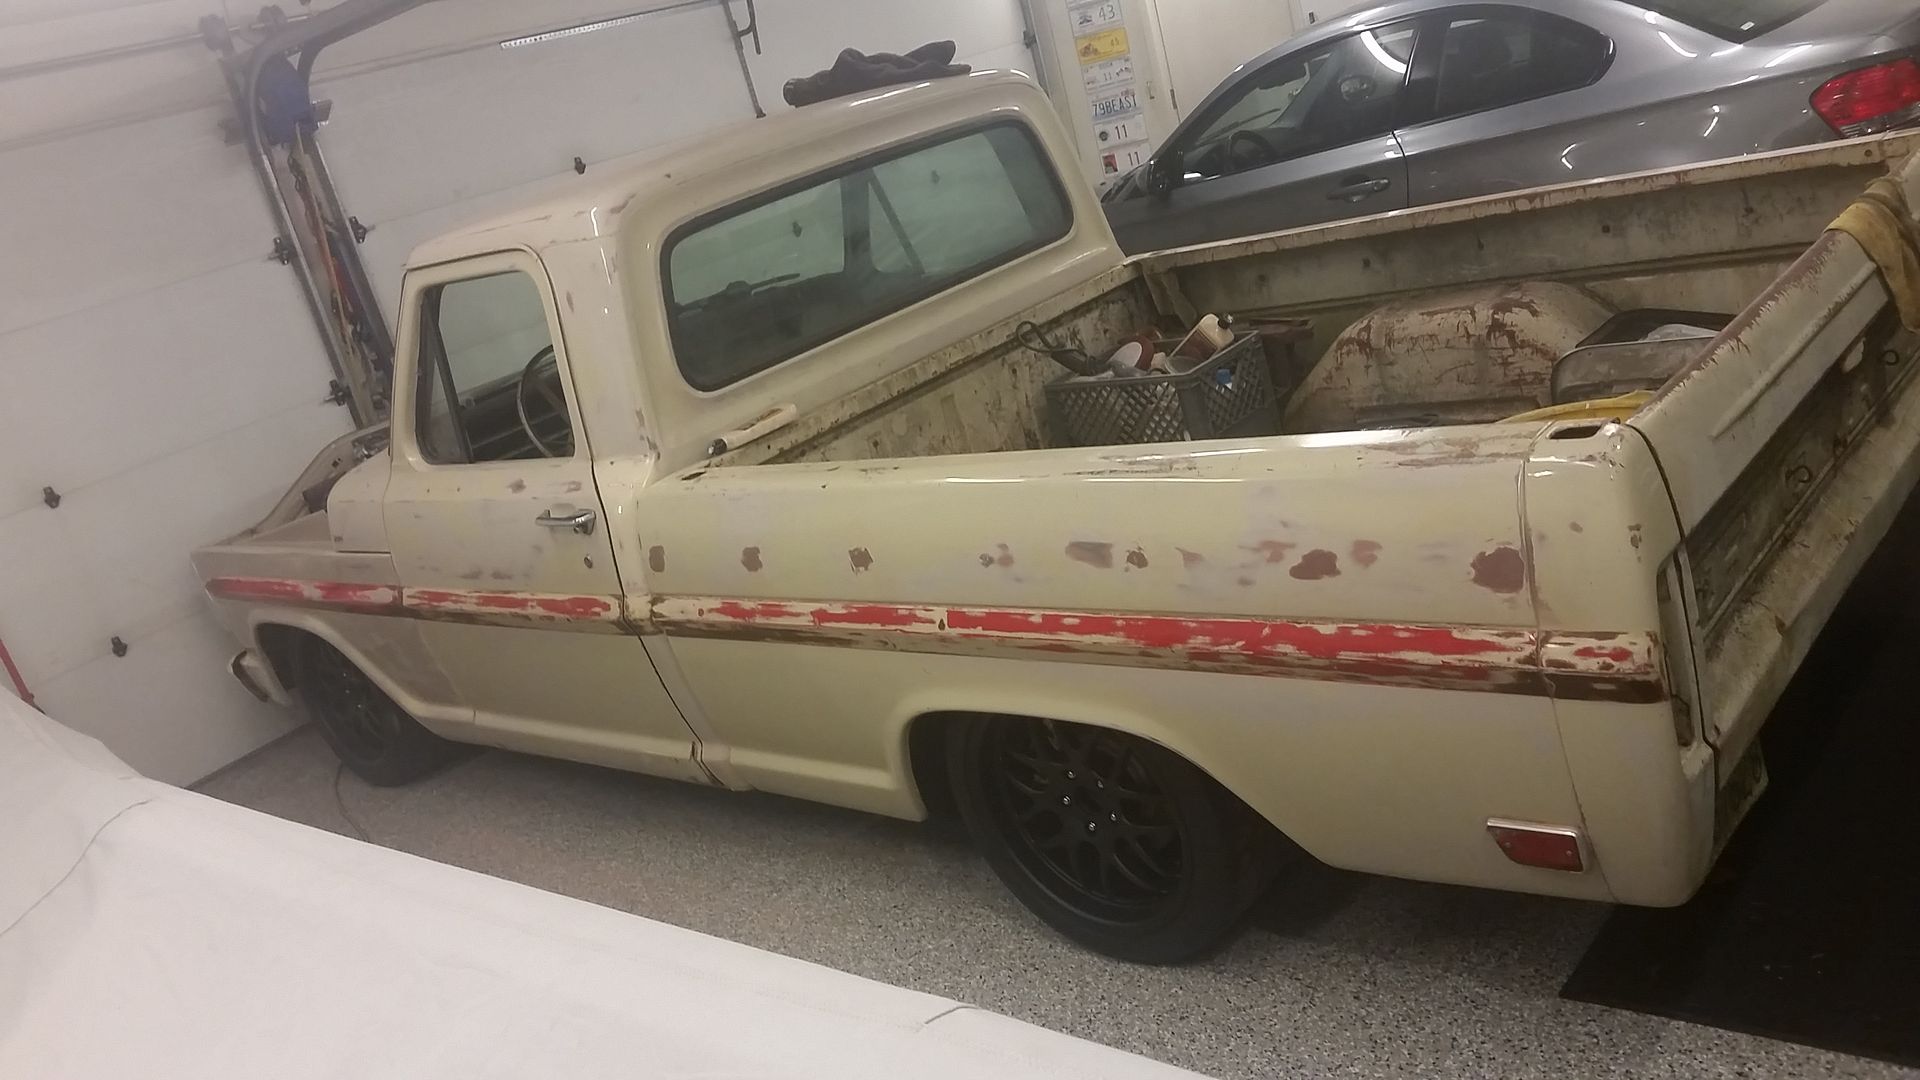
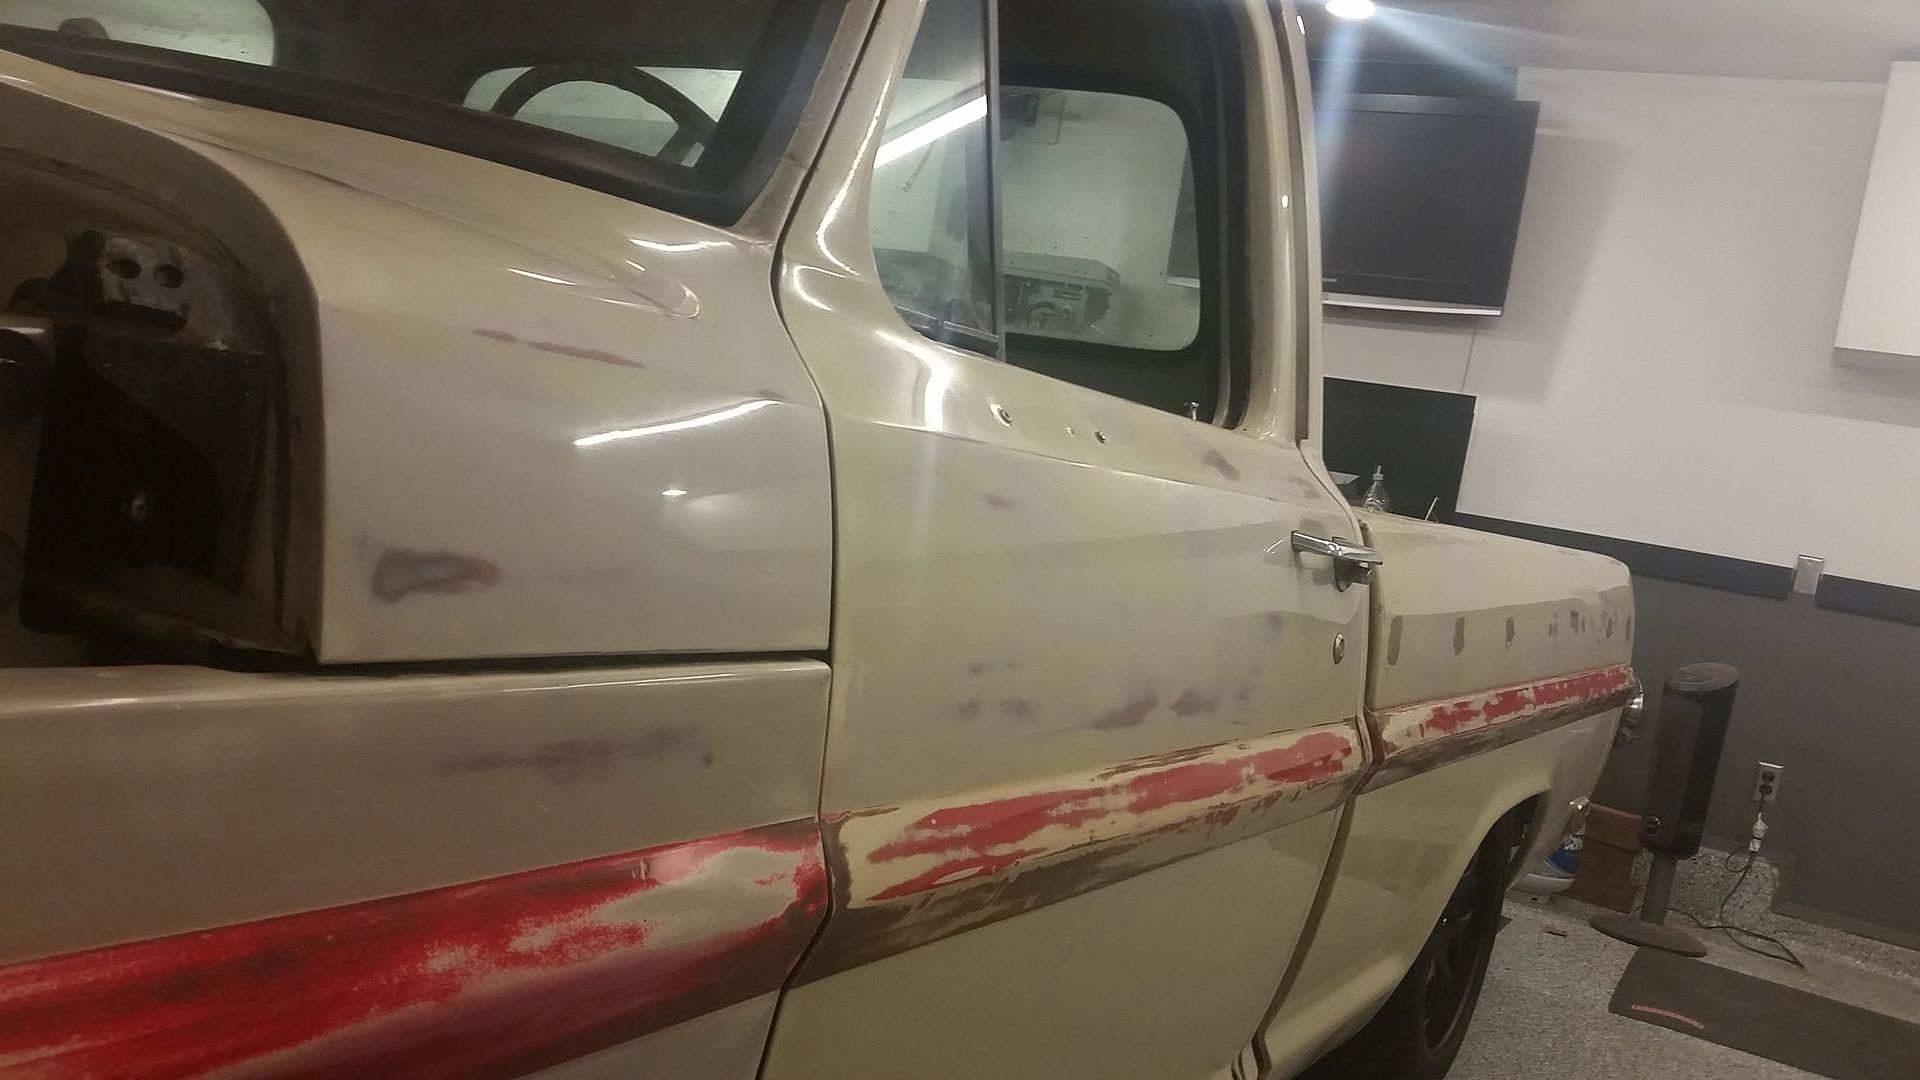
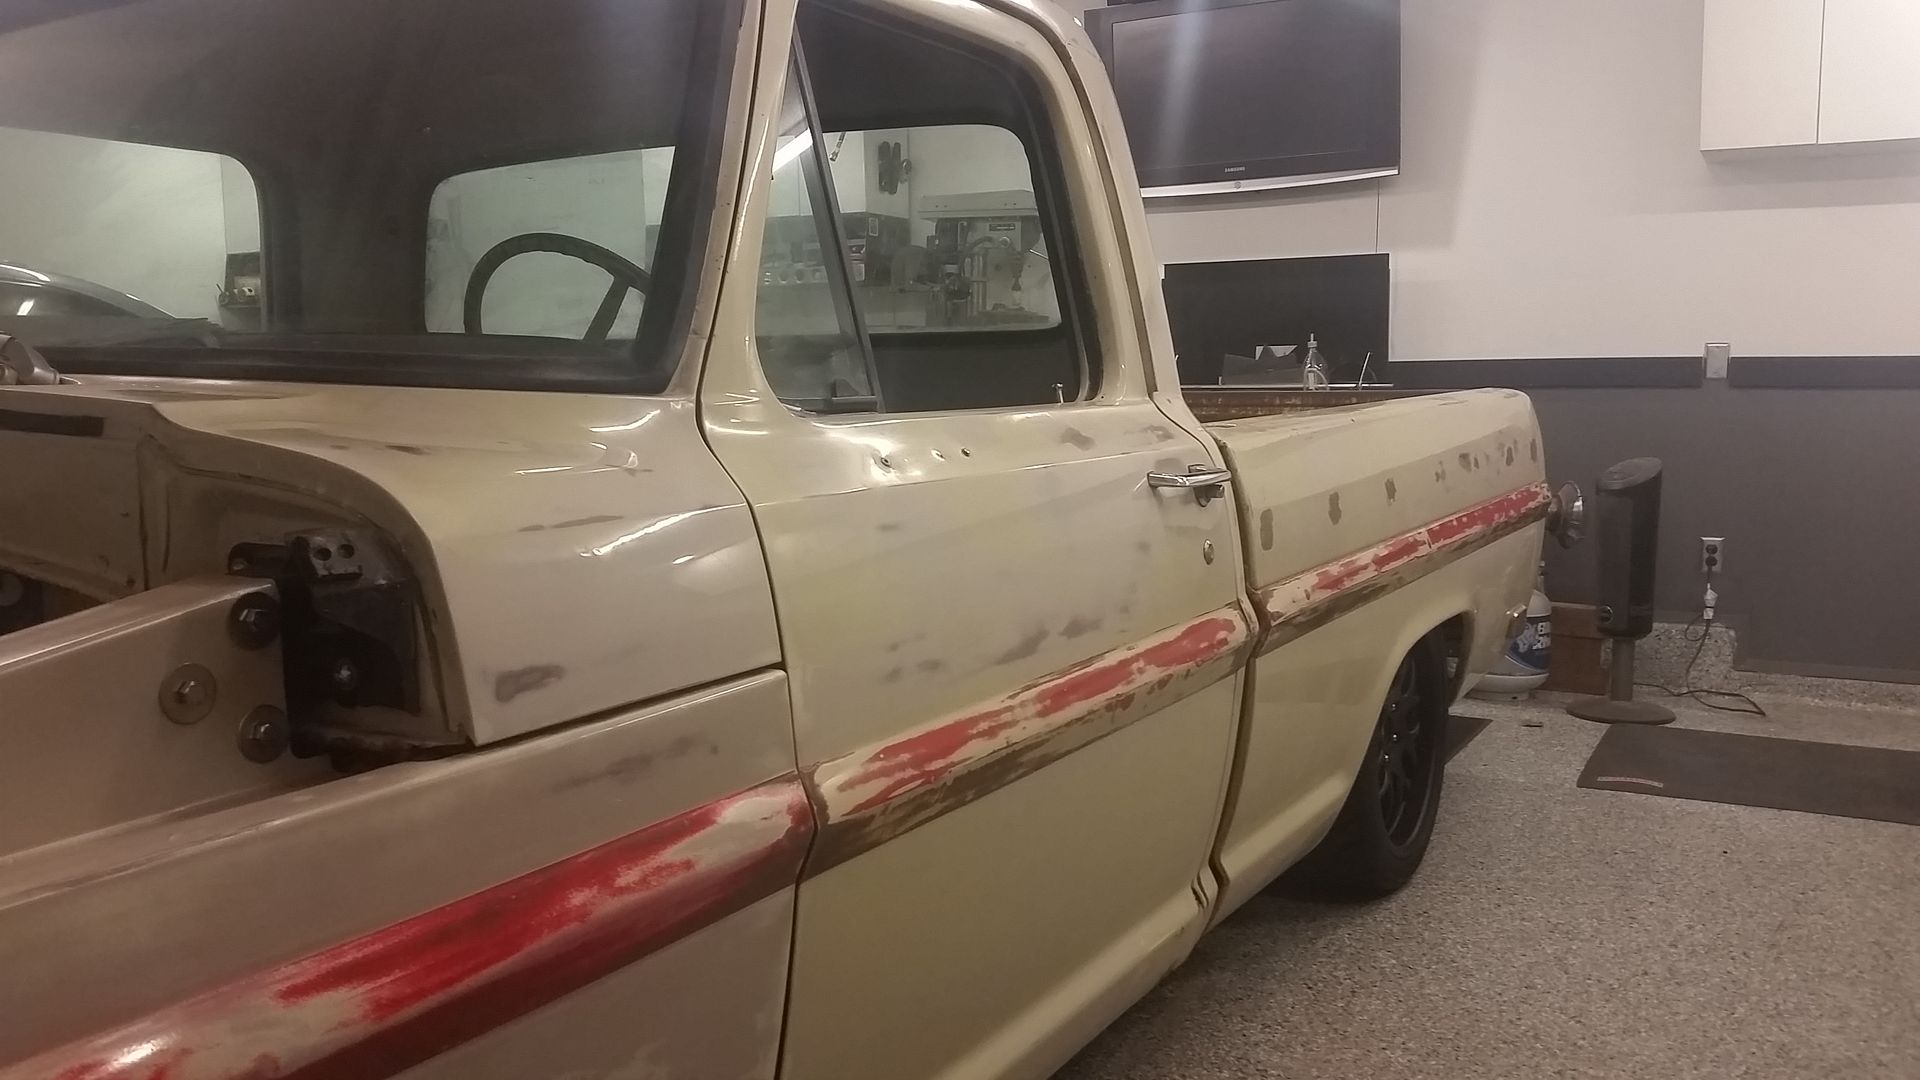
I kind of like this shot.....Cool stuff under the beater truck.
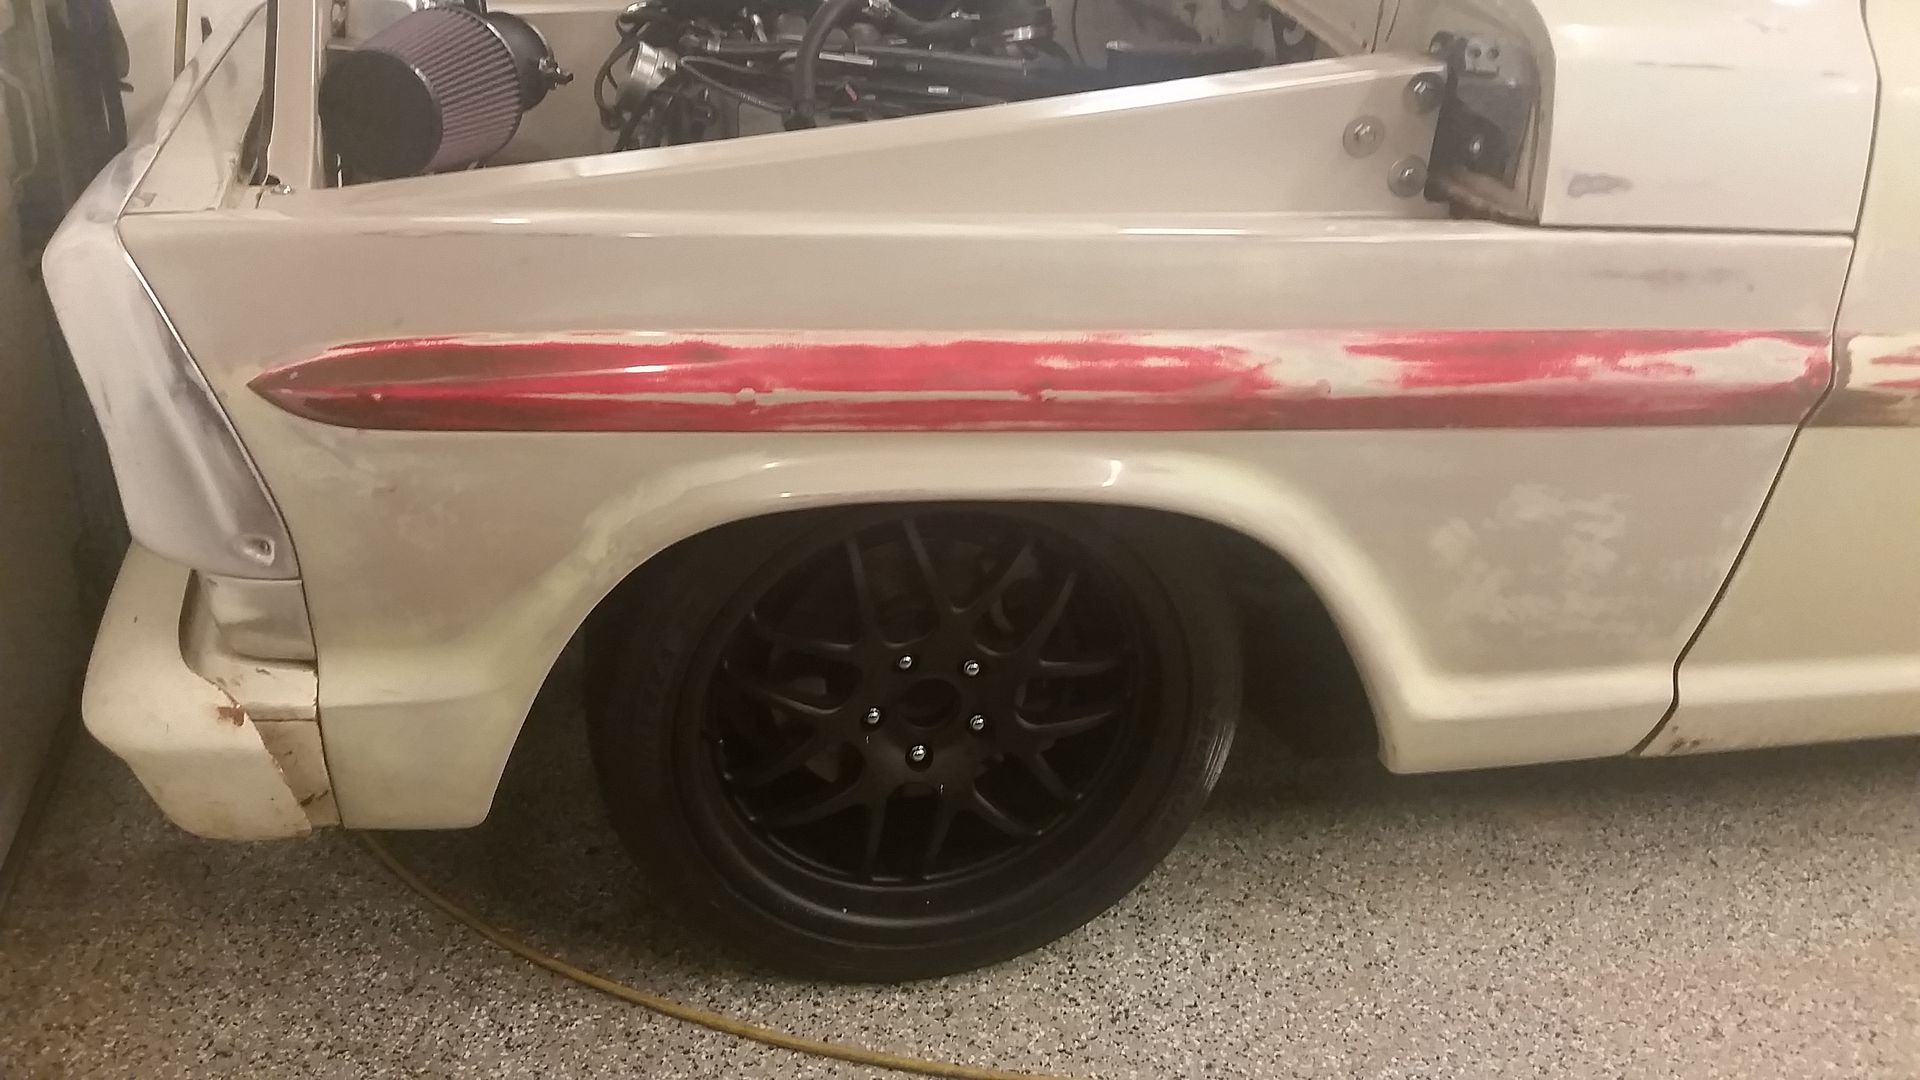
I really need to get some parts coming or I am not going to make my deadline.
Sean